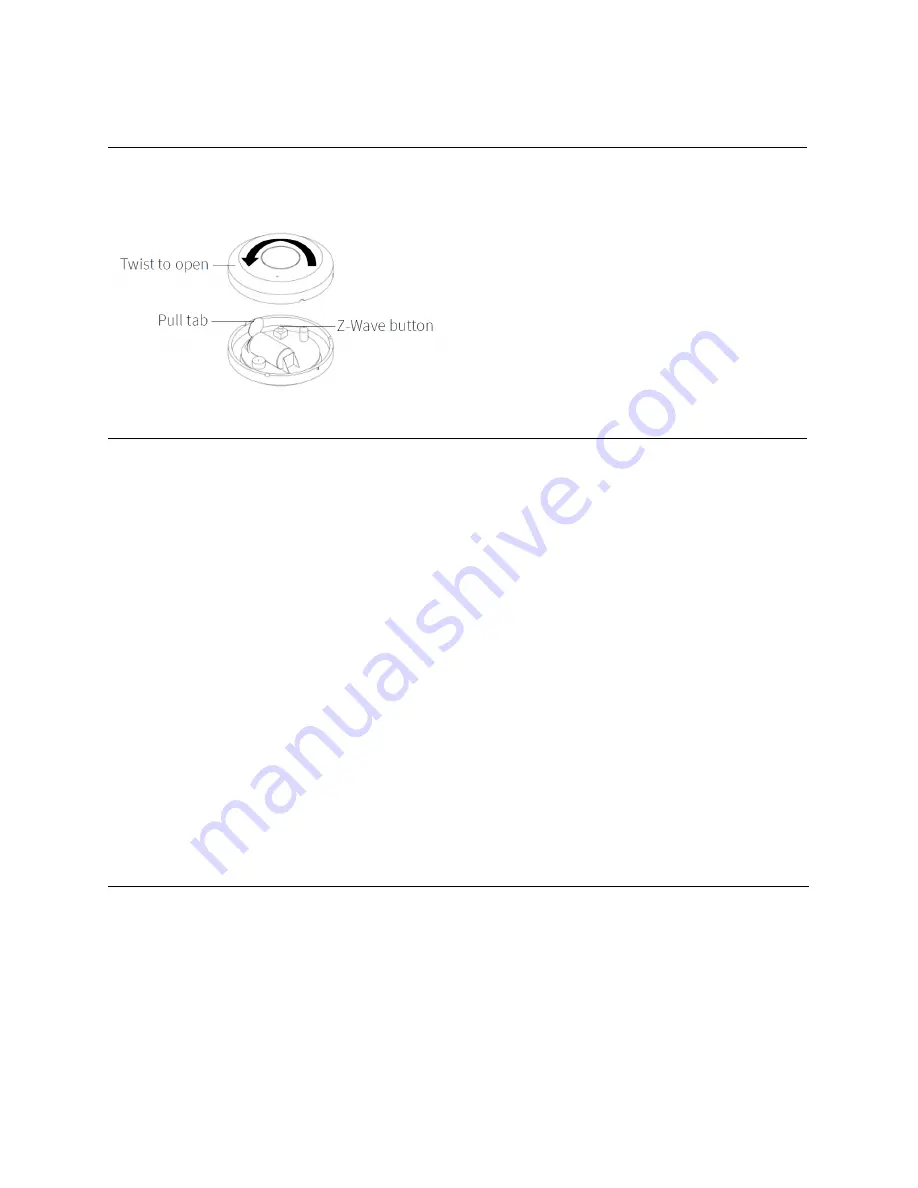
INSTALLATION
WAIT!
Include the Water Sensor to your Z-Wave network and test before mounting it.
Z-WAVE INCLUSION
1. Bring the Water Sensor within direct range of your controller
2. Carefully remove the cover from the sensor
3. Remove the plastic pull-tab from the battery slot. The LED indicator will blink slowly 5 times
4. Put your Z-Wave controller into inclusion mode
5. Press and release the Z-Wave button on the Water Sensor 3 TIMES quickly. The LED indicator
will flash quickly
6. A new water (leak) sensor will appear on your controller's device list
Troubleshooting Tips
If you are unable to include the Z-Wave Water Sensor to your controller, try one of the following:
- Bring the sensor closer to your hub or use a hand-held secondary controller to perform inclusion
- Once in inclusion mode, press and release the Z-Wave button quickly 6-7 TIMES to ensure the command
has gone through
- Put your controller in EXCLUSION mode. Press and release the Z-Wave button quickly 3 TIMES, and then
try adding the sensor to your network again
- You may need to change the device type manually if the sensor is not recognized correctly (email us for
more info: [email protected])
Z-WAVE EXCLUSION
1. Make sure the Water Sensor is powered on and located within direct range of your Z-Wave gateway
controller
2. Put your Z-Wave controller in exclusion mode
3. Press and release the Z-Wave button 3 TIMES quickly. The LED indicator will flash quickly
4. The Water Sensor should disappear from your controller's device list
If the first attempt is unsuccessful, please repeat the process following all steps carefully.


