ZMODO H.264 Скачать руководство пользователя страница 18

17


the future for potential updates regarding this feature.


*

Email


Setting

: 

Click [

], the EMAIL setup screen will appear. To take effect this function must be paired with 

an alarm email setting. Enter the smtp mail server address in the screen, the corresponding smtp port 
number(if the port uses SSL you must check the box indicating such) the desired email address to be used for 
sending the email, that emails corresponding password(please check the validating identity box), and the 
recipient email address, Pressing the [Test] button next to sender mail address will send a test email if the 
settings match up to the chosen email address.


*

Mobile port

: This port controls all information transmitted for viewing and control via a mobile device such 

as a smart phone or tablet when used in conjunction with the Zviewer application on the device.


*

FTP server

: Please refer to the previous section regarding file sharing.


*

UPnP

: To start UPnP   set the feature to on and select [

]. UPnP, short for universal plug and play, when 

connected to a network with the same feature will automatically map out and open the necessary ports in 
order of the user to be able to view the system through the internet. Not all networks or routers in use today 
have this feature.  Refer to your routers user manual for more information on compatibility.


*

IP ACCESS

: When disabled any PC(IP address) can access the device

. When set to “Allow Access” only 

devices using IP addresses entered in to this setting will be allowed access to the IE web client and all 
others will be restricted at the log in screen. When using the “Forbidden”  setting any device will have access 
to the IE web client with the exception of devices using IP addresses entered in to this category. Only one of 
these 3 settings is in effect at any time.


*

Time synchronization

: Click [

] to start synchronization.  The device can automatically update its time and 

date based on the server information entered in this option. If turned off the device when connected to the 
internet will pull a date and time from a default server and update accordingly.


Note1

: Any settings adjusted in the network will not take effect until saved from the save menu.


Note2

: Currently mail using PPPoE is only supported if using the SMTP protocol.


Note3

: Regarding the mobile port as of 04/01/2013 the only officially supported mobile platforms are 

Android and iOS. Please refer to our knowledgebase at 

http://kb.zmodo.com

 for future updates to this 

information.


2) Web Client Operation


BEFORE PROCEEDING: 

Set IE ActiveX Controls. Instructions at: 

http://kb.zmodo.com/article.php?id=96


Open IE browser, type in the IP address of the DVR and the corresponding web port if you are using anything 
other than 80.  The log-in screen will appear.


Note1

: If PPPoE or DHCP is selected, the user should check the IP address again after restarting device.


Note2

: If it is the first time logging in through IE, after setting ActiveX as mentioned above you will have to 

install the IE Add-On associated with the DVR. The default user name and password are: Admin (case 
sensitive) and the password is either 111111 or 888888. 


Note3

: Compared with the local side, the added settings on IE Web client side are as the table below:


Table IV 1 Settings added on IE side


Menu


Contents


<Server>Tab


Name of server is configurable on Web client side.


<Channel>Tab


The channel OSD is User-defined.


<Device>Tab


User can adjust miniNVR time accordance with PC time.


<State>Tab


Device states can be viewed directly.


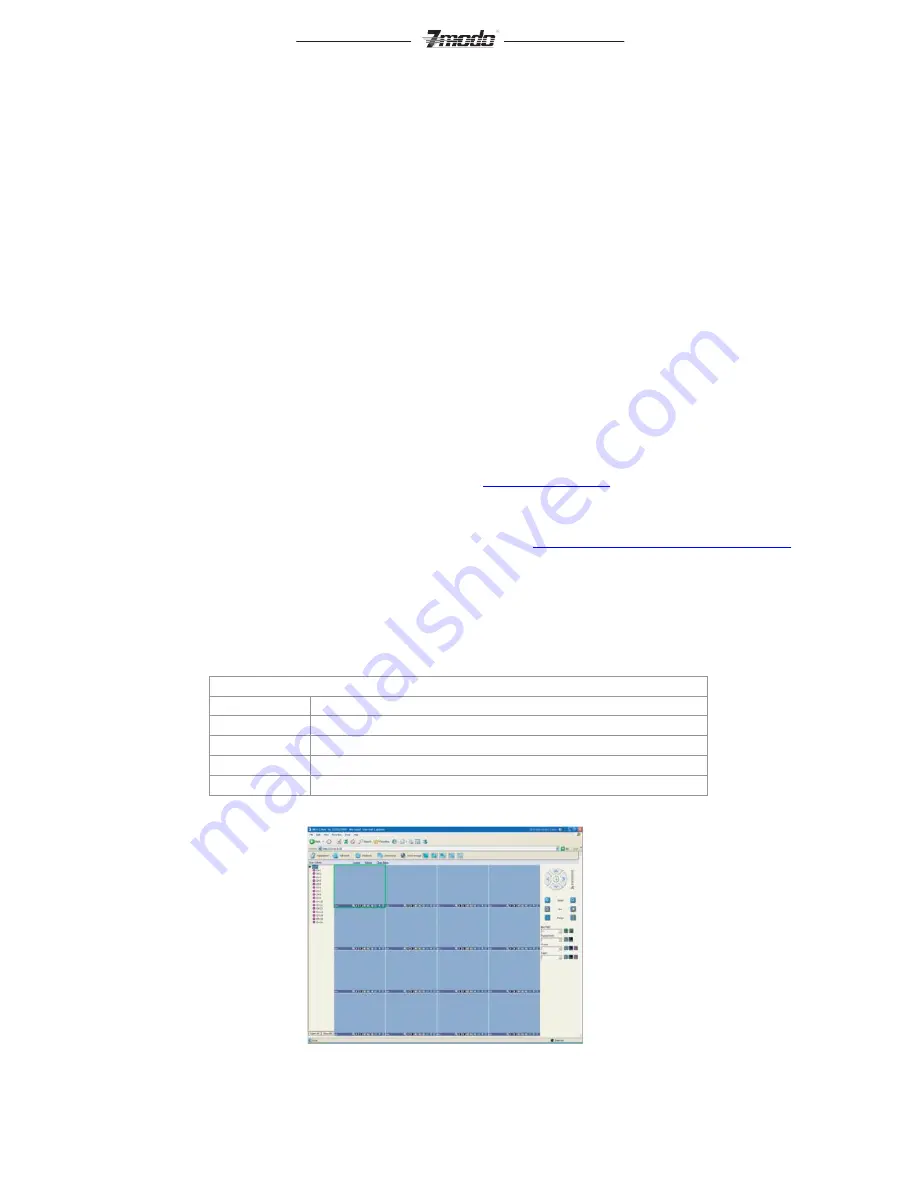
3) Web Screen Description


FigIV 3Web Screen


Содержание H.264

Страница 1: ...H 264 Standalone NVR 4CH 8CH User Manual NVR User Manual For further help please visit www zmodo com H 264 Standalone DVR 16 CH User Manual DVR User Manual For further help please visit kb zmodo com ...

Страница 2: ...ionDate location repair or part replacement our company must receive payment and is not liable for any payment to the consumer All resulting loses will be the consumer s responsibility In cases of use causing the product s malfunction or damage or if the environment is not suitable for the product s usage and causes malfunction or damage In cases of natural disasters as defined by law or unavoidab...

Страница 3: ...l Status Display Area 10 2 System Status Bar 10 3 Tool Bar 11 3 Record 11 1 Manual Record 12 2 Record Schedule 12 4 Camera Control 12 1 PTZ Control 12 2 Motion Detection Settings 12 3 Mask Setting 13 5 Playback 13 6 Backup 14 7 Alarm Settings 15 1 Alarm Input 15 2 Alarm linkage 15 3 Alarm Detection and Schedule 15 4 Device Exception Status 15 8 Network operation 15 1 Network settings 15 2 Web Clie...

Страница 4: ...Record 20 4 Advanced Setting of Video 20 Chapter Five Appendix 21 1 Specifications 21 2 Methods of Calculating HDD Capacity 22 1 Calculate the maximum capacity of the build in hard disk 22 2 Calculate the compression bit rate for recording T hours 22 3 Default Values 23 4 Introduction of Mobile phone Monitor 24 1 Configuration of server DVR 24 2 Installation and running of client mobile phone proc...

Страница 5: ...ording Manual record and schedule record supported The schedule record types include timed motion detection and alarm SATA hard disk supported Backup and clip record files through USB flash disk portable USB HDD and USB CD DVD RW supported Preview and Playback Simultaneous output of VGA and VOUT to TV Up to 4 channels playback in fast play mode slow play mode rewind and single frame forward suppor...

Страница 6: ...e Description Buttons Numbers 0 9 1 Input numbers 2 One key channel selection in preview mode 3 One key channel selection in play mode Numbers 10 0 Used in combination with 0 9 to select channels 10 16 LED PWR Red LED indicating DVR is powered on HDD Red LED indicating that the hard disk drive is being accessed May be solid or intermittent IR Green LED Will blink to indicate the use of the remote ...

Страница 7: ...pper menu The same as ESC button of remote control PTZ One key PTZ control TV VGA Switch the TV VGA default output REW Play in slow mode fast rewind PAUSE 1 Play 2 Pause FWD Fast Forward STEP Go to next frame STOP Stop Table 1 4 Remote Control Description NO Name Description 1 Rec Record 2 Power Press it to power off device 3 Numbers Input numbers or select to switch among relevant channels 4 Func...

Страница 8: ...nd schedule record 3 Press it to set start time and end time in file search 9 MENU Opens DVR main menu 10 ESC Return to upper menu 11 PTZ One key PTZ control 12 Backup Backup record 13 TV VGA Switches the default output between TV and VGA 14 CLEAR Alarm off 15 SEQ Sall sequence 16 Play Control Buttons Stop 1 Play Pause 2 One key file search play in slow mode fast rewind go to previous section ...

Страница 9: ...a standard BNC socket 1Vp p 75 Ω Note The video signal cable should be kept away from any interference such as electromagnetism Audio Input The audio input interface is standard RCA socket 2Vp p 600 Ω Note The audio input resistance is a little bit high please use active sound collection device or active microphone The audio signal cable should be kept away from any interference such as electromag...

Страница 10: ...dress Clear Alarm Tool Bar Quick Playback PTZ Baudrate PTZ ID Color Setting Subnet Mask Gateway Http Port Shut down Video Motion Detection Command Port Single Channel Four Channels Nine Channels Sixteen Channels Position Net Mosaic Motion Handling Video Lost Handling Channel Name Setting Alarm Input CH Alarm Input Type Media Port PPPoE Setting PPPoE IP DNS Address DDNS Auto Register File Sharing A...

Страница 11: ...ainly describes the main system operations of DVR Please see the following contents for details 1 Power on the DVR Start up The Power LED will light after powering on correctly Please refer to 2 6 Rear Panel Connection for details of the connection method Press Power on off button to start up device The preview screen will appear After pressing the ESC button on the front panel or remote or right ...

Страница 12: ...be heard together with the video when the matching channel is selected The audio will also be heard on its corresponding channel in playback mode User can select to display a single particular channel by pressing the Numbers buttons When in preview mode user can enter into 1 4 6 8 9 16 split view mode by pressing FN button directly or by the toolbar Image Parameters Setting Please enter Tool Bar S...

Страница 13: ...on on the display 8 pixels per unit To reduce or increase screen in vertical direction Toreduceorincreasescreeninhorizontaldirection To move the screen up down left right Tozoomoutthescreentolargestandshowincentral Note1 When the mouse hovers over a toolbar icon it will display that buttons menu function in a floating text box next to the cursor Note2 When video source is PAL screen display range ...

Страница 14: ...ouse you may click on a record type selection at the bottom and then click and drag across the grid to change large grid portions at once Select OK to confirm settings The settings will take effect after being saved Note1 User can copy the current Record type onto the neighboring grid by pressing Fn button first Direction buttons secondly and then the Fn button again to exit Note2 When motion dete...

Страница 15: ... run 3 Click on again to finish setting Click on to run track and click again to stop running Note Whether Track is supported or not depends on the type of PTZ 2 Motion Detection Settings Motion detection settings include sensitivity and area The sensitivity includes three levels High Med and Low Please select Tool Bar System Video Motion Detection to set schedule and area settings With the grid d...

Страница 16: ...stop point for viewing are selected move highlight icon to Play using buttons and press OK button to start playing Move the highlight icon to Backup using buttons and press OK button to bring up and begin file backup of the selected time frame Playback Control This will allow for rewind in playback Available speeds are 8X and 16X Allows you to pause or resume playing current playback video Stop pl...

Страница 17: ...tings have been saved device exceptions will be handled the way user has selected 8 Network operation 1 Network settings Please enter Tool Bar System Network Setting Network Connection There are three connection types available Static IP DHCP and PPPoE Static IP If this type selected please type in an IP address subnet mask and gateway User can ping the IP address to check its connection status fr...

Страница 18: ...the exception of devices using IP addresses entered in to this category Only one of these 3 settings is in effect at any time Time synchronization Click to start synchronization The device can automatically update its time and date based on the server information entered in this option If turned off the device when connected to the internet will pull a date and time from a default server and updat...

Страница 19: ...ess up down Start stop voice monitoring The icon will turn to green when sound is on Start stop recording The icon will turn to green when recording Click to snapshot the image in the camera at that moment Stop preview Note Click to set the storage directory of record files and pictures captured PTZ Setting The PTZ setting of client web is similar as the PTZ operation of local device please refer ...

Страница 20: ... do the indicated operations Query Target Localhost Channel 1 Kind All Record Beigin End 2009 07 10 00 00 00 2009 07 10 09 21 09 Query File Playback The play control screen is on the left side of the screen It includes image display area play control bar and channel information Click Play the recorded files selected will be displayed in chronological order The progress of playing is shown as the f...

Страница 21: ...be sure the USB device is connected correctly and that the firmware upgrade has already been properly copied in to the drive After accomplishing upgrade the Restart prompt screen will appear Please restart the device the latest software will be installed automatically then IE Please refer to 5 2 2 Device Parameters Settings for details 3 Device Information HDD Size display the current total capaci...

Страница 22: ... User can set beginning and ending dates and time of DST Device will automatically adjust the time after being saved Menu Overtime After started menu overtime when there is no mouse motion on the menu will time out and automatically close the menu and lock the device User will have to log in to the DVR with ID and password each time this happens Channel Lock Select channel lock to enter channel lo...

Страница 23: ... Linux 2 6 O S Pentaplex operation record playback preview and network browse backup supported I O Interface Video Input 16 channel BNC 1Vp p 75Ω PAL 625 line 50 f s NTSC 525 line 60 f s SECAM 625 line 50 f s Audio Input 4 channel RCA 2Vp p 600Ω VGA Output 1 channel DIN 15 optional 800 600 60Hz 1024 768 60Hz 1280 1024 60Hz 1440 900 60Hz CVBS Output 1 channel BNC 1Vp p 75Ω Audio Output 1 channel RC...

Страница 24: ...e log of operation and alarming will be saved automatically User can directly play the record files that being record when the alarm event occurs PTZ Control Multiple protocols Pelco P Pelco D and Samsung etc supported Upgrade of protocol supported Multiple PTZ operations Pan Tilt Zoom Preset Sequence Track and Auxiliary Switch supported Alarm Management 4 channel alarm input NO NC supported Motio...

Страница 25: ... time out setting Off 30seds 1min 5mins off Channel lock setting Click into sub menu screen Rescourse distribution mode Click into sub menu screen Video settings Record Schedule Click into sub menu screen 24 hours Video quality Best High Mid Low Best Record Frame Rate PAL Full 12 6 3 1 User defined NTSC Full 15 7 3 1 User defined SECAM Full 12 6 3 1 User defined Full Record Resource Video Video Au...

Страница 26: ...ile Sharing Click to select or disselect Off Email Setting Click into sub menu screen Mobile Port Click into sub menu screen 7050 UPnP setting Off on click into sub menu screen Off Dedicated server Off on click into sub menu screen Off FTP setting Off on click into sub menu screen Off IP Access Disabled Allowed Access or Forbidden Disabled Time synchronized Off on click into sub menu screen Off Al...

Страница 27: ...umber of channels your DVR has Select OK to save your device Fig3 Fig4 4 To delete or edit a device press and hold on its name from the device list Fig2 1 From the main page tap any blank window and you will see an orange highlight around the perimeter of the window Fig1 2 Press the settings gear and from the device list select a device Upon selecting a device its channel list will appear and you ...

Страница 28: ... save your device Note Greyed out values must have something input before you will be able to save Connecting to a Device 1 From the home screen Fig1 select 1 of the 4 windows so that an orange highlight is around the perimeter of the box 2 Press the settings arrow in the bottom left and select Connect to Device Fig2 3 From this device list step 1 will bring you to you may select your device from ...

Страница 29: ...rt Informative Knowledge Base at kb zmodo com 24 7 Live Support on www zmodo com Mailing Address Champaign Office 1401 Interstate Drive Champaign IL 61822 Los Angeles Office 17870 Castleton Street Suite 200 Industry CA 91748 ...

Отзывы: