background image


4.29 


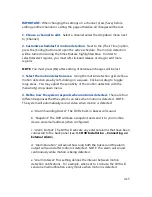
8. Disconnect from your wireless network and access the DVR using 3G/4G.


Connect your mobile device to a different internet connection from your DVR 
(3G/4G or any other wireless connection) and repeat step 6.  Our product servers 

will automatically authenticate your DVR for remote-viewing capabilities.  


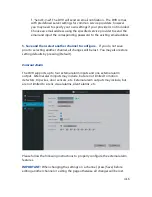
9. Your device is now activated for remote surveillance!


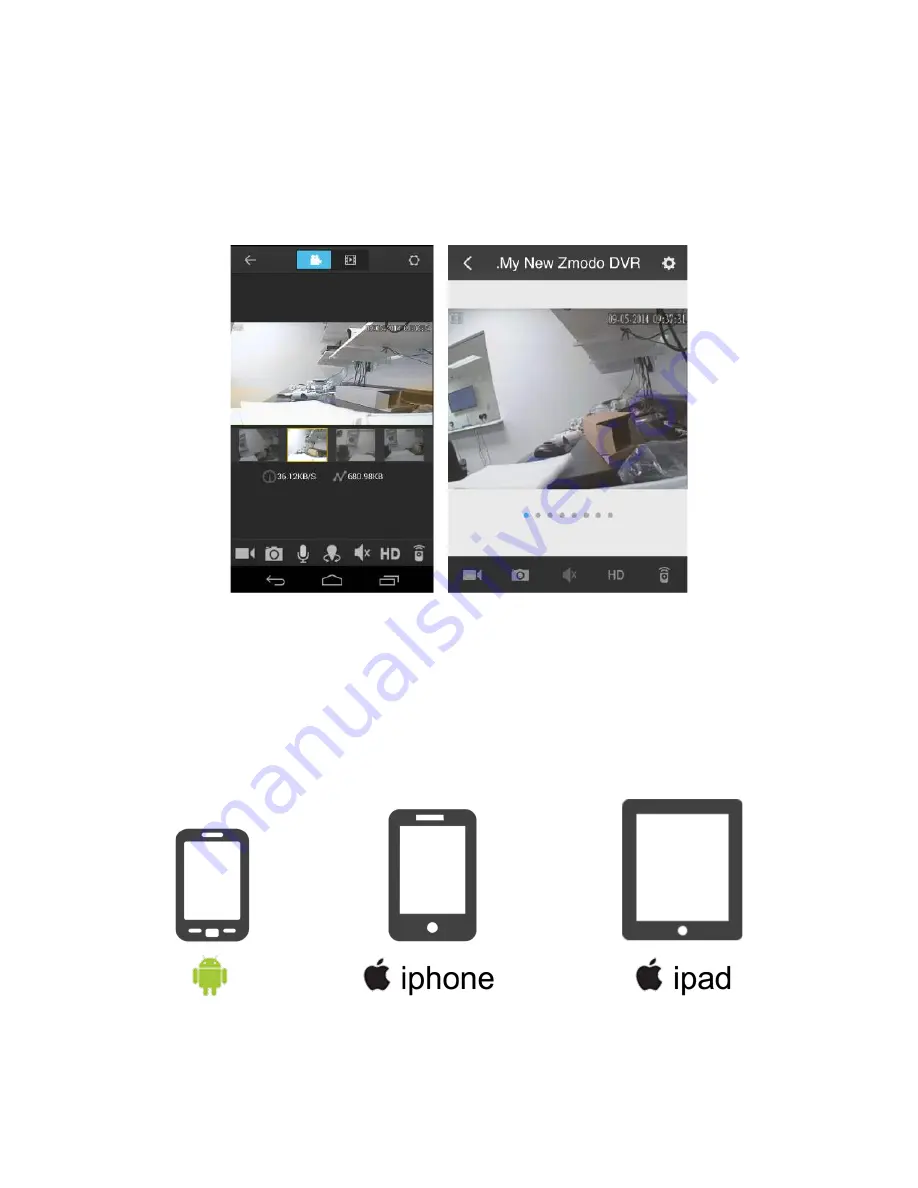
 You will now be able 

to view your DVR on any Android or iOS device with internet connection!  In 

order to do so, simply download the Zsight app on the desired device and log in 
to your account from step 1.  You can also share your device with anyone with a 
Zsight user account by accessing the settings menu for your device in the Zsight 

app.  

Congratulations, and thank you for choosing Zmodo!


Содержание DX-SIN8

Страница 1: ...1...

Страница 2: ...2...

Страница 3: ...9 Rear Panel 2 10 Mouse 2 11 3 First time Setup 3 1 3 1 DVR Installation 3 1 HDD Installation 3 1 Connecting your DVR 3 5 Connecting the Display 3 6 Connecting Video Audio using BNC cables 3 6 Connec...

Страница 4: ...agement 4 13 4 2 Camera Controls 4 19 Image Setting 4 19 Zoom 4 20 Snapshot 4 21 Playback 4 22 PTZ Control 4 23 4 3 Remote viewing Setup 4 25 4 4 Updating your DVR 4 30 From your Mobile Device via Zsi...

Страница 5: ...s important information prior to reading the manual and installing the system It overviews the manual purpose and conventions to aid in installation and covers minimum system requirements to ensure su...

Страница 6: ...to this chapter before calling technical support Manual Conventions This manual uses several symbols typographies and abbreviations that carry specific definitions In order to properly follow instruct...

Страница 7: ...install the DVR near any heat sources and avoid direct sunlight Make sure there is good air circulation where the DVR is installed Install the DVR in a stable environment Handle the DVR carefully and...

Страница 8: ...options make your DVR available and accessible anywhere at anytime Using next generation plug and play technology and a revolutionized user interface this system delivers a revolutionarily user frien...

Страница 9: ...20 frames sec PAL HD1 20 frames sec NTSC 20 frames sec PAL CIF 30 frames sec NTSC 25 frames sec PAL Audio Input 8 channel RCA Output 1 channel BNC Compression G 711 Storage Reviewing Playback Up to 4...

Страница 10: ...thout HDD Language Support 11 languages 2 3 Compatibility This DVR is compatible with all Zmodo BNC surveillance cameras Cameras can be purchased at http www cctvhotdeals com When purchasing cameras w...

Страница 11: ...rocedures please make sure that your package includes the following contents 8 Channel Security DVR ZMD DX SIN8 USB Mouse 12V 3A Power Adapter Quick Installation Guide Case Screws not pictured Pre Ins...

Страница 12: ...and optimizes storage by increasing recording quality when a critical event occurs Multitasking Users can view record playback backup live view and remotely access the DVR simultaneously from multipl...

Страница 13: ...Product Introduction 2 9 Front Panel...

Страница 14: ...Product Introduction 2 10 Rear Panel...

Страница 15: ...Product Introduction 2 11 Mouse...

Страница 16: ...estern Digital Caviar Green AV GP hard drives or Seagate Pipeline hard drives that are specifically engineered for use in security camera environments We also suggest that you make your purchase from...

Страница 17: ...e Setup 3 2 1 Make sure your DVR is unplugged from its power source and slide the top panel off of the DVR 2 Connect the SATA power and data cables from the DVR to the corresponding ports on your HDD...

Страница 18: ...d as shown IMPORTANT Make sure that the cables do not come into contact with the cooling fan 4 Holding the hard drive and the DVR gently turn it over and line up the holes on the hard drive with the h...

Страница 19: ...holes on the back panel and the two holes on the sides 6 When you power on your system you will see a popup asking you to format your HDD Press OK and wait 5 10 minutes NOTE If you do not see this pop...

Страница 20: ...ailed instruction please refer to 3 2 Camera Installation 2 Connect your display to the appropriate display input For detailed instruction please refer to 3 1 DVR Installation Connecting the Display 3...

Страница 21: ...quipment please identify the type of connection that you will be using For HDMI connections we recommend that you use one of the following brands Phillips LG or Samsung 3 Connect to the corresponding...

Страница 22: ...slots Line up the slots with the protrusions as shown in the picture below 2 Push the connector in and twist until the connection is secure as shown 3 If you are making a video connection plug in the...

Страница 23: ...ith your finger nail or pen in order to open the spring loaded connection 2 With the orange tab pushed in insert the bare wire from your alarm about 1 8 1 4 inches into the port 3 Let go of the orange...

Страница 24: ...two separate connectors on each end One of the connectors is for the power and the other is for video Connect the male power and video BNC end of the cables to the female power and video BNC connector...

Страница 25: ...ting your cameras The following steps provide instructions to mount the camera on a drywall Your installation may vary depending on the specific camera purchased You will need 1 Surveillance Camera no...

Страница 26: ...ion To adjust the camera position loosen the nob on the bracket by turning it counterclockwise and adjust the camera accordingly When the desired camera position is achieved tighten the nob by turning...

Страница 27: ...ystem will automatically set the date and time settings through the internet connection If you do not enable this you will need to manually input the date and time in the corresponding forms Name phon...

Страница 28: ...ault it will be set to the 9 channel view with the live video streams from all eight camera feeds To access the new quick menu move your cursor to the bottom of the screen using your mouse or press th...

Страница 29: ...ew For further live video viewing options refer to 4 1 Main Menu Detailed Video Settings Quad View Select four channels 1 4 or 5 8 to view simultaneously 8 Channel View Quickly toggle the viewing mode...

Страница 30: ...eral Settings menu to manage accounts change the date time view the system events log view hard disk information change PTZ settings view and upgrade your firmware and restore your device to factory s...

Страница 31: ...ng your user accounts by simply highlighting a user account from the menu and selecting a function to perform Date Language Use this menu to change the date time settings and the language settings of...

Страница 32: ...ated motion sensors activated alarms etc Use this menu to review the system log of all event notifications Series Numbers the events in sequence Type Describes the type of notification Alarm System St...

Страница 33: ...ity the DVR will either stop recording or overwrite the older playback files The overwrite feature is generally recommended Refresh Update the HDD information shown on the page Total Space The total a...

Страница 34: ...device Refer to your camera s manual for specific instructions on changing the address Baud Rate Refers to the frequency of communications this must match the camera s baud rate Data Bit This is typic...

Страница 35: ...startup guide to appear refer to 3 3 DVR First time Startup The startup guide will appear the next time the system is powered on Please refer to the following instructions to upgrade the firmware from...

Страница 36: ...our users This page provides links to some of our resources that will help guide you to a maximal experience of our products Use a QR code scanner on your mobile device and scan the QR codes to acces...

Страница 37: ...age otherwise all changes will be lost Channel Name You may set a name to describe the camera feed on your DVR For example if you have set up a camera in the front yard on channel 1 you could name it...

Страница 38: ...that are connected to the DVR remotely devices that are connected through 3G 4G or a different internet connection than the DVR Video Quality Change the overall quality of the video Increasing the qua...

Страница 39: ...u must first select the channel to edit and select the draw tool Select an area by clicking and dragging down and to the right with your cursor A gray box will appear Remove selected areas by selectin...

Страница 40: ...re an advanced user we do not recommend that you change these settings These definitions are not sufficient for manual networking and configuration Web Port This designates the port used when accessin...

Страница 41: ...et up a DDNS Dynamic DNS Server for remote surveillance please refer to the knowledge base for full instructions UPNP UPNP Universal Plug and Play is a protocol used to establish network connectivity...

Страница 42: ...will automatically mark recordings that are triggered by critical events motion detection and alarms in the playback menu Use this menu to define critical events and best optimize recording and storag...

Страница 43: ...uring the highlighted time periods Edit a channel s recording schedule by selecting the appropriate camera under Channel Then Deselect and reselect squares by left clicking and dragging the cursor acr...

Страница 44: ...the sensitivity of the motion detection with the Sensitivity drop down menu 4 Define how the system responds when motion is detected There are four different responses that the system can take when mo...

Страница 45: ...selecting another channel all changes will be lost You may also restore setting defaults by pressing Default External Alarm The DVR supports up to four external alarm inputs and one external alarm ou...

Страница 46: ...a Buzzer The DVR s built in buzzer will sound b Alarm Output The DVR will activate any external alarms that have been connected to the back panel see 3 1 DVR Installation Connecting an External Alarm...

Страница 47: ...ss response for that channel 2 Define how the system responds when video is lost There are four possible responses when video is lost Choose an option by selecting the box next to it a Send E mail The...

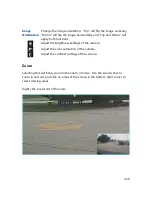
Страница 48: ...ut will sound after motion is detected 4 2 Camera Controls When on the home screen you can access the DVR s camera controls by double clicking on the desired channel feed and a blue menu will appear a...

Страница 49: ...oth functions Adjust the brightness settings of the camera Adjust the color saturation of the camera Adjust the contrast settings of the camera Zoom Selecting this will bring you into the zoom in mode...

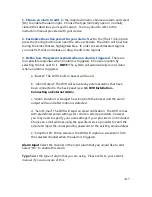
Страница 50: ...snapshot at any time in order to do so click once on the Snapshot button in the camera functions bar A thumbnail will appear on the bottom left of your screen Access the snapshots gallery in the quic...

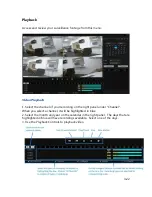
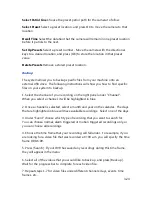
Страница 51: ...of your recording on the right panel under Channel When you select a channel it will be highlighted in blue 2 Select the month and year on the calendar in the right panel The days that are highlighted...

Страница 52: ...e camera in the direction of the arrow Start the PTZ patrolling function the camera will automatically patrol a certain movement path Adjust the camera focus Adjust the lens aperture to optimize the i...

Страница 53: ...t panel under Channel When you select a channel it will be highlighted in blue 2 Once a channel is selected select a month and year on the calendar The days that are highlighted in blue will have avai...

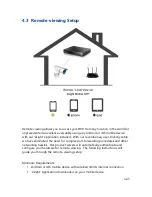
Страница 54: ...utionary user friendly setup we have eliminated the need for complex port forwarding procedures and other networking hassles Our product servers will automatically authenticate and configure your hard...

Страница 55: ...ur mobile device is connected to the internet through the same wireless router as your DVR 3 Open the Zsight app on your mobile device and create a Zsight account If this is your first time using Zsig...

Страница 56: ...per right hand corner to open the Add Device menu 5 Add your DVR by scanning the QR code found in step 1 Select the Scan QR Code option as shown in the image and a QR code scanner will open Locate the...

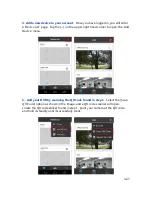
Страница 57: ...ed to name your device Choose any unique name for your device to distinguish it in your device list 7 Select your system from the device list to view the live video stream Go back to the Device List s...

Страница 58: ...or remote viewing capabilities 9 Your device is now activated for remote surveillance You will now be able to view your DVR on any Android or iOS device with internet connection In order to do so simp...

Страница 59: ...ck the Device Update section towards the bottom of the menu If it says that an update is available press on it and the device will automatically update Please wait 5 10 minutes for the process to comp...

Страница 60: ...ower coming from the outlet by plugging in another device to the outlet If there is no power please try another outlet or power source Hard drive is not detected by the system Hard drive cables may no...

Страница 61: ...t add the device to my Zsight account The device is already tethered to a preexisting Zsight account For security purposes our Zsight servers restrict each device to one linked Zsight account It is po...

Страница 62: ...g requirements are met To avoid any delay or denial of processing your return please verify the product you are returning meets the guidelines below and qualifies for return If a non conforming produc...

Страница 63: ...er service we used to ship your order In the event that your order arrived damaged or incomplete due to external damage please keep all interior and exterior packaging as this is needed when we file t...

Страница 64: ...to send your product s back for a refund Most vendors who offer Zmodo products will offer a 30 day refund option however this is subject to the specific policy of the sales vendor that the product s w...

Страница 65: ...rranty excludes 3rd party software connected equipment or stored data In the event of a claim Zmodo s sole obligation shall be to replace our product with its equivalent or the best possible substitut...

Страница 66: ...b zmodo com Technical Support If you ever have any problems setting up or using this product call our TOLL FREE number for additional assistance 866 551 6881 Telephone Service Hours Mon Fri 8 00am 8 0...

Отзывы: