2
Installation Diagram
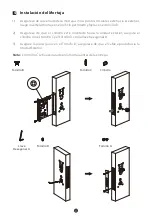
Installation Procedure
1
Check Opening Direction
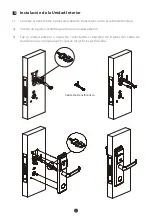
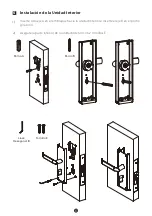
Screw E
Hex Wrench B
Indoor Unit
Screw E
Battery
(not include)
Battery Box
Spin
dle A
Spin
dle B
Hex Wrench A
Scre
w D
Spin
dle A
Cyli
nde
r
Mortise
Screw C
Screw B
Screw A
Screw B
Screw A
Screw B
Keys
Transfer Cable
Vacuum
Sucker
Outdoor Unit
Door
Strike Plate
and Box
Person Location
Left Inward
Right Inward
Left Outward
Right Outward
Mortise
Strike
Plate
Strike
Plate
Mortise
Mortise
Strike
Plate
Strike
Plate
Mortise
Note:
Please install the Mortise and Strike Plate according to the above illustration.


