


3 4
⑤
⑥
⑦
Note: The installation step for pendant mounting is the same as wall mounting.
Paper template for pendant mounting Picture of complete pendant mounting
( 1 )
( 2 )
( 3 )
( 4 )
( 5 )
( 6 )
( 7 )
( 8 )
1. Power supply
: Connect with power adaptor.
2.
LAN
: Ethernet port for 10/100M. Through this port, you can connect the camera with other network devices like switcher, hub,
router, etc.
3.
Reset button
: Long press this button for more than 30 seconds when power on, the camera will recover to default configuration.
Default IP address is
192.168.1.88
, user name “
admin
” and password “
admin
”.
4.
Alarm (NC, COM, NO, GND, IN)
: connect with external alarm input & output devices. See below detailed information.
IN
1
2
3
4
5
NC
COM
NO
GND
Alarm input
Alarm output
Note:
Software setting for different alarm input devices is varied. Please refer to the interface description in user manual.
5.
Backup port:
prepared for other function.
6.
Audio input
: connects with external voice collectors like microphone to realize voice collection function.
7.
Audio output
: connects with external play devices like act loudspeaker to realize broadcast function.
8.
Analog video output
: for project configuration use. Please refer to user manual for details.
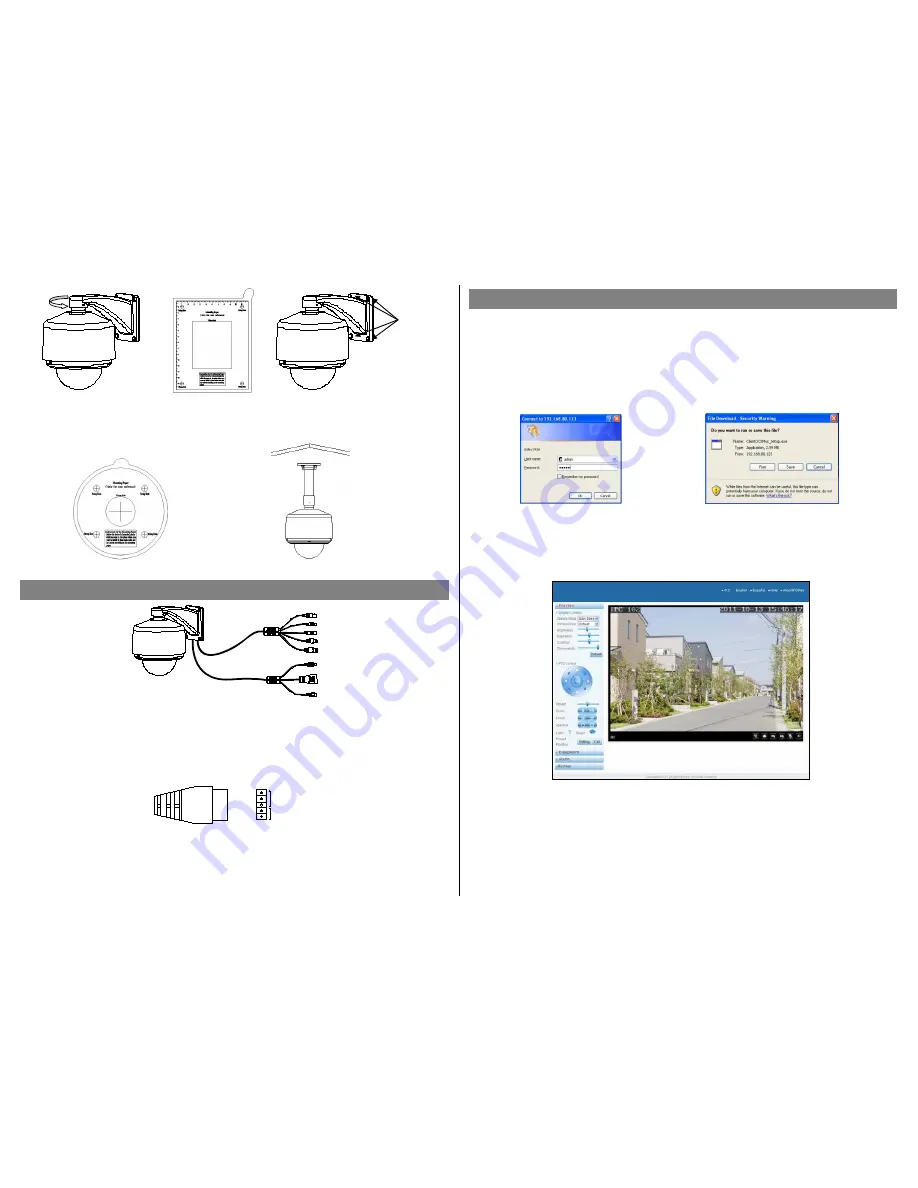
For the first network connection, please follow the following steps to configure your network.
1. Use cable to connect camera with computer.
2. When connecting with 10M network, the orange indicator will be on, when connecting with 100M network, the green indicator
will also be on.
3. If your computer IP address is in different gateway with that of camera, please change your computer IP address in the same
gateway as camera, for example, 192.168.1.87.
4. In the IE browser, please input camera IP address (default IP “
192.168.1.88
”) and enter, then below dialog table will come out.
Picture 1 Picture 2
5. After input the user name and password (default user name “
admin
” and password “
admin
”), below activeX controls will show
in the screen. This is a prerequisite activeX and controls for this application, without any danger information. Please run it
according to above picture 2.
6. After finish the activeX and controls installation, please refresh the web page and below picture will come out.
7. If you want to change the camera IP address, please refer to the user manual.
Notes
:
①
Please adjust the IP address well first and then install the camera.
②
Other information not mentioned here, please refer to camera user manual for details
Chapter 4: Network connection
Chapter 3: Introduction on cable interface
Steel
expansion
bolt


