ZKTeco ProBio(QR) Скачать руководство пользователя страница 15

ProBio (QR) 


  User Manual 

P a g e

 | 14 


Copyright©2021 ZKTECO CO., LTD. All rights reserved. 

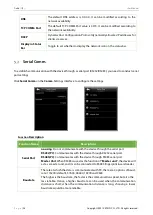
If an employee registers a face in addition to password, the following screen will appear. Select the 

 to 

enter password verification mode.  


Input the password and press [

OK

]. 


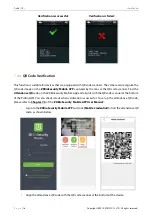
Following are the display screen after entering a correct password and a wrong password respectively. 

Verification is successful: 


Verification is failed: 


Содержание ProBio(QR)

Страница 1: ...Product Name and Model Number User Manual P a g e 1 Copyright 2020 ZKTECO CO LTD All rights reserved USER MANUAL Applicable Models ProBio QR Version 1 0 Date May 2021 English...

Страница 2: ...sign and that the said personnel have received thorough training in operating and maintaining the machine unit equipment It is further essential for the safe operation of the machine unit equipment th...

Страница 3: ...it equipment and such amendments shall not give any right to claim any compensation or damages under any circumstances ZKTeco shall in no way be responsible i in case the machine unit equipment malfun...

Страница 4: ...of biometric verification procedures and the productization of biometric verification SDK which was initially widely applied in PC security and identity authentication fields With the continuous enhan...

Страница 5: ...ion Button or key names for devices For example press OK Window names menu items data table and field names are inside square brackets For example pop up the New User window Multi level menus are sepa...

Страница 6: ...5 COMBINED VERIFICATION 17 2 MAIN MENU 19 3 USER MANAGEMENT 20 USER REGISTRATION 20 SEARCH USER 23 EDIT USER 23 DELETING USER 24 4 USER ROLE 25 5 COMMUNICATION SETTINGS 27 NETWORK SETTINGS 27 SERIAL C...

Страница 7: ...T 57 13 SYSTEM INFORMATION 58 14 QR CODE AS THE MOBILE CREDENTIAL 59 CONNECT TO ZKBIOSECURITY SOFTWARE 59 14 1 1 SET THE COMMUNICATION ADDRESS 59 14 1 2 ADD DEVICE ON THE SOFTWARE 60 14 1 3 ADD PERSON...

Страница 8: ...Disconnect the system from the Mains AC or DC power source and refer service personnel under the following conditions When cord or connection control is affected When the liquid spilled or an item dro...

Страница 9: ...romagnetic radiation devices such as generators including electric generators radios televisions especially CRT monitors or speakers Operation Safety If smoke odour or noise rise from the device turn...

Страница 10: ...everse connection may damage the device It is not advisable to connect the AC 24V power supply to the DC 12V input port Make sure to connect the wires following the positive polarity and negative pola...

Страница 11: ...Standing Position Facial Expression and Standing Posture The recommended distance Recommended Facial Expression and Standing Posture Facial Expression Standing Posture NOTE Please keep your facial ex...

Страница 12: ...ace into the green frame in the screen Standby Interface After connecting the AC adapter the following standby interface is displayed Tap to enter the User ID input interface When there is no Super Ad...

Страница 13: ...device The following is the pop up prompt box of comparison results 1 1 Facial Verification Compare the face captured by the camera with the facial template related to the entered user ID Press on th...

Страница 14: ...verification the prompt box displays Successfully Verified as shown below 1 4 2 Password Verification The device compares the entered password with the registered password of the given User ID Press...

Страница 15: ...isters a face in addition to password the following screen will appear Select the to enter password verification mode Input the password and press OK Following are the display screen after entering a...

Страница 16: ...card number data registered in the device The following is the comparison result prompt box 1 1 Card Verification The device compares the acquired card number with the card data related to the entere...

Страница 17: ...ed by the lens or the QR code scanner Find the Attendance QR code on the ZKBioSecurity Mobile App and align it with the QR code scanner at the bottom of the ProBio QR You can check in out when verific...

Страница 18: ...rmation 2 The QR code and the scanner are kept parallel and at a certain distance 15 to 30cm is recommended depending on the size of the phone screen and the density of the QR code when scanning 1 4 5...

Страница 19: ...registered verification template both the Face and the Password previously stored to that Personnel ID in the Device But as the employee has registered only the Face but not the Password the verificat...

Страница 20: ...es Data Mgt To delete data including access records admin role screen savers and so on to backup and restore data Delete access records delete all data delete admin role delete screen savers and so on...

Страница 21: ...enu 1 Register a User ID and Name Tap New User and enter the User ID and Name NOTE A name can take up to 17 characters The user ID may contain 1 to 9 digits by default You can modify your ID during th...

Страница 22: ...he user Click User Role to select Normal User or Super Admin NOTE If the selected user role is the Super Admin the user must pass the identity authentication to access the main menu The authentication...

Страница 23: ...if the two entered passwords are different then the prompt Password not match will appear NOTE The password may contain one to eight digits by default Register User Photo When a user registered with...

Страница 24: ...p assign the registered users to different groups for better management New users belong to Group 1 by default and can be reassigned to other groups The device supports up to 99 access control groups...

Страница 25: ...nformation from the device On the Delete interface click on the required operation and then select OK to confirm the deletion Delete Operations Delete User Deletes all the user information deletes the...

Страница 26: ...e User Defined Role under the User Role menu You may set the permission scope of the custom role up to 3 roles and enroller that is the permission scope of the operation menu Click User Role on the ma...

Страница 27: ...ed on the left and its sub menus will be listed on its right First click on the required Main Menu functions and then select its required sub menus from the list which the user can access Note If the...

Страница 28: ...k settings and ensure that the device and the PC connect to the same network segment Tap Ethernet on the Comm Settings interface to configure the settings Function Description Function Name Descriptio...

Страница 29: ...s interface to configure the settings Function Description Function Name Descriptions Serial Port no using Do not communicate with the device through the serial port RS232 PC Communicates with the dev...

Страница 30: ...ings interface to configure the communication settings Function Description Function Name Descriptions Comm Key The default password is 0 and can be changed The Comm Key can contain 1 6 digits and ran...

Страница 31: ...ver Address The IP address of the ADMS server Server Port Port used by the ADMS server Enable Proxy Server The IP address and the port number of the proxy server is set manually when the proxy is enab...

Страница 32: ...14th to 25th bits The 2nd to 9th bits is the site codes while the 10th to 25th bits are the card numbers Wiegand34 ECCCCCCCCCCCCCCCCCCCCCCCCCCCCCCCCO It consists of 34 bits of binary code The 1st bit...

Страница 33: ...SSSSSSSSSSSSCCCCCCCCCCCCCCCCCCCCCCCCCCCCCCCCO It consists of 50 bits of binary code The 1st bit is the even parity bit of the 2nd to 25th bits while the 50th bit is the odd parity bit of the 26th to 4...

Страница 34: ...ype and its corresponding format Various card formats are present in the device After card swiping the system will read the card number and will compare the detected card format with different card fo...

Страница 35: ...ding that type of card NOTE In the Card format detect automatically interface of an IC device the device cannot detect the card number or Wiegand format only by swiping an IC card For detecting the Wi...

Страница 36: ...the date and time 1 Tap Set Date to manually set time and tap Confirm to save 2 Tap Set Time to select a time zone then tap the return button to save and exit 3 Tap 24 Hour Time to enable or disable t...

Страница 37: ...n January 1 2020 After restoring the factory settings the time of the device will remain at 18 30 on January 1 2020 Access Logs Setting Click Access Logs Setting on the System interface Function Descr...

Страница 38: ...a set of old access logs Users may disable the function or set a valid value between 1 and 999 Periodic Del of ATT Photo When attendance photos reach its maximum capacity the device automatically del...

Страница 39: ...lt value of 82 Exposure This parameter is used to set the exposure value of the camera Quality It is the image quality for facial registration and comparison The higher the value the clearer image is...

Страница 40: ...QR User Manual P a g e 39 Copyright 2021 ZKTECO CO LTD All rights reserved NOTE If upgrade file is needed please contact our technical support Firmware upgrade is not recommended under normal circums...

Страница 41: ...interface to customize the display style of the main interface Function Description Function Name Description Wallpaper It helps to select the main screen wallpaper according to the user preference La...

Страница 42: ...e To Sleep m If the sleep mode is activated and when there is no operation in the device then the device will enter standby mode Press any key or finger to resume normal working mode This function can...

Страница 43: ...r disable the bell status Bell Time Oncetherequiredtimeisset thedeviceautomaticallytriggerstoringthebellduring that time Repeat Set the required number of counts to repeat the scheduled bell Ring Tone...

Страница 44: ...les interface click on the required bell schedule and select Edit to edit the selected bell schedule The editing method is the same as the operations of adding a new bell schedule Delete a bell On the...

Страница 45: ...cess records conditionally Delete Attendance Photo To delete attendance photos of designated personnel Delete Blocklist Photo To delete the photos taken during failed verifications Delete All Data To...

Страница 46: ...or block listed photos Selecting Delete by Time Range you need to set a specific time range to delete all data within a specific period Select Delete by Time Range Set the time range and click OK Back...

Страница 47: ...g e 46 Copyright 2021 ZKTECO CO LTD All rights reserved The following is the backup complete result interface Restore Data Tap Restore Data on the Data Mgt interface to restore the data in the device...

Страница 48: ...time zone of the user s time period 2 The corresponding user s group must be already set in the door unlock combination and if there are other groups being set in the same access combo then the verif...

Страница 49: ...sible only during that period Normal open time Period It is the scheduled time period for Normal Open mode so that the door is always open during this period Master Device While configuring the master...

Страница 50: ...me period One can set a maximum of 3 time periods for every time zone The relationship among these time periods is OR Thus when the verification time falls in any one of these time periods the verific...

Страница 51: ...after the Start Time such that Start Time is 00 00 and End Time is 23 59 4 The default Time Zone 1 indicates that the door is open all day long Holidays Whenever there is a holiday you may need a dis...

Страница 52: ...ck the Door unlock combination to be set and select the up and down arrows to input the combination number and then press OK For Example If the Door unlock combination 1 is set as 01 03 05 06 08 It in...

Страница 53: ...ck out record must occur alternatively to open the door to represent a consistent pattern This function requires two devices to work together One device is installed on the indoor side of the door mas...

Страница 54: ...s a check out or the user can check out only if the last record is a check in otherwise the alarm is triggered Duress Options Settings Once a user activates the duress verification function with a spe...

Страница 55: ...lect Download on the USB Manager interface Function Description Function Name Description Download Access Records Download access records in specified time period into USB disk User Data Import all th...

Страница 56: ...The images will be displayed on the device s main interface after upload Wallpaper To upload all wallpapers from USB disk into the device You can choose Upload selected picture or Upload all pictures...

Страница 57: ...attendance and blocklist photos is similar to that of searching for access records The following is an example of searching for access records On the Attendance Search interface tap Event Logs to sear...

Страница 58: ...are normal Test LCD To automatically test the display effect of LCD screen by displaying full color pure white and pure black to check whether the screen displays colors normally Test Voice To automa...

Страница 59: ...tion Description Function Name Description Device Capacity Displays the current device s user storage administrators password and face storage access records attendance and blocklist photos and user p...

Страница 60: ...ss should be able to communicate with the ZKBioSecurity server preferably in the same network segment with the server address 2 In the main menu click COMM Cloud Server Setting to set the server addre...

Страница 61: ...arch to open the Search interface in the software 2 Click Search and it will prompt Searching 3 After searching the list and total number of access controllers will be displayed 4 Click Add in operati...

Страница 62: ...aptured by the QR code scanner Making the QR code as a Mobile Credential you can check in out conveniently and achieve contactless access The steps are given below 14 2 1 Mobile APP Configuration Afte...

Страница 63: ...ode of the new App client After the client is identified successfully set the Client Name and select Connection Test 5 After the network is connected successfully select Save 14 2 2 Login the Mobile A...

Страница 64: ...Copyright 2021 ZKTECO CO LTD All rights reserved 2 After successful login select Mobile Credential on the App and a QR code will appear which includes employee ID and card number static QR code only...

Страница 65: ...ll prompt to authorize the modification of screen brightness settings as shown in the figure 3 The QR code is automatically refreshed for every 30s and it also supports manual refresh 14 2 3 Scan the...

Страница 66: ...e your face and forehead properly and do not cover your face and eyebrows with your hair 5 It is recommended to show a normal facial expression A smile is acceptable but do not close your eyes or incl...

Страница 67: ...reflect light For persons with thick eyeglasses frames it is recommended to capture two images one with eyeglasses and the other one without them Face Complete face with clear contour real scale evenl...

Страница 68: ...stration the feature template Fingerprint template Face template Palm template will be saved on the device according to the device type you have selected to verify the unique similarity between you an...

Страница 69: ...you enable this function we assume that you are aware of the potential security risks 5 All the data collected by our products is encrypted using the AES 256 algorithm All the data uploaded by the Ad...

Страница 70: ...ent Name Hazardous Toxic Substance Element Lead Pb Mercury Hg Cadmiu m Cd Hexavalent chromium Cr6 Polybrominate d Biphenyls PBB Polybrominated Diphenyl Ethers PBDE Chip Resistor Chip Capacitor Chip In...

Страница 71: ...ZKTeco Industrial Park No 32 Industrial Road Tangxia Town Dongguan China Tel 86 769 82109991 Fax 86 755 89602394 www zkteco com Copyright 2021 ZKTECO CO LTD All rights reserved...

Отзывы: