
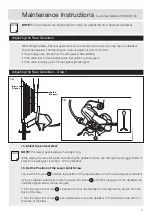


Adjusting the Rear Derailleur
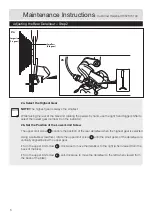
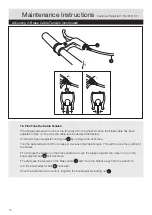
Adjusting the Rear Derailleur – Step 1
.
1a
1b
1a. Select the Lowest Gear
NOTE!
The lowest gear is always the largest cog.
While raising the rear of the bike and rotating the pedals by hand, use the right hand trigger shifter to
select the lowest gear (number 1 on the indicator).
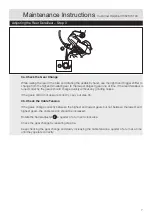
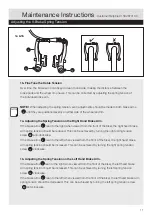
1b. Set the Position of the Lower Limit Screw
The lower limit screw controls the position of the rear derailleur when the lowest gear is selected.
Using a suitable screwdriver, rotate the lower limit screw until the small gears of the derailleur are
vertically aligned below the lowest gear.
• Turn the lower limit screw clockwise to move the derailleur to the right (when viewed from the
back of the bike).
• Turn the lower limit screw anti-clockwise to move the derailleur to the left (when viewed from
the back of the bike).
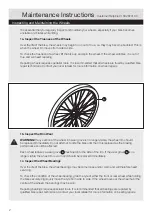
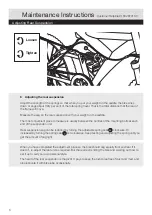
While riding the bike, if the rear gears fail to work correctly and/or become noisy, the rear derailleur
should be adjusted. The following are a few examples of when to do this:
• If a grinding noise comes from the rear gears while peddling
• If the chain fails to move between the rear gears or jumps gears
• If the chain routinely jumps off the highest (smaller) gear.
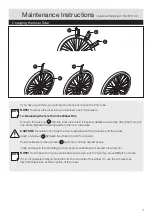
NOTE!
You will need a second person to help you adjust the front and rear derailleur.
D
D
D
D
D
5
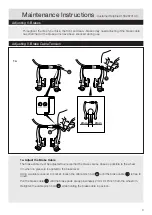
Smallest
(6th gear)
Largest
(1st gear)
Maintenance Instructions
Customer Helpline 01582 670100


