Rev.180102
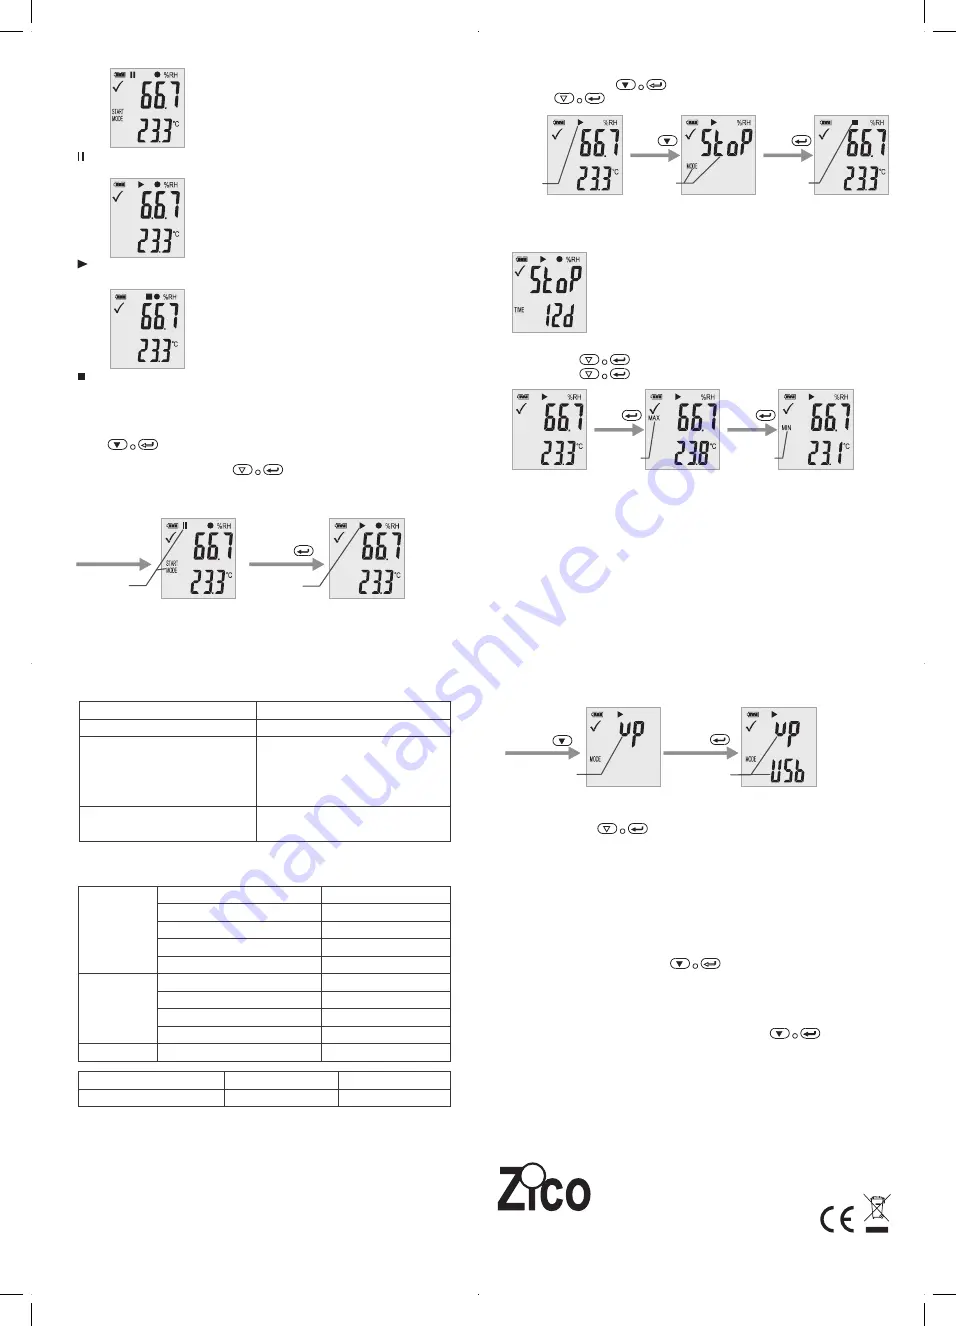
State 1:
The logger is in the “Manual ” mode, but the start key has not been not pressed yet.
State 2:
The logger is recording.
State 3:
Recording is stopped.
6-Function Menu
If the logger is not recording, only Start Recording is available.
Press the button to enter the function menu and to display humidity or air pressure,
and select the menu functions.
To activate a user menu function press the button and hold it for three seconds.
• Start Recording
To start the recording if the logger is in “Manual” mode.
• Stop Recording
In recording state, Press the button to select this function to stop recording.
Press button and hold it for three seconds.
After Setting
“Manual” mode
Waiting start
Long Press
Recording
Recording
Long press
Short press
Manual stop
page
Stop record
•
The following picture shows remaining recording time is 12 days.
Max & Min
Short press button
switch shows the highest reading since start of recording.
Short press button
switch shows the lowest reading since start of recording.
Generating a PDF-File
As soon as the logger is connected to a USB-slot, a PDF file with all recorded data in chart and an
overview of alarms is generated automatically. During PDF generation “USB PDF” appears on the
display, green and red led light indicator, when the PDF file is ready “PDF” disappear and remaining
“USB” on the display.
Depending on the number of stored measurements, generating the PDF-file might take up to
30 seconds.
As soon as the logger is reprogrammed, the PDF file on the logger will be deleted.
Remaining Recording Time
Display the remaining time until end of recording.
•
•
Short press
Short press
Max
Min
7-LED Status Guide
Relative Humidity
Temperature
Display condition
8-Specification
(
T = 25
℃
unless otherwise noted
)
0 to 100%
±5.0%
±3.5%
±3.0%
0.1
Overall Range
Accuracy (0 to 20 and 80 to 100%)
Accuracy (20 to 40 and 60 to 80%)
Accuracy (40 to 60%)
resolution
Overall Range
Action
-Logging
-Logging, low alarm or high alarm.
-Manual mode waiting start
-Memory full
-Stop upon key
-Setup successful
-check upgrade file successful
LED Indication
Cycle green single flash
Cycle red single flash
Green double flash one time
-30 to 60
℃(-22
to 140
℉)
±1℃,±1.8℉
±0.5℃,±0.9℉
0.1
Accuracy(-30 to +0
℃
,-22 to 32
℉)
Accuracy
(0
to 60
℃
,32 to 140
℉)
resolution
-30~60
℃
Temperature and Humidity
20010
1min~24h
Type
Data memory
Sample rate
Remark:
CR2450 battery performance is optimal in room temperature. Battery life cycle will reduce at low
temperature (-18
℃
). If the device is to be used to record in extremely low temperature, it is advised
to take measures to reduce power consumption to prolong operation time. An option includes:
• Choose battery that is designed to operate at low temperature
• Disable LED to reduce power consumption
• Set longer sample interval, 5 minutes for example
9-Firmware upgrade
User can also upgrade its firmware in this page.
In this page, long press and display will show “UP+USB”
Then insert the device into the PC USB port. The device will appear as a Mass Storage Device in PC
with no content.
Drag and drop the firmware to the folder.
The device will disappear in the OS. DO NOT unplug the device from PC. It takes around
After upgrade completed, Device will automatically appear as a Mass Storage Device again.
The firmware version is indicated in the left bottom corner of the .pdf test report generated.
10-Restore Default factory firmware
Remove the battery, in the following order:
1. Hold down the button (until power on) ; connect to the computer USB, the green
LED light up.
2. Waiting for 2 minutes, computer will identify the instrument USB disk.
11-Delete all data
Logger work normally on battery power. Hold down two buttons , connect to the
computer USB, the logger will delete all data.
*If waiting for 5 minutes and the instrument can’t connect to the computer, maybe need to restore
default factory firmware, or need to delete all data.
Firmware
upgrade page
Long Press
Short press
Firmware
upgrade page
Connect PC,
paste firmware
flie to the logger
disk.
Waiting 2 minutes
or red LED OFF.
www.zicotech.com
Zi-9530


