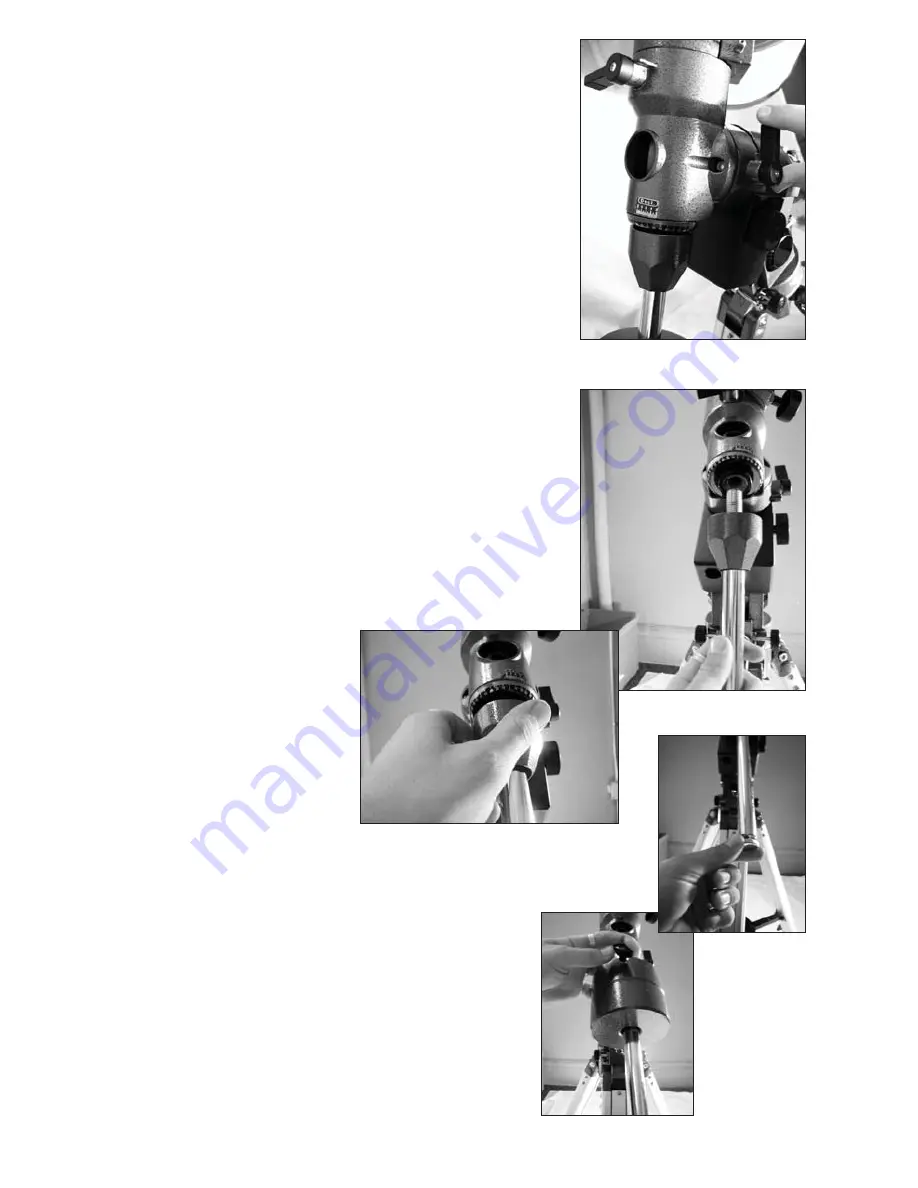
6. Holding the counterweight shaft, turn the
Dec. axis cap attached to the shaft clockwise
(looking at the large end of the cap) until it
stops. Insert the shaft into the counter-weight
shaft socket and screw the shaft into the socket
unti secure. To eliminate the gap between the
Dec. axis cap and the Dec. axis of the mount,
turn cap (without turning the counterweight
shaft) until it is snug with the end of the Dec.
axis.
7. Remove screw located at the end of the
counterweight shaft. Loosen the thumbscrews
on the counterweights until shaft opening in
the counterwiegt is completely unobstructed.
With the thumbscrew pointing down, slide
the counterweight up the counterweight shaft
and tighten counterweight thumbscrew until
snug. Repeat for each counterweight. Replace
the end screw of the counterweight shaft and
tighten until snug.
5. Loosen R.A. and Dec. axes by turning axis
release levers 180°. Position mount so that
Dec. axis is at 0° and R.A. Axis is at 0, then
re-tighten the axis release levers. The mount
should now vertically level. With the mount in
this vertical position, find the counter-weight
shaft socket located at the end of the Dec. axis
above the north leg of the tripod.
Содержание Kepler
Страница 1: ...KEPLER 152...


