Mounting your Zepp Golf sensor
Slide the sensor into the golf mount ensuring a secure fit. After you have
inserted the sensor, attach the mount to the glove by sliding it over the tab
of your glove so that it fits squarely in the center.
Capture a Swing
Once you have established Bluetooth connection and mounted the sensor
to your golf glove you’re almost ready to capture a swing.
1. Open the app. Follow the steps to create your account if you haven’t
done so already.
2.
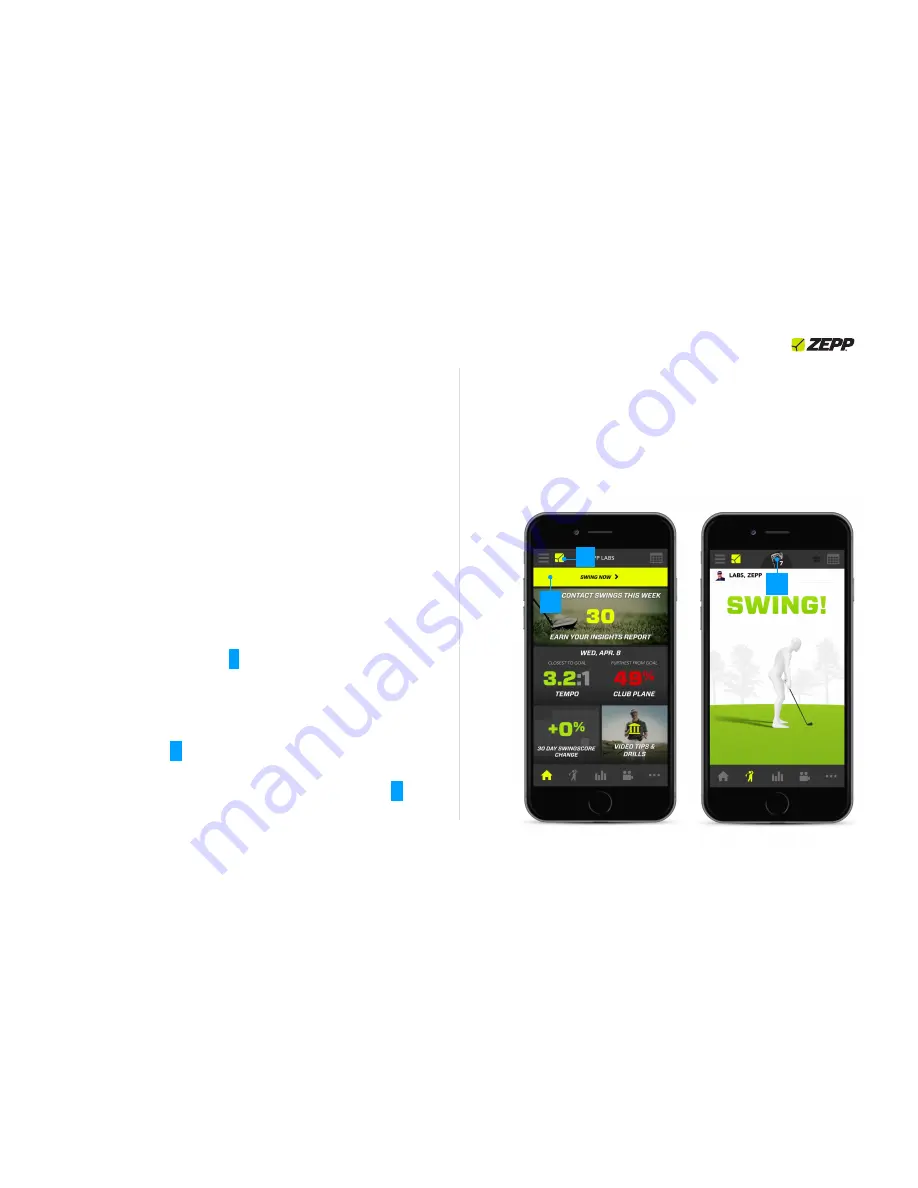
Wait for the yellow sensor icon to appear and become solid in the upper
left corner of the Home Screen. (
1
) Once the light becomes solid, the
app will ask you to calibrate the sensor. We recommend calibrating the
sensor prior to each swing session. If you are not asked to calibrate or
wish to recalibrate the sensor, tap the yellow sensor icon.
3.
Select “Swing Now” (
2
) to open the 3D view as this screen is the main
swing screen. Once in the 3D view, select the club you are using by
tapping the club icon in the located next to the calibration icon. (
3
)
4.Set up and take a swing!
Each time you make a swing the Zepp Golf app
will show your swing in the app within a few seconds.
Simply continue
swinging after capturing your first swing in order to capture another
swing. Swings can be captured when making contact with a ball as well
as when taking dry swings.
ZEPP GOLF USER GUIDE
Page 5
2
3
1
Содержание GOLF
Страница 1: ...ZEPP GOLF USER GUIDE Updated April 30 2015 ...
Страница 5: ...Getting Started ZEPP GOLF USER GUIDE Page 1 ...
Страница 9: ...Getting to know the Zepp Sensor ZEPP GOLF USER GUIDE Page 4 ...
Страница 14: ...Getting to know the Zepp App ZEPP GOLF USER GUIDE Page 9 ...
Страница 22: ...General Information Specifications ZEPP GOLF USER GUIDE Page 17 ...


