background image

41

Monsoon Connect Guide d’utilisation, d’entretien et d’installation

ZEPHYRONLINE.COM

Liste des pièces et accessoires

La description

Numéro d’article

Pièces de rechange

LumiLight LED, 6 W

Z0B0047

Filtre à chicane (chacun)

50210039

Accessoires optionnels

Télécommande RF

14000005

Pour commander des pièces, visitez-nous en ligne à  

http://store.zephyronline.com.

Содержание AK9428BS

Страница 1: ...WWW ZEPHYRONLINE COM DEC20 0201 Airflow Control Technology TM C Monsoon Connect AK9428BS AK9434BS AK9440BS AK9446BS EN Use Care and Installation Guide FR Guide d utilisation d entretien et d installation ...

Страница 2: ...2 Monsoon Connect Use Care and Installation Guide MONSOON CONNECT INSERT CORE ...

Страница 3: ...ng 9 10 Ducting Options 11 Hood Specifications 12 Electrical Supply 13 Cable Lock 13 Preparation Installation 14 16 Horizontal Ducting Preparation 17 19 PBD 1300B Dual Blower Installation 20 22 Features Controls 23 29 Proximity Controls 23 25 Zephyr Connect 26 27 Optional RF Remote Control 28 29 Maintenance 30 32 Hood Filter Cleaning 30 31 LumiLight LED 32 ACT Conversion 33 35 Airflow Control Techno...

Страница 4: ...annot be locked securely fasten a prominent warning device such as a tag to the service panel General Safety WARNING Warning means that failure to heed this safety statement may result in extensive product damage serious personal injury or death CAUTION Caution means that failure to heed this safety statement may result in minor or moderate personal injury property or equipment damage WARNING To r...

Страница 5: ... within walls ceilings attics crawl spaces or garages WARNING WARNING TO REDUCE THE RISK OF FIRE ELECTRIC SHOCK OR INJURY TO PERSONS OBSERVE THE FOLLOWING a Installation work and electrical wiring must be done by qualified person s in accordance with all applicable codes and standards including fire rated construction b Sufficient air is needed for proper combustion and exhausting of gases through t...

Страница 6: ...supply and connected to an individual properly grounded branch circuit protected by a 15 or 20 ampere circuit breaker or time delay fuse Wiring must be 2 wire with ground Please also refer to Electrical Diagram on product Ź A cable locking connector not supplied might also be required by local codes Check with local requirements purchase and install appropriate connector if necessary National Fire...

Страница 7: ...alled 4 LumiLight LED 6W pre installed AK9446BS only 1 Single blower motor pre installed 1 8 round adapter with damper 2 Horizontal ducting blower mount brackets 1 Top rectangular cover plate 1 Hardware package M4 x 6mm 8 Wire Caps 3 8 x 1 2 12 3 16 x 3 8 10 Parts Not Supplied Ducting conduit and all installation tools Cable locking connector if required by local codes RF remote control Dual blowe...

Страница 8: ... x Ft Ft Ft Ft 6 7 8 10 Round roof cap 30 Ft x Ft Subtotal column2 Subtotal column1 Total ductwork Maximum Duct Length For satisfactory air movement the totalductlengthshould not exceed 150 equivalent feet 6 roundto 3 1 4 x 10 rect transition 1 Ft x Ft 6 roundto 3 1 4 x 10 rect transition 900 elbow 16 Ft x Ft 7 roundto 3 1 4 x 10 rect transition 8 Ft x Ft 7 roundto 3 1 4 x 10 rect transition 900 e...

Страница 9: ...9 Monsoon Connect Use Care and Installation Guide ZEPHYRONLINE COM Installation Instructions Mounting Height Clearance Ducting 24 min 34 max 36 ...

Страница 10: ...mum mount height between range top to hood bottom should be no less than 24 Maximum mount height should be no higher than 34 It is important to install the hood at the proper mounting height Hoods mounted too low could result in heat damage and fire hazard while hoods mounted too high will be hard to reach and will lose its performance and efficiency If available also refer range manufacturer s hei...

Страница 11: ...certified Silver Tape or Duct Tape Fire Hazard NEVER exhaust air or terminate ductwork into spaces between walls crawl spaces ceilings attics or garages All exhaust must be ducted to the outside unless using the recirculating option WARNING 8 round horizontal ducting 8 round vertical ducting 8 round vertical ducting Soffit or crawl space Roof Pitch w Flashing Cap side wall cap w gravity damper side...

Страница 12: ...7 3 16 48 17 7 8 30 only 5 9 16 36 42 48 6 1 8 C L 30 9 1 4 36 11 7 8 42 14 7 8 48 17 7 8 2 elec k o 10 3 8 elec k o C L 5 1 2 7 11 16 12 19 3 8 12 3 remote antenna Ø 7 11 16 9 15 16 9 1 2 14 3 16 8 1 16 10 3 8 30 22 3 8 36 28 3 8 42 34 3 8 48 40 1 4 30 28 3 8 36 34 3 8 42 40 3 8 48 46 1 4 30 9 1 4 36 11 7 8 42 14 7 8 48 17 7 8 8 round ducting 10 round ducting ...

Страница 13: ...on cord or adapter plug with this appliance Follow national electrical codes or prevailing local codes and ordinances This appliance requires a 120V 60Hz electrical supply and connected to an individual properly grounded branch circuit protected by a 15 or 20 ampere circuit breaker or time delay fuse Wiring must be 2 wire w ground Please also refer to the Electrical Diagram labeled on product Cabl...

Страница 14: ...g 8 8 x 1 2 stainless steel screws 4 screws in the front and 4 screws in the sides FIG C 28 3 8 or 34 3 8 or 40 3 8 or 46 1 4 19 3 8 cut out AK9428 AK9434 AK9446 AK9440 1 4 po 1 1 8 po Make sure the surface you are securing the liner to is capable of holding the weight of AK94 Failure to do so may cause personal injury or damage to cooking surface or counter WARNING FIG B FIG C 5 If using RF remot...

Страница 15: ...tion 1 Remove baffle filters by 1 Pulling filter toward front of liner 2 Pivoting rear of filter down 2 Remove grease tray by 1 Pulling up on tray to release from bottom panel 2 Lifting tray out of liner body 3 Remove left and right side spacer panels by removing 2 screws from behind each panel if applicable 1 2 1 1 2 ...

Страница 16: ...om Panel Screws 2 1 4 Remove bottom panel by 1 Removing 2 screws from left and right sides of bottom panel 2 Pulling bottom panel toward front of liner to release from locking tabs 6 Vertical ducting preparation is complete Refer to page 14 step 4 to complete installation 5 Secure 8 or 10 round ducting collar to top of insert by 4 M4 x 6mm screws ...

Страница 17: ...ntal Ducting Preparation 1 Follow steps 1 to 4 from pages 15 and 16 Remove blower molex plug 2 Remove blower from liner by removing the 4 3 16 x 3 8 screws from the top of the liner Set screws aside for later usage 3 Using a flat head screwdriver remove 8 round knock out plate at the back of the liner ...

Страница 18: ...iner secure plate to top of liner with 2 3 16 x 3 8 screws At this point install the liner into the cabinet by following the steps on page 14 step 4 After liner installation continue on page 18 5 From inside the liner push 8 round adapter through the back knock out and secure to interior back wall of liner with 4 M4 x 6mm screws 6 Secure 2 horizontal ducting blower brackets to blower as shown abov...

Страница 19: ...cated on the interior back wall of the liner 2 Pivot top horizontal ducting bracket to meet captive nuts on interior back wall 1 2 1 8 Secure blower to captive nuts on interior back wall of liner with 8 3 16 x 3 8 screws 4 screws for each bracket Seal any gaps around the knock out plate by using certified aluminum duct tape Plug in blower molex plug Horizontal ducting preparation is now complete Re...

Страница 20: ...the instructions below PBD 1300B dual blower kit compatible only with AK9434BS AK9440BS and AK9446BS 1 Remove the baffle filters and if applicable remove the side panels Disconnect blower plug 2 Remove 4 screws at top of hood body attaching blower to blower plate Remove blower from interior of hood body 3 Remove 4 screws from interior of hood body attaching blower plate to hood body Remove blower p...

Страница 21: ...ll previously removed blower onto one side of dual blower plate and attach by 4 previously removed screws from step 2 6 Install blower from PBD 1300B kit onto other side of dual blower plate by 4 3 16 x 3 8 screws 7 Dual blower screw mount locations 8 Remove 5 screws to remove the light panel Install dual blower PCB inside the hood body ...

Страница 22: ...ual blower K and white single pin power cord F to dual blower PCB NOTE To secure the 10 transition adapter to top of hood a cut out of 14 1 2 width x 10 1 2 depth will need to be made in the cabinet bottom If internal cabinet dimensions prevent this size of a cut out then the 10 transition adapter may be mounted to the cabinet bottom rather than the top of the hood Cut out dimensions for this type...

Страница 23: ...il the fan and lights are turned off CONTROL ICONS Power Ź Press the power icon to power on or off the fan and lights Ź The hood has a memory function to remember the last used settings for the fan and lights Ź After pressing the power icon to power off the hood GOODBYE will appear on the LCD display for 2 seconds Ź The 3s icon under the power icon only illuminates when the fan is powered on It is...

Страница 24: ...TED or WIFI DISCONNECTED will appear on the LCD display whenever the connection changes which will be managed via the Zephyr Connect app Ű Ź While the fan is on press and hold for 3 seconds to enable the delay off timer The fan will change to speed 1 the timer display will illuminate the LCD display will show AUTOMATIC DELAY OFF and the timer will begin counting down from 10 minutes After the time...

Страница 25: ...provides the option to reset the reminder Recirculating Mode Charcoal Filter Replacement Reminder Ź Hold and for 3 seconds to enable or disable recirculating mode which will remind you to replace the charcoal filter The LCD display will show RECIRCULATING ENABLED to enable and RECIRCULATING DISABLE to disable for 2 seconds Ź After 200 hours of fan use the notification bell icon will illuminate When ...

Страница 26: ...uct information The Zephyr Connect app is available on iOS devices using iOS 11 0 or later or Android devices using Android version 8 or later Visit the Apple App Store or Google Play Store for more information If your range hood is not connected to WiFi the functionality will operate similarly to a typical range hood without WiFi connectivity Please review the included Zephyr Connect Quick Start ...

Страница 27: ...a Start Enable Hood Name Delay Off Timer Enable delay off timer for 10 minutes After 10 minutes the hood will power off Alexa Stop Disable Hood Name Delay Off Timer Disable delay off timer Control Type Google Home Voice Command Description Power Hey Google turn on Hood Name Turn on range hood power Hey Google turn off Hood Name Turn off range hood power Fan Hey Google increase Hood Name speed Incr...

Страница 28: ...cause undesired operation Synchronization To create a unique link between your hood and remote control please follow these steps 1 With hood off press and hold on the hood until the controls display REMOTE PAIRING 2 Press a button on the remote and the remote control will be synchronized with the hood RF Remote Control Functions Blower On Speed Selection Press to power on blower and cycle through ...

Страница 29: ...utlet for easy storage Note The remote holder does not charge the RF remote Maximum remote control communication distance is 15 feet from the liner RF Remote Maintenance Clean the remote control using non abrasive detergents Follow instructions below for replacing battery Using a small flat head screwdriver raise the cover of the battery door A in order to access the battery compartment FIG E Remov...

Страница 30: ...eaners to polish and buff out the stainless luster and grain Always scrub lightly with clean cotton cloth or micro fiber cloth and buff in the direction of the stainless steel grain Ų The filters are intended to trap residue and grease from cooking Although the filters should never need replacing they are required to be cleaned every 30 days or more often depending on cooking habits Filters may be pl...

Страница 31: ...handles 2 Pivot back of filter upwards so it is angled in the liner 3 Push filter into channel on back of liner to lock into place Removing the Grease Tray Grease tray has a hooked lip that attaches to bottom panel top edge Remove grease tray by 1 Pull up on tray to release from bottom panel FIG G1 2 Pull tray out of liner body FIG G2 Maintenance 1 2 FIG F 1 1 2 FIG G ...

Страница 32: ...ontact Zephyr to order replacement parts See the list of parts and accessories page for part numbers and contact information LED Removal FIG H 1 Remove baffle filters 2 Remove light panel by five screws 3 Disconnect LED light quick connector 4 Push in the two side clips on the ends of the LED light 5 Push LED light through the light panel opening FIG H Push the clip ...

Страница 33: ...ng on the hood the CFM cannot be changed again CAUTION ů Ĭ Ļĭ Some local codes limit the maximum amount of CFM a range hood can move ACT allows you to control the maximum blower CFM of select Zephyr Ventilation range hoods without the need for expensive make up air kits ACT enables the installer to easily set the maximum blower speed to one of three most commonly specified CFM levels 590 390 or 290...

Страница 34: ...llation 4 Remove the appropriate foil CFM sticker included with the hood literature and place inside the hood body below the wiring diagram or in another clearly visible location To verify if your installer enabled ACT 1 With hood off hold the On Off button for three seconds The Display will show if ACT is disabled and set to the maximum CFM or if ACT is enabled and set to one of the restricted ma...

Страница 35: ...able Remove both spacer panels by 2 screws for each spacer panel 3 Remove 5 screws attaching light panel FIG I 1 3 5 7 2 4 6 8 1 3 5 7 2 4 6 8 1 3 5 7 2 4 6 8 1 3 5 7 2 4 6 8 Jumper 7 8 DEFAULT POSITION Max Blower CFM 590 Jumper 5 6 Max Blower CFM 390 Jumper 3 4 Max Blower CFM 290 Jumper 1 2 1 3 5 7 2 4 6 8 PC Board Jumper Pins Plastic Jumper FIG J ...

Страница 36: ...iagram WIFI WHITE B W BLACK BLACK BLACK BLACK BLACK BLACK BLACK B W WHITE WHITE WHITE WHITE WHITE GREEN BODY MOTOR 1 MOTOR 2 WHITE K Single Blower Dual Blower A Wi Fi connection wire C Power wire for expansion PCB D Power wire for expansion PCB E Blower connection wire F Blower connection wire G Control connection wire H Dual blower PCB to switch wire I Power lead J Dual blower connection wire K B...

Страница 37: ...B W BLACK BLACK BLACK BLACK BLACK BLACK BLACK B W WHITE WHITE WHITE WHITE WHITE GREEN BODY MOTOR 1 MOTOR 2 WHITE K Single Blower Dual Blower A Wi Fi connection wire B LED PCB wire C Power wire for expansion PCB D Power wire for expansion PCB E Blower connection wire F Blower connection wire G Control connection wire H Dual blower PCB to switch wire I Power lead J Dual blower connection wire K Blow...

Страница 38: ...the blower is too hot to operate and shuts the blower down The blower will function properly after the thermally protected system cool down Damaged capacitor Change the capacitor Blower molex plug pin is not making contact Disconnect the blower molex plug check pins inside plug to see if pin is pushed inside the plug too far Reset pin if needed The blower is defective possibly seized Change the bl...

Страница 39: ...nge the filter Spring clip is broken on the filter Change the spring clip RF Remote control does not work Battery is dead Replace battery with type A23 12v Poor communication with the hood Remote control must be within 15 ft of hood RF Remote lost communication with the hood Reset hood and remote by switching power off at the circuit breaker for 5 minutes Place remote on counter top near the hood an...

Страница 40: ...ocking the pathway to the range hood Walls may reduce signal strength User cannot change Wi Fi connections The range hood and user s phone have already connected Enter Bluetooth settings and forget the device to reset the process on the phone Cannot bind the hood to my Zephyr Connect account Only one Zephyr Connect account can be bound to the hood Log in using the Zephyr Connect account that is al...

Страница 41: ...de ZEPHYRONLINE COM List of Parts Accessories Description Part Number Replacement Parts LumiLight LED 6W Z0B0047 Baffle Filter each 50210039 Optional Accessories RF Remote Control 14000005 To order parts visit us online at http store zephyronline com ...

Страница 42: ...42 Monsoon Connect Use Care and Installation Guide MONSOON CONNECT INSERT CORE Notes ...

Страница 43: ...ll labor costs associated with this warranty All Products must be installed by a qualified professional installer to be eligible for warranty repairs or service Limitations of Warranty OUR OBLIGATION TO REPAIR OR REPLACE AT OUR OPTION SHALL BE YOUR SOLE AND EXCLUSIVE REMEDY UNDER THIS WARRANTY WE SHALL NOT BE LIABLE FOR INCIDENTAL CONSEQUENTIAL OR SPECIAL DAMAGES ARISING OUT OF OR IN CONNECTION WI...

Страница 44: ...se take a moment to register your new Zephyr product at www zephyronline com registration Zephyr Ventilation 2277 Harbor Bay Pkwy Alameda CA 94502 1 888 880 8368 Prompt registration helps in more ways than one IT S IMPORTANT Ensures warranty coverage should you need service Ownership verification for insurance purposes Notification of product changes or recalls ...

Страница 45: ...WWW ZEPHYRONLINE COM DEC20 0201 Airflow Control Technology TM C EN Use Care and Installation Guide FR Guide d utilisation d entretien et d installation Monsoon Connect AK9428BS AK9434BS AK9440BS AK9446BS ...

Страница 46: ...2 Monsoon Connect Guide d utilisation d entretien et d installation INSÉRER CORE MONSOON CONNECT ...

Страница 47: ...0 Options de conduits 11 Spécifications de la hotte 12 Fourniture électrique 13 Raccord de câble 13 Préparation et installation 14 16 Préparation des conduits horizontaux 17 19 Installation du double ventilateur PBD 1300B 20 22 Fonctionnalités et commandes 23 29 Contrôles de proximité 23 25 Zephyr Connect 26 27 Télécommande RF en option 28 29 Entretien 30 32 Nettoyage de la hotte et du filtre 30 31 ...

Страница 48: ...abricant b Avant l entretien ou le nettoyage de l unité coupez l alimentation au panneau de service et verrouillez les moyens de déconnexion de service pour éviter toute mise sous tension accidentelle Lorsque le moyen de déconnexion de service ne peut pas être verrouillé fixez solidement un dispositif d avertissement bien visible tel qu une étiquette au panneau de service Sécurité générale ATTENTIO...

Страница 49: ...t normes applicables y compris la construction résistant au feu b Une quantité d air suffisante est nécessaire pour une combustion et une évacuation correctes des gaz par le conduit de fumée cheminée de l équipement à combustible pour empêcher le refoulement Suivez les directives et les normes de sécurité du fabricant de l équipement de chauffage telles que celles publiées par la National Fire Pro...

Страница 50: ... une alimentation électrique de 120 V à 60 Hz et est connecté à un circuit de dérivation individuel correctement mis à la terre protégé par un disjoncteur de 15 ou 20 ampères ou un fusible temporisé Le câblage doit être à 2 fils avec mise à la terre Veuillez également vous référer au schéma électrique du produit Ź Un connecteur de verrouillage de câble non fourni peut également être requis par les ...

Страница 51: ...les codes locaux Télécommande RF Moteur à double soufflante Pièces fournies Quantité Partie 1 Insérer le corps de la hotte 2 Filtres à chicane 3 Filtres à chicane AK9446BS uniquement 2 LumiLight LED 6 W pré installé 4 LumiLight LED 6 W préinstallé AK9446BS uniquement 1 Moteur de soufflante simple préinstallé 1 Adaptateur rond de 8 po avec amortisseur 2 Supports de montage du ventilateur à conduit ...

Страница 52: ... rect droit circ droit rect coude à 90º rect coude à 45º rect coude plat à 90º circ coude à 90º coude à 45º Sous total colonne 1 Longueur maximale du conduit d aération Pour un mouvement d air convenable la longueur totale d un conduit d aération ne devrait pas compter plus que l équivalent de 150 pieds Pièces de conduit Longueur x Nombre utilisé 6 circ à rect de 3 1 4 x 10 coude à 90º 6 circ à re...

Страница 53: ...9 Monsoon Connect Guide d utilisation d entretien et d installation ZEPHYRONLINE COM Instructions d installation Hauteur de montage dégagement et gaine 24 po min 34 po max 36 po ...

Страница 54: ...x La hauteur de montage minimale entre le haut de la cuisinière et le bas de la hotte ne doit pas être inférieure à 24 po La hauteur de montage maximale ne doit pas dépasser 34 po Il est important d installer la hotte à la bonne hauteur de montage Les hottes montées trop bas peuvent entraîner des dommages causés par la chaleur et un risque d incendie tandis que les hottes montées trop haut seront ...

Страница 55: ...que d incendie NE JAMAIS évacuer l air ni terminer de conduits dans des espaces entre les murs les vides sanitaires les plafonds les greniers ou les garages Tout l échappement doit être canalisé vers l extérieur à moins d utiliser l option de recirculation ATTENTION Gaine horizontale ronde 8 po Conduit vertical rond de 8 po Conduit vertical rond de 8 po Soffite ou vide sanitaire Pente de toit avec...

Страница 56: ...L C 30 po 9 1 4 po 36 po 11 7 8 po 42 po 14 7 8 po 48 po 17 7 8 po 2 po entrée defoncable 10 3 8 po entrée defoncable L C 5 1 2 po 7 11 16 po 12 po 19 3 8 po 12po 3 po antenne à distance Ø 7 11 16 po 9 15 16 po 9 1 2 po 14 3 16 po 8 1 16 po 10 3 8 po 30 po 22 3 8 po 36 po 28 3 8 po 42 po 34 3 8 po 48 po 40 1 4 po 30 po 28 3 8 po 36 po 34 3 8 po 42 po 40 3 8 po 48 po 46 1 4 po 30 po 9 1 4 po 36 po ...

Страница 57: ...ion individuel correctement mis à la terre protégé par un disjoncteur de 15 ou 20 ampères ou un fusible temporisé Le câblage doit être à 2 fils avec terre Veuillez également vous référer au schéma électrique étiqueté sur le produit Le câblage électrique doit être effectué par des personnes qualifiées conformément à tous les codes et normes applicables Cette hotte doit être correctement mise à la ter...

Страница 58: ... vis à l avant et 4 vis sur les côtés FIG C 28 3 8 po 34 3 8 po 40 3 8 po 46 1 4 po 19 3 8 po coupé AK9428 AK9434 AK9446 AK9440 1 4 po 1 1 8 po Assurez vous que la surface sur laquelle vous fixez la doublure est capable de supporter le poids de l AK94 Le non respect de cette consigne peut entraîner des blessures corporelles ou endommager la surface de cuisson ou le comptoir ATTENTION FIG B FIG C 5 ...

Страница 59: ...flecteurs en 1 Tirant le filtre vers l avant de la doublure 2 Pivotement de l arrière du filtre vers le bas 2 Retirez le plateau à graisse en 1 Tirant sur le plateau pour le dégager du panneau inférieur 2 Soulever le plateau hors du corps de la doublure 3 Retirez les panneaux d entretoise latéraux gauche et droit en retirant les 2 vis derrière chaque panneau 1 2 1 1 2 ...

Страница 60: ...ez le panneau inférieur en 1 Retirez les 2 vis des côtés gauche et droit du panneau inférieur 2 Tirer le panneau inférieur vers l avant de la doublure pour le dégager des languettes de verrouillage 6 La préparation des conduits verticaux est terminée Reportez vous à la page 14 étape 4 pour terminer l installation 5 Fixez le collier de conduit rond de 8 po ou 10 po au sommet de l insert à l aide de...

Страница 61: ...1 Suivez les étapes 1 à 4 des pages 15 et 16 Retirez le bouchon molex du ventilateur 2 Retirez le ventilateur de la gaine en retirant les 4 vis 3 16 x 3 8 du haut de la gaine Mettez les vis de côté pour une utilisation ultérieure 3 À l aide d un tournevis à tête plate retirez le rond de 8 ou 3 1 4 x10 rect plaques à défoncer à l arrière de la doublure ...

Страница 62: ...s 3 16 x 3 8 À ce stade installez la doublure À ce stade installez la doublure dans l armoire en suivant les dans l armoire en suivant les étapes de la page 14 étape étapes de la page 14 étape 4 Après l installation de la 4 Après l installation de la doublure continuez à la page doublure continuez à la page 18 18 5 Depuis l intérieur de la gaine poussez l adaptateur rond de 8 po à travers la décou...

Страница 63: ...périeur pour qu il rencontre les écrous captifs sur la paroi arrière intérieure 1 2 1 8 Fixez le ventilateur aux écrous captifs sur la paroi arrière intérieure du revêtement avec 8 vis 3 16 x 3 8 4 vis pour chaque support Scellez tous les espaces autour de la plaque d éjection à l aide de ruban adhésif en aluminium certifié Branchez la prise molex du ventilateur La préparation des conduits La prépa...

Страница 64: ...soufflante PBD 1300B compatible uniquement avec AK9434BS AK9440BS ou AK9446BS 1 Retirez les filtres déflecteurs et le cas échéant retirez les panneaux latéraux Débranchez la fiche du ventilateur 2 Retirez les 4 vis en haut du corps de la hotte fixant le ventilateur à la plaque du ventilateur Retirez le ventilateur de l intérieur du corps de la hotte 3 Retirez les 4 vis de l intérieur du corps de la ho...

Страница 65: ... de la plaque de ventilateur double et fixez le à l aide des 4 vis précédemment retirées de l étape 2 6 Installez le ventilateur du kit PBD 1300B sur l autre côté de la plaque de ventilateur double à l aide de 4 vis 3 16 x 3 8 7 Emplacements de montage de deux vis de ventilateur 8 Retirez les 5 vis pour retirer le panneau lumineux Installez le circuit imprimé du double ventilateur à l intérieur du ...

Страница 66: ...et le cordon d alimentation blanc à une broche F au PCB double ventilateur REMARQUE Pour fixer l adaptateur de transition de 10 po au haut de la hotte une découpe de 14 1 2 po de largeur x 10 1 2 po de profondeur devra être faite dans le bas de l armoire Si les dimensions internes de l armoire empêchent cette taille de découpe alors l adaptateur de transition de 10 pouces peut être monté sur le bas...

Страница 67: ... Les icônes ne disparaîtront pas tant que le ventilateur et les lumières ne seront pas éteints ICÔNES DE CONTRÔLE Allumer Ź Appuyez sur l icône d alimentation pour allumer ou éteindre le ventilateur et les lumières Ź La hotte a une fonction de mémoire pour mémoriser les derniers réglages utilisés pour le ventilateur et les lumières Ź Après avoir appuyé sur l icône d alimentation pour éteindre la h...

Страница 68: ...DISCONNECTED apparaîtront sur l écran LCD chaque fois que la connexion change ce qui sera géré via l application Zephyr Connect Retard automatique désactivé Ź Pendant que le ventilateur est en marche maintenez enfoncé pendant 3 secondes pour activer la minuterie d extinction Le ventilateur passera à la vitesse 1 l affichage de la minuterie s allumera l écran LCD affichera AUTOMATIC DELAY OFF et la...

Страница 69: ...cation Zephyr Connect offre la possibilité de réinitialiser le rappel Ě Ů Ź Maintenez et pendant 3 secondes pour activer ou désactiver le mode de recirculation qui vous rappellera de remplacer le filtre à charbon L écran LCD affichera RECIRCULATING ENABLED pour activer et RECIRCULATING DISABLE pour désactiver pendant 2 secondes Ź Après 200 heures d utilisation du ventilateur l icône de la cloche de...

Страница 70: ...duit L application Zephyr Connect est disponible sur les appareils iOS utilisant iOS 11 0 ou version ultérieure ou les appareils Android utilisant la version Android 8 ou ultérieure Visitez l Apple App Store ou le Google Play Store pour plus d informations Si votre hotte n est pas connectée au WiFi la fonctionnalité fonctionnera de la même manière qu une hotte de cuisine classique sans connectivit...

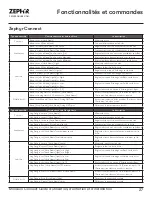
Страница 71: ...a Start Enable Hood Name Delay Off Timer Activer la minuterie d arrêt pendant 10 minutes Après 10 minutes la hotte s éteint Alexa Stop Disable Hood Name Delay Off Timer Désactiver le temporisateur d arrêt Type de contrôle Commande vocale Google Home La description Puissance Hey Google turn on Hood Name Allumez la hotte Hey Google turn off Hood Name Coupez l alimentation de la hotte Ventilateur Hey...

Страница 72: ...t la télécommande veuillez suivre ces étapes 1 Avec le capot éteint appuyez et maintenez sur le capot jusqu à ce que les commandes affichent REMOTE PAIRING 2 Appuyez sur un bouton de la télécommande et la télécommande sera synchronisée avec la hotte Fonctions de la télécommande RF Ventilateur Allumer Choix de vitesses Appuyez sur pour mettre le ventilateur en marche et choisir l une des six vitess...

Страница 73: ...le Remarque le support de télécommande ne charge pas la télécommande RF La distance de communication maximale de la télécommande est de 15 pieds de la doublure Maintenance à distance RF Nettoyez la télécommande avec des détergents non abrasifs Suivez les instructions ci dessous pour remplacer la batterie À l aide d un petit tournevis à tête plate soulevez le couvercle du couvercle du logement des ...

Страница 74: ...pour polir et polir le lustre et le grain de l acier inoxydable Frottez toujours légèrement avec un chiffon en coton propre ou en microfibres et polissez dans le sens du grain de l acier inoxydable Ů ů Les fi ltres sont destinés à piéger les résidus et les graisses de cuisson Bien que les filtres ne devraient jamais avoir besoin d être remplacés ils doivent être nettoyés tous les 30 jours ou plus sou...

Страница 75: ...voter l arrière du filtre vers le haut pour qu il soit incliné dans la doublure 3 Poussez le filtre dans le canal à l arrière de la doublure pour le verrouiller en place Retrait du bac à graisse Le plateau à graisse a une lèvre crochue qui se fixe au bord supérieur du panneau inférieur Retirez le bac à graisse en 1 Tirez sur le plateau pour le dégager du panneau inférieur FIG G1 2 Retirez le plateau ...

Страница 76: ...pièces de rechange Voir la page de la liste des pièces et accessoires pour les numéros de pièces et les coordonnées Retrait de la LED LumiLight FIG H 1 Retirer les filtres déflecteurs 2 Retirez le panneau lumineux par cinq vis 3 Débranchez le connecteur rapide de la lumière LED 4 Poussez les deux clips latéraux aux extrémités de la lumière LED 5 Poussez la lumière LED à travers l ouverture du pannea...

Страница 77: ...gé AVERTISSEMENT Technologie de contrôle du débit d air ACT Certains codes locaux limitent la quantité maximale de CFM qu une hotte de cuisinière peut déplacer ACT vous permet de contrôler le CFM maximum du ventilateur de certaines hottes de cuisinière Zephyr Ventilation sans avoir besoin de kits d air d appoint coûteux ACT permet à l installateur de régler facilement la vitesse maximale du ventil...

Страница 78: ... l installation de la hotte 4 Retirez l autocollant CFM en aluminium approprié inclus avec la documentation de la hotte et placez le à l intérieur du corps de la hotte sous le schéma de câblage ou à un autre endroit clairement visible Ů Ļė 1 Avec le capot éteint maintenez le bouton Marche Arrêt enfoncé pendant trois secondes L écran affichera si ACT est désactivé et réglé sur le CFM maximum ou si ...

Страница 79: ...nt par 2 vis pour chaque panneau d espacement 3 Retirez les 5 vis fixant le panneau lumineux FIG I 1 3 5 7 2 4 6 8 1 3 5 7 2 4 6 8 1 3 5 7 2 4 6 8 1 3 5 7 2 4 6 8 Cavalier 7 8 POSITION PAR DÉFAUT 1 3 5 7 2 4 6 8 Carte de circuits imprimés Broches de cavaliers Cavalier de plastique Débit maximal du ventilateur 390 Cavalier 3 4 Débit maximal du ventilateur 290 Cavalier 1 2 Débit maximal du ventilateu...

Страница 80: ...OIR NOIR BLANC NOIR BLANC BLANC BLANC BLANC BLANC VERT CORPS MOTEUR 1 MOTEUR 2 BLANC K Souffleur simple Double ventilateur A Fil de connexion Wi Fi C Câble d alimentation pour PCB d extension D Câble d alimentation pour PCB d extension E Fil de connexion du ventilateur F Fil de connexion du ventilateur G Fil de connexion de contrôle H Circuit imprimé à double ventilateur pour passer le fil I Cordon...

Страница 81: ...C BLANC BLANC BLANC BLANC VERT CORPS MOTEUR 1 MOTEUR 2 BLANC K Souffleur simple Double ventilateur A Fil de connexion Wi Fi B Fil de carte PCB de LED C Câble d alimentation pour PCB d extension D Câble d alimentation pour PCB d extension E Fil de connexion du ventilateur F Fil de connexion du ventilateur G Fil de connexion de contrôle H Circuit imprimé à double ventilateur pour passer le fil I Cord...

Страница 82: ...ilateur Le ventilateur fonctionnera correctement après le refroidissement du système thermiquement protégé Condensateur endommagé Changez le condensateur La broche de la prise molex du ventilateur ne fait pas de contact Débranchez la fiche molex du ventilateur vérifiez les broches à l intérieur de la fiche pour voir si la broche est enfoncée trop loin dans la fiche Réinitialisez la broche si nécessair...

Страница 83: ...e filtre Changer le clip à ressort La télécommande RF ne fonctionne pas La batterie est morte Remplacez la batterie par un type A23 12v Mauvaise communication avec la hotte La télécommande doit être à moins de 15 pieds de la hotte La télécommande RF a perdu la communication avec la hotte Réinitialisez la hotte et la télécommande en coupant l alimentation au disjoncteur pendant 5 minutes Placez la t...

Страница 84: ...nt réduire la puissance du signal L utilisateur ne peut pas modifier les connexions Wi Fi La hotte et le téléphone de l utilisateur sont déjà connectés Entrez les paramètres Bluetooth et oubliez l appareil pour réinitialiser le processus sur le téléphone Impossible de lier la hotte à mon compte Zephyr Connect Un seul compte Zephyr Connect peut être lié au capot Connectez vous en utilisant le compte...

Страница 85: ...NLINE COM Liste des pièces et accessoires La description Numéro d article Pièces de rechange LumiLight LED 6 W Z0B0047 Filtre à chicane chacun 50210039 Accessoires optionnels Télécommande RF 14000005 Pour commander des pièces visitez nous en ligne à http store zephyronline com ...

Страница 86: ...42 Monsoon Connect Guide d utilisation d entretien et d installation INSÉRER CORE MONSOON CONNECT Remarques ...

Страница 87: ... les frais de déplacement du technicien à votre domicile pour que le Produit soit réparé enlevé ou réinstallé Un an après la date d achat originale du Produit vous êtes également responsable de tous les frais de main d œuvre associés à la présente garantie Restrictions de la garantie NOTRE OBLIGATION DE RÉPARER OU DE REMPLACER À NOTRE GRÉ LE PRODUIT CONSTITUE VOTRE SEUL ET UNIQUE RECOURS SOUS LA P...

Страница 88: ...e produit au www zephyronline com registration Zephyr Ventilation 2277 Harbor Bay Pkwy Alameda CA 94502 1 888 880 8368 Cet enregistrement rapide est utile à bien des égards C EST IMPORTANT Il assure la couverture de votre garantie si vous avez besoin de service après vente À des fins d assurance il permet de confirmer que vous êtes le propriétaire Il vous permet de recevoir des avis concernant des m...

Отзывы: