


©2013 DJI Innovations. All Rights Reserved.
9
(2) GCU Power Cable
connection
Connect the
GCU Power Cable
to a connecter, if DJI Multi-rotor is used,
solder the power cable to the power pad on aircraft.
(3) Gimbal TILT Control channel
X2
X1
4.
Connection has been finished. They can come into use after power on.
5.
The tilt direction of gimbal can be controlled by one channel of Autopilot System (WKM is X2, NAZA-M and
NAZA-M V2 is X1). You are asked to set the corresponding channel on your Transmitter, and connect the
corresponding port of Receiver to the Main Controller. Use the Gimbal Assistant Software to help you with
configuration.
Notes:
(1)
Re-do the Transmitter calibration after NAZA-M Firmware upgrade and double check other items.
(2)
Make sure to power on the gimbal after camera mounting, since the wrong center of gravity will cause
motor overheating and then lead to damage.
(3)
Make sure connections are correct; otherwise may lead to the gimbal normal work or even out of control.
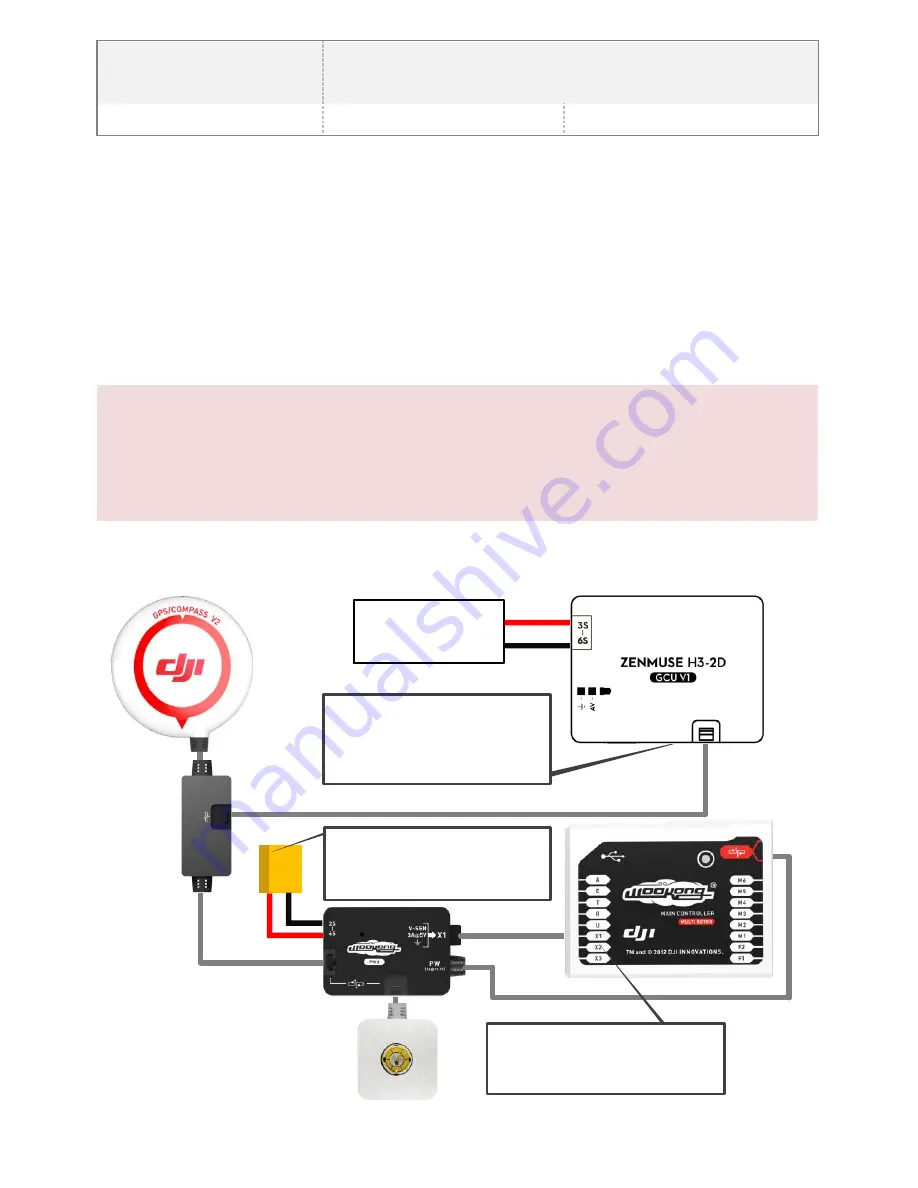
GCU and DJI Autopilot System Connection
positive pole(
+
)
negative pole(-)
Battery
(3S~6S)
Note:
The GCU can be connected to any CAN
ports on the PMU or to the CAN port on
the GPS.(Any spare CAN port on the
WKM system.)
To Battery
Note:
The PMU and GCU can both connect to
the same battery of LiPo 3S-6S.
Gimbal TILT Control
Channel X2 is for Gimbal TILT Control,
connect it correctly, and configure the right
channel on your Transmitter.
Fig.1 GCU and WKM Connection Diagram


