background image

17

16

17

6.2 Set-up menu

Set-up menu

In the set-up menu the following 
sub-menus are available:

Picture orientation

Language

Quick key assignment

ZAP keys assignment

Accumulated lamptime

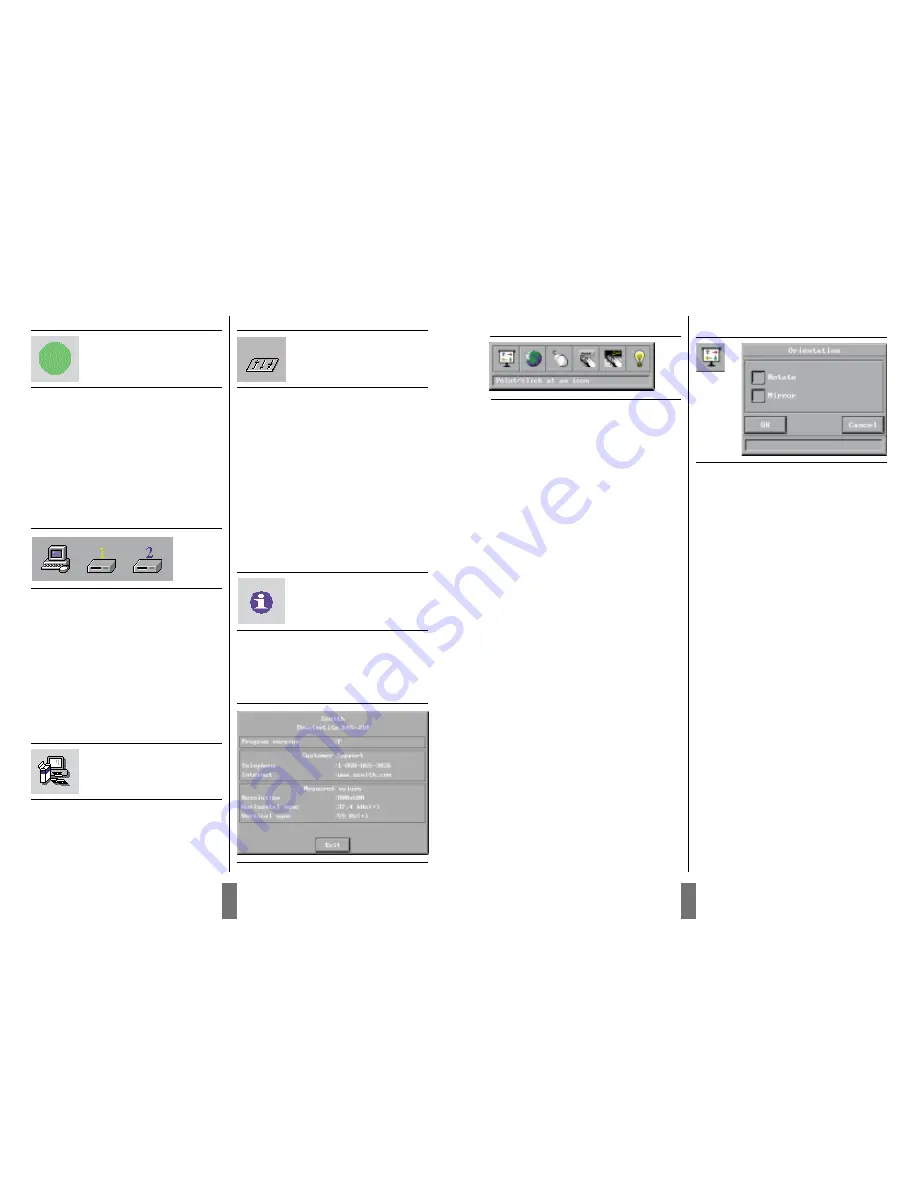
6.2.1 Picture orientation 

Picture orientation

The picture orientation menu is used for
rotating and mirroring the picture.

Normal

Normal is used when the projector is standing
on a table projecting a picture on a screen.

Mirror

Mirror is used when the projector is projecting
a picture from behind the screen

Rotate

Rotate is used when the projector is ceiling
mounted and projecting an image from the
front.

Rotate and mirror

Rotate and mirror is used when the projector
is ceiling mounted and projects the picture
from behind the screen.

Auto set-up

Auto set-up will do automatic set-up of the
projector:

Horizontal and vertical position

Sampling clock

Phase

Chooses between available video formats
and NTSC/PAL auto detection

Source

You can connect three different sources to the
projector; one computer source, two video
sources.
You select the source you want to use by click-
ing on the icon representing the source. Use
the pressure-sensing pad on the remote mouse
to move the mouse pointer to an icon and
click the button (left mouse) underneath the
remote mouse.

Set-up menu

In this menu you set up the projector with
settings that will not be changed often, e.g.
language or picture orientation.

Control panel

In this menu you can make adjustments for
picture.

Removing the main menu

To remove the menu system, press the MENU
key on the Remote control. You can also
remove the menu by clicking the right mouse
button (on the top of the remote control). The
right mouse button will also function as cancel
when in the menus. 

The menu will disappear in 40 seconds. 

Product information

Click on the product information icon for
information about the product and support. 

Press the main menu button again to 
exit this screen.

Содержание TheaterLite DXG-210

Страница 1: ...e ...

Страница 2: ...er grounding and in particular specifies that the cable ground shall be connected to the grounding system of the building as close to the point of the cable entry as practical REGULATORY INFORMATION This equipment has been tested and found to comply with the limits for a Class B digital device pursuant to Part 15 of the FCC Rules These limits are designed to provide reasonable protection against h...

Страница 3: ...uipment Example of Grounding According to National Electrical Code Instructions NEC National Electrical Code IMPORTANT SAFETY INSTRUCTIONS Important safeguards for you and your new product Your product has been manufactured and tested with your safety in mind However improper use can result in potential elec trical shock or fire hazards To avoid defeating the safeguards that have been built into y...

Страница 4: ...ing 23 7 8 6 Contents Page Before you start 8 1 1 Color coding for ease of use 8 1 2 Accessories 8 1 2 1 Video accessories 8 1 2 2 Other cables accessories 8 1 2 3 Optional cables and accessories 8 1 3 Insert batteries in the remote control 9 1 4 Connect projector to power supply 9 Important information 9 Connecting a computer to the projector 10 Connecting a video source to the projector 11 Using...

Страница 5: ...1 Before you start Thank you for choosing a Zenith projector Your Zenith projector will display high bright ness images with vivid colors even under nor mal light conditions As input for your presen tation you can use CD ROM Photo CDs Laser Disks DVD normal VCRs or computers You can have multiple inputs connected simultaneously for a high impact multimedia presentation Thanks to the unique Graphic...

Страница 6: ...ion What do I do if 4 Connecting a video source to the projector Figure 6 Connecting to video sources VIDEO RS 232 MONITOR IN C R B H SYNC V SYNC S VIDEO The procedure for connecting a computer to the projector is the same for all types of computers 1 Make sure the computer monitor and projector are switched off 2 Identify the RGB out connector on the back of your computer where you connect a moni...

Страница 7: ...urned off and can be turned on by using defined keys Normal mode In normal mode a picture will be shown on the screen Quick mode see section 6 2 3 Quick mode is used with the interactive remote control quick key You assign functionality for the quick key on the remote control in the quick menu see section 6 2 3 When clicking on the Quick key you will be able to switch between all the functions you...

Страница 8: ...run for a little while cooling the projector before stopping To return to normal mode press the Menu key on the remote control 6 Using the menus 5 3 Using the touch panel on the projector The touch panel gives you direct access to the most important functions of the projector The key functions are as follows Source The projector has direct keys for four sources Functionality Computer PC Composite ...

Страница 9: ...oses between available video formats and NTSC PAL auto detection Source You can connect three different sources to the projector one computer source two video sources You select the source you want to use by click ing on the icon representing the source Use the pressure sensing pad on the remote mouse to move the mouse pointer to an icon and click the button left mouse underneath the remote mouse ...

Страница 10: ...as been in use You also use this window to reset the accumulated lamp time after the lamp has been replaced 6 2 2 Language Language selection This menu allows you to choose between six different menu languages English French German Italian Spanish and Norwegian Click in the box next to the language you want to use Click on the OK button The window will disappear and the selected language will be u...

Страница 11: ...ure positioning Adjust vertical and horizontal position of the picture on the screen with the two sliders Select OK to save your changes and exit or select Cancel to exit without saving your changes CHAN FOCU S ZOOM S V V TV PC 1 2 6 3 Control panel menu Control panel menu when PC is selected In the control panel you have access to menus for adjusting picture settings The icons Picture positioning...

Страница 12: ...sing the setup button on the touch panel or run auto set up from the menu 2 The synchronization on the PC is not set optimally There is poor response from the Remote Control Possible causes and remedies 1 Check that nothing is blocking the IR receiver at the front of the projector 2 Make sure the remote control is pointed towards the screen 3 Make sure there is no more than 33ft 10m in distance to...

Страница 13: ......

Отзывы: