STEP 3
DVD Recording
Step by Step DVD Recording
Follow these steps to make your first DVD Recording.
a
Load a recordable disc into the disc tray.
•
If you load a completely blank disc, the Recorder will ini-
tialize the disc.
DVD-R:
The Recorder initializes the disc for Video mode.
The recording mode will always be Video mode.
DVD-RW:
The Recorder initializes the disc for VR mode.
DVD+R:
The Initialize menu appears. Select “Yes” then
press ENTER.
DVD+RW:
The Recorder initializes the disc for DVD+RW
mode.
•
Also, you can format the disc from the Setup menu as
described in step 4.
b
Set the Recording Mode.
•
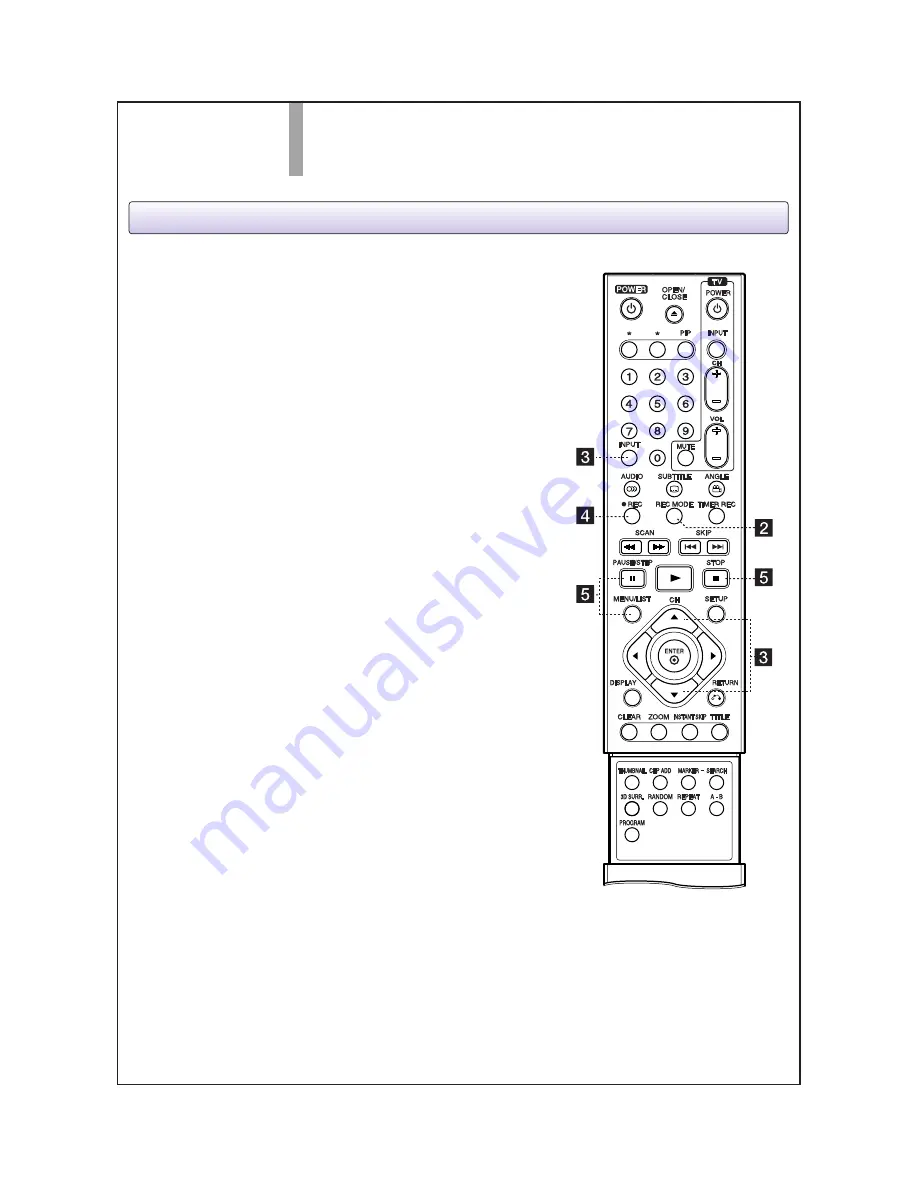
Press REC MODE to set the Record Mode to HQ, SQ,
LQ, or EQ.
•
The amount of available recordable space on the disc
appears on the On-Screen Display.
c
Specify source to record.
•
Use CH
v
/
V
buttons to select the channel you want to
record.
•
If you are recording from a Camcorder or other external
device, use AV to select input source
AV1:
AUDIO IN 1 / VIDEO IN 1 jacks on back panel
AV2:
INPUT 2 (VIDEO, AUDIO (L/R), S-VIDEO IN) jacks
on front panel
DV:
DV IN port on front panel.
d
Start recording.
•
Press REC to start recording.
e
Pause/Stop recording.
•
Press
PAUSE/STEP (
X
)
to pause recording.
Press PAUSE/STEP (
X
) again or REC (
z
) to continue the
recording.
•
After recording is complete, press STOP
(
x
)
.
A message appears for a few moments while the
Recorder stops recording and adds the new title to the
disc menu.
•
Use MENU/LIST to review the contents of your recorded
disc.


