background image

10

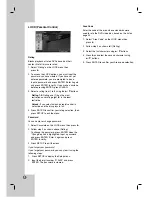
HDMI connection 

If you have a HDMI TV or monitor, you can connect it
to this player using a HDMI cable.

1. Set the TV’s source to HDMI (refer to TV’s

Owner’s manual).

2. Connect the HDMI OUT jack on the unit to the

HDMI jack on a HDMI compatible TV or 
monitor (H).

3. Press RESOLUTION repeatedly to select the

desired resolution.

Notes :

• Both PCM and Bitstream Audio out is available,

when the sample frequency is set to 48kHz in HDMI
connection.

• If Audio setup is set to bitstream and your TV does

not support Bitstream Audio out in HDMI
connection, audio sound may not output or
distorted.

• When the no sound or noisy sound are output with

HDMI connection, set the Audio option [Dolby
Digital, DTS or MPEG] in the SETUP menu to PCM
or Off.

• The arrow on the cable connector body should face

up for correct alignment with the connector on the
player.

• If there is noise or lines on the screen, please

check the HDMI cable.

• Not all HDCP-compatible DVI devices will work with

this unit.

• If your HDMI TV does not support HDCP, 

the blue screen appears on the screen.

• If the abnormal picture appears on the TV screen,

turn off the unit and then turn the unit on again.

Tips:

• When you use HDMI connection, you can change

the resolution (480i, 480p, 720p, 1080i)for the HDMI 
output.

• The HDMI will out at 480p resolution, even if you

set the resolution to 480i on the HDMI connection.

About HDMI

HDMI (High Definition Multimedia Interface) supports
both video and audio on a single digital connection for
use with DVD Players, Set-Top Boxes, and other AV
devices.
HDMI was developed to provide the technologies of
HDCP (High-bandwidth Digital Content Protection).
HDCP is used to protect digital content transmitted
and received.

HDMI has the capability to support standard,
enhanced, or high-definition video plus standard to
multi-channel surround-sound audio, HDMI features
include uncompressed digital video, a bandwidth of up
to 5 gigabytes per second, one connector (instead of
several cables and connectors), and communication
between the AV source and AV devices such as
DTVs.

HDMI, the HDMI logo and High-Definition Multimedia
Interface are trademarks or registered trademarks of
HDMI licensing LLC.

HDMI compatible TV

Rear of DVD player

HDMI

H

Содержание DVB612

Страница 1: ...DV186NH_HA1ULZ_ENG Copyright 2006 LG Electronics U S A Inc For service support Call Toll Free Number 1 800 243 0000 Installation and Operating Guide Warranty Model Number DVB612 DVD Player...

Страница 2: ...e reasonable protection against harmful interference when the product is operated in a residential installation This product generates uses and can radiate radio frequency energy and if not installed...

Страница 3: ...the other A grounding type plug has two blades and a third grounding prong The wide blade or the third prong are provided for your safety If the provided plug does not fit into your outlet consult an...

Страница 4: ...Dolby Digital DTS MPEG 13 Sample Freq Frequency 13 Dynamic Range Control DRC 13 Vocal 13 LOCK Parental Control 14 Rating 14 Password 14 Area Code 14 OTHERS 15 Auto Play 15 B L E Black Level Expansion...

Страница 5: ...plicable only to the disc represented by the symbol All discs and file listed below DVD and finalized DVD R RW DVD Audio discs Audio CDs MP3 files WMA files DivX files Notes on Discs Handling Discs Do...

Страница 6: ...mbers in it clearly visible on the cover This number must match your unit s regional code or the disc cannot play If you try to play a DVD with a different regional code from your player the message C...

Страница 7: ...OWER Switches the unit ON and OFF b Z OPEN CLOSE Opens or closes the disc tray c N PLAY Starts playback d x STOP Stops playback e Disc Tray Insert a disc here f Display window Shows the current status...

Страница 8: ...io language or an audio channel SUBTITLE Selects a subtitle language ANGLE Selects a DVD camera angle if available SETUP Accesses or removes the Setup menu MARKER Marks any point during playback SEARC...

Страница 9: ...inition or digital ready television you may take advantage of the unit s progressive scan output for the highest video resolution possible Progressive scan does not work with the analog video connecti...

Страница 10: ...DCP the blue screen appears on the screen If the abnormal picture appears on the TV screen turn off the unit and then turn the unit on again Tips When you use HDMI connection you can change the resolu...

Страница 11: ...gital Multi channel sound A digital multi channel connection provides the best sound quality For this you need a multi channel audio video receiver that supports one or more of the audio formats suppo...

Страница 12: ...ake various adjustments to items such as picture and sound You can also set a language for the subtitles and the Setup menu among other things For details on each Setup menu item see pages 13 to 15 To...

Страница 13: ...PEG Bitstream Select Bitstream if you connect this unit s DIGITAL OUT jack to an amplifier or other equipment with a Dolby Digital DTS or MPEG decoder PCM for Dolby Digital MPEG Select when connected...

Страница 14: ...ess SETUP to exit the menu Password You can enter or change password 1 Select Password on the LOCK menu then press B 2 Follow step 2 as shown above Rating To change the password press ENTER when the C...

Страница 15: ...off Off Standard grey scale 7 5 IRE cut off DivX R VOD We provide you the DivX VOD Video On Demand registration code that allows you to rent and purchase videos using the DivX VOD service For more in...

Страница 16: ...select point A and point B and repeats a sequence from point A Starting point to point B End point Press CLEAR to exit ZOOM During playback or pause mode press ZOOM to enlarge the video image 3 steps...

Страница 17: ...in hours minutes and seconds from left to right If you enter the wrong numbers press CLEAR to remove the numbers you entered Then input the correct numbers 4 Press ENTER to confirm Playback starts fro...

Страница 18: ...bles you to quickly access different groups during playback via the on screen display 1 Press DISPLAY during playback on in stop mode 2 Press 3 3 4 4 to select Group icon 3 Press 1 2 or the numbered b...

Страница 19: ...Program list have played once 6 To resume normal playback from programmed playback select a track on the list and then press PLAY Repeat Programmed Tracks Press REPEAT to select a desired repeat mode...

Страница 20: ...he video image 3 steps You can move through the zoomed picture using b B v V buttons Note When the resolution is set to 720p or 1080i this function is not available To rotate picture Press v V during...

Страница 21: ...s then press b B to select another language code until the subtitle is displayed properly DivX disc compatibility with this player is limited as follows Available resolution size of the DivX file is u...

Страница 22: ...setting Set the appropriate code number again Maintenance and Service Refer to the information in this chapter before contacting a service technician Handling the Unit When shipping the unit Please sa...

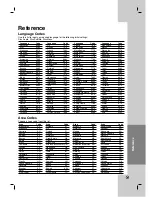
Страница 23: ...7789 Byelorussian 6669 Cambodian 7577 Catalan 6765 Chinese 9072 Corsican 6779 Croatian 7282 Czech 6783 Danish 6865 Dutch 7876 English 6978 Esperanto 6979 Estonian 6984 Faroese 7079 Language Code Fiji...

Страница 24: ...n the DVD player again by pressing POWER Insert a playable disc Check the disc type and regional code Change the rating level Point the Remote Control at the remote sensor of the DVD player Operate th...

Страница 25: ...or operating problems that result from normal wear and tear misuse abuse operation outside environmental specifications or contrary to the requirements or precautions in the Operating Guide accident...

Отзывы: