background image

3367-O

O N - S C R E E N   M E N U S           V I D E O   M E N U

P A G E   1 6

Customizes

the way

your picture 

looks.

Video Menu

Press MENU repeatedly until the Video
menu appears. Your options are:

• Contrast

: Adjusts the level of differ-

ence between white and black in the
TV picture. The more contrast, the
brighter the picture appears.

• Brightness

: Increases or decreases

amount of white in the TV picture. 

• Color

: Adjusts levels of all colors in

the TV picture. 

• Tint

: Balance between amount of red

and green in the TV picture. 

• Sharpness

: Raise or lower the 

definition of the TV picture. The lower
the level, the softer the images will
appear.

• Picture Preference

: Choose either

Custom or Preset. Custom allows you
to set the picture the way you want.
Preset moves all the above options
back to their original, levels. 

Using the UP/DOWN arrows select
Contrast on your screen. (The first from
the top.)

Using the RIGHT/LEFT arrows, adjust the
contrast level to your preference. 

Press ENTER, or MENU one more time to
return to TV viewing, or repeat from
step four to set the other menu options. 

Using the Up/Down arrow, select Picture
Pref. on your screen. (On the bottom.)

Using the RIGHT/LEFT arrows, choose
either the original settings with Preset,
or use your own settings with Custom.

1

2

3

4

5

6

Someone left the picture looking terrible?
Just choose the Preset option in Picture
Preference to quickly reset the levels.

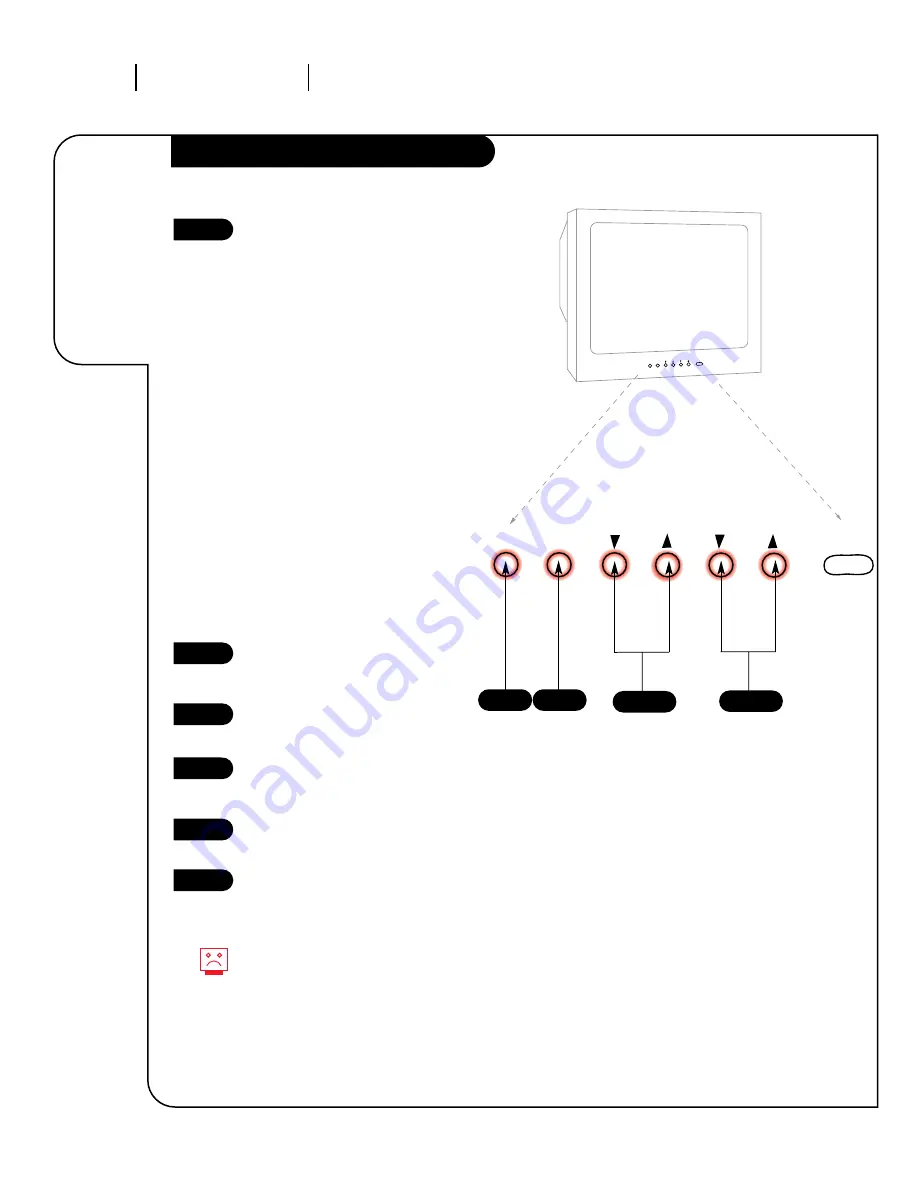
ENTER

MENU

VOL
ADJ

CH
SEL

POWER

ENTER

MENU

VOL
ADJ

CH
SEL

POWER

1

3

Typical TV Front Panel Controls

2/4

5

Содержание A13P01D

Страница 1: ...ine numbers H13P01L A13P01D o p e r a t i n g g u i d e w a r r a n t y Thanks for choosing Zenith h o o k u p d i r e c t o r y i n d e x y o u r o n s c r e e n m e n u s p a g e 20 p a g e 11 p a g...

Страница 2: ...f the National Electric Code U S A The code provides guidelines for proper grounding and in particular specifies that the cable ground shall be connected to the grounding system of the building as clo...

Страница 3: ...cribes what you want to do then go to that page number Note Design and specifications are subject to change without prior notice Cable TV wall jack Cable box In Out Cable TV wall jack Cable box In Out...

Страница 4: ...k on the back of your TV 300 TO 75 OHM ADAPTER A small device that connects a two wire 300 ohm antenna to a 75 ohm RF jack They are usually about an inch long with two screws on one end and a round op...

Страница 5: ...V Cable TV wall jack Cable TV wall jack Cable box In Out RF coaxial wire 75ohm RF coaxial wire 75ohm 3 4 output switch Antenna Antenna Typical TV back Typical TV back If you re using a cable box leave...

Страница 6: ...e Air Antenna In Out 3 4 VCR back VCR back AV panel Output switch Typical TV back In Out 3 4 VCR back VCR back AV panel Output switch Typical TV back 3369 o INSTALLATION STANDARD P A G E 6 Connect you...

Страница 7: ...back AV panel Output switch Typical TV back In Out 3 4 VCR back VCR back AV panel Output switch Typical TV back 3369 o INSTALLATION STANDARD P A G E 7 Connect your VCR and Cable to your Entertainment...

Страница 8: ...he Auto Program Menu Using the UP DOWN CHANNEL SELECT arrows select Off Air Antenna or Cable TV if you sub scribe to cable service Press the RIGHT VOLUME ADJUST arrow to begin the channel search Press...

Страница 9: ...make changes or adjustments Press ENTER to remove menus Menus disappear after five seconds To get them back push the MENU button again Your front panel may differ from this one but its functions are...

Страница 10: ...tons to access it Pressing the ENTER key will show the Channel Time display the currently select ed channel and the time set on the Clock CHANNEL DOWN UP buttons Use to change the channels Auto Progra...

Страница 11: ...and stores active channels to flip through using Channel Up Down Ch Add Del Manually picks and chooses which active channels will appear when flip ping through using Channel Up Down Clock Set Sets th...

Страница 12: ...od Just rerun Auto Program to find the channels available in your area Select a Channel using Ch Up Down Press MENU repeatedly until the Setup Menu appears Use SEL Up Down to select the Ch Add Del opt...

Страница 13: ...ock menu Press and hold down SEL Up Down to select AM or PM release then press and hold down again until current time is selected Press ENTER to remove menus 1 2 3 When using the on screen menus the b...

Страница 14: ...ext Press ADJ Up Down to choose Off Caption 1 2 3 4 or Text 1 2 3 4 Press ENTER to remove menus 1 2 3 When using the on screen menus the buttons on the front panel correspond are as follows VOLUME Adj...

Страница 15: ...h or French Press ENTER to remove menus 1 2 3 When using the on screen menus the buttons on the front panel correspond are as follows VOLUME Adjust Up Down CHANNEL Select Up Down To Change the Languag...

Страница 16: ...Custom or Preset Custom allows you to set the picture the way you want Preset moves all the above options back to their original levels Using the UP DOWN arrows select Contrast on your screen The firs...

Страница 17: ...nt Machine on Use a quality wood cleaner and polish This will protect the Entertainment Machine from dirt and dust as well as keep the cabinet looking new If you leave your Entertainment Machine dorma...

Страница 18: ...phones Medical equipment If possible increase the distance between your Entertainment Machine and the offending appliance Or shut one of them off Check volume control Try another channel The problem m...

Страница 19: ...er of television signals sent over the air A large metal piece of equipment does not always have to be visible for your home to be using an antenna AUTO PROGRAM Auto Program has your TV automatically...

Страница 20: ...9 Cable Cable Box Hook ups 5 7 Captions and Text Menu 14 Ch Channel Add Del 12 Clock Set 13 Front Panel Controls 9 Glossary 19 Hook Up Directory for VCRs Cable Service and Accessories 3 Language Menu...

Страница 21: ...y In Service Models under 21 diagonal U S A screen size must be taken to a Zenith authorized service center for warranty service and must be picked up by the owner Antenna Reception problems caused by...

Отзывы: