3
H
OW
TO
USE
AUDIO
/
VIDEO
BREAKAWAY
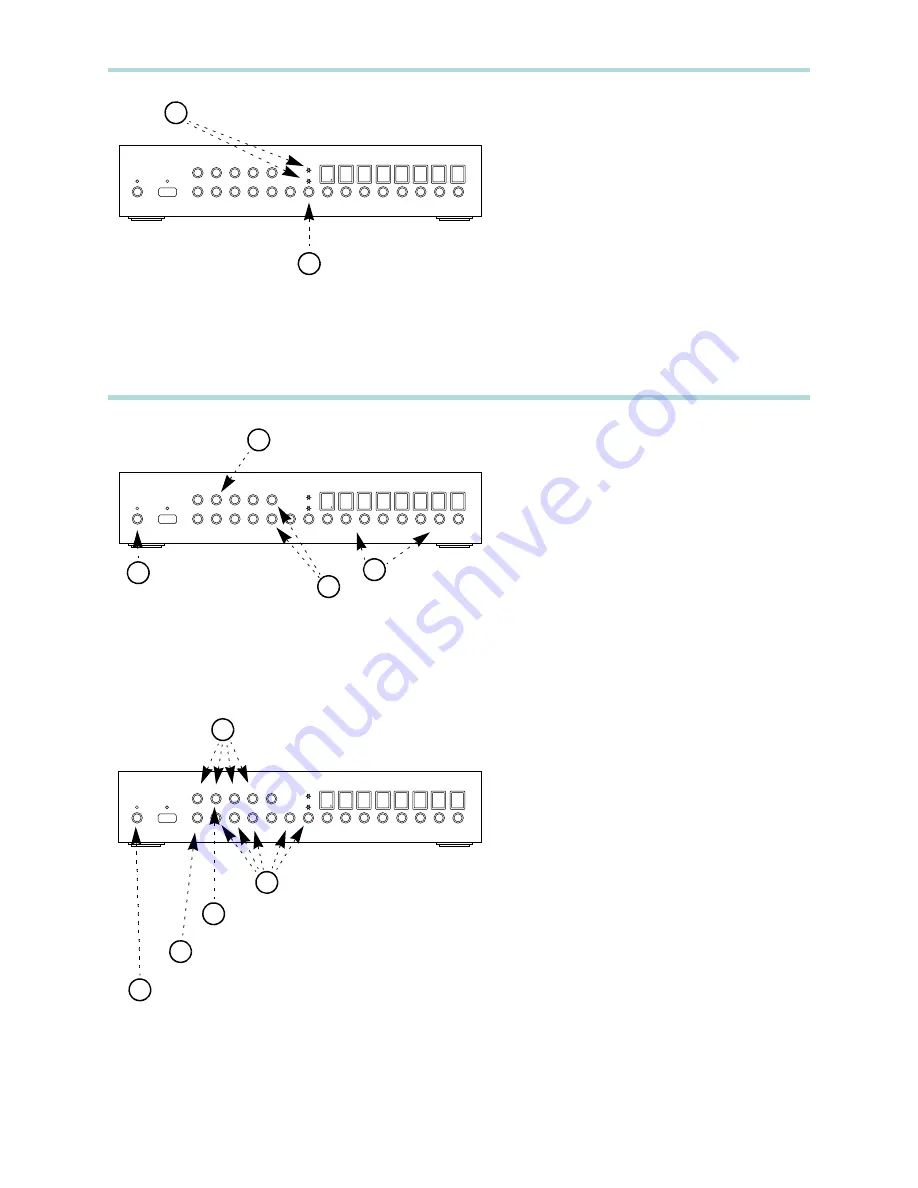
1
Press the
VID
/
AUD
button until the
channel to break away is the only
LED
that is lit.
2
LED
s indicate what channels will
switch when remapping zones:
• If only the
VID
LED
is lit, then only the
video channel will switch.
• If only the
AUD
LED
is lit, then only
the audio channel will switch.
AUDIO VIDEO MATRIX SWITCH
AUD
VID
MEM 1 2 3 4
CLR 5 6 7 8 ENT 1 2 3 4 5 6 7 8
1
2
P
RESS
UNTIL
DESIRED
LED
’
S
ARE
LIT
W
HEN
LED
IS
LIT
,
CHANNEL
WILL
SWITCH
4
H
OW
TO
ADJUST
VOLUME
/
TONE
/
EQUALIZER
CONTROLS
1
Press and release the
POWER
button, the
display will fill with dashes ‘-’.
2
Press the ‘1’ button to adjust volume
and tone settings.
3
Use the ‘4’ and ‘8’ buttons to raise and
lower the volume settings.
4
Use the zone buttons to switch between
zones.
5
Use buttons
MEM
, 1, 2, 3, 5, 6, 7,
ENT
,
and
VID
/
AUD
to choose between
volume and tone adjustments:
•
MEM
= Balance
• 1
= Volume
• 2
= Bass
• 3
= Treble
• 5
= Eq1 (100Hz)
• 6
= Eq2 (330Hz)
• 7
= Eq3 (1000Hz)
•
ENT
= Eq4 (3300Hz)
•
VID
/
AUD
= Eq5 (10000Hz)
6
Press and hold the ‘1’ button to select
the Master Volume for all zones.
7
Press the
CLR
button to set balance,
tone and equalizer settings to zero.
8
Press the
POWER
button to return to
normal.
AUDIO VIDEO MATRIX SWITCH
AUD
VID
MEM 1 2 3 4
CLR 5 6 7 8 ENT 1 2 3 4 5 6 7 8
1
2
P
RESS
AND
RELEASE
P
RESS
TO
ADJUST
VOLUME
AND
TONE
TO
ENTER
SETUP
3
U
SE
4 & 8
TO
RAISE
AND
LOWER
LEVELS
AUDIO VIDEO MATRIX SWITCH
AUD
VID
MEM 1 2 3 4
CLR 5 6 7 8 ENT 1 2 3 4 5 6 7 8
4
S
WITCH
BETWEEN
ZONES
6
5
5
7
C
HOOSE
BETWEEN
VOLUME
AND
TONE
ADJUSTMENTS
C
HOOSE
BETWEEN
VOLUME
AND
TONE
ADJUSTMENTS
P
RESS
AND
HOLD
FOR
MASTER
VOLUME
P
RESS
TO
ZERO
BALANCE
,
TONE
8
P
RESS
TO
RETURN
TO
NORMAL
AND
EQUALIZER
SETTINGS


