


“Brightness” and “Color” are two main categories of the settings within the ZEISS Connect App. Specific settings can be
saved for each illumination mode. After changing any settings, you can save the illumination mode in order to reuse the
new parameters next time.
Detailed Setting Information
Parameter
Before adjustment
Adjusted Settings
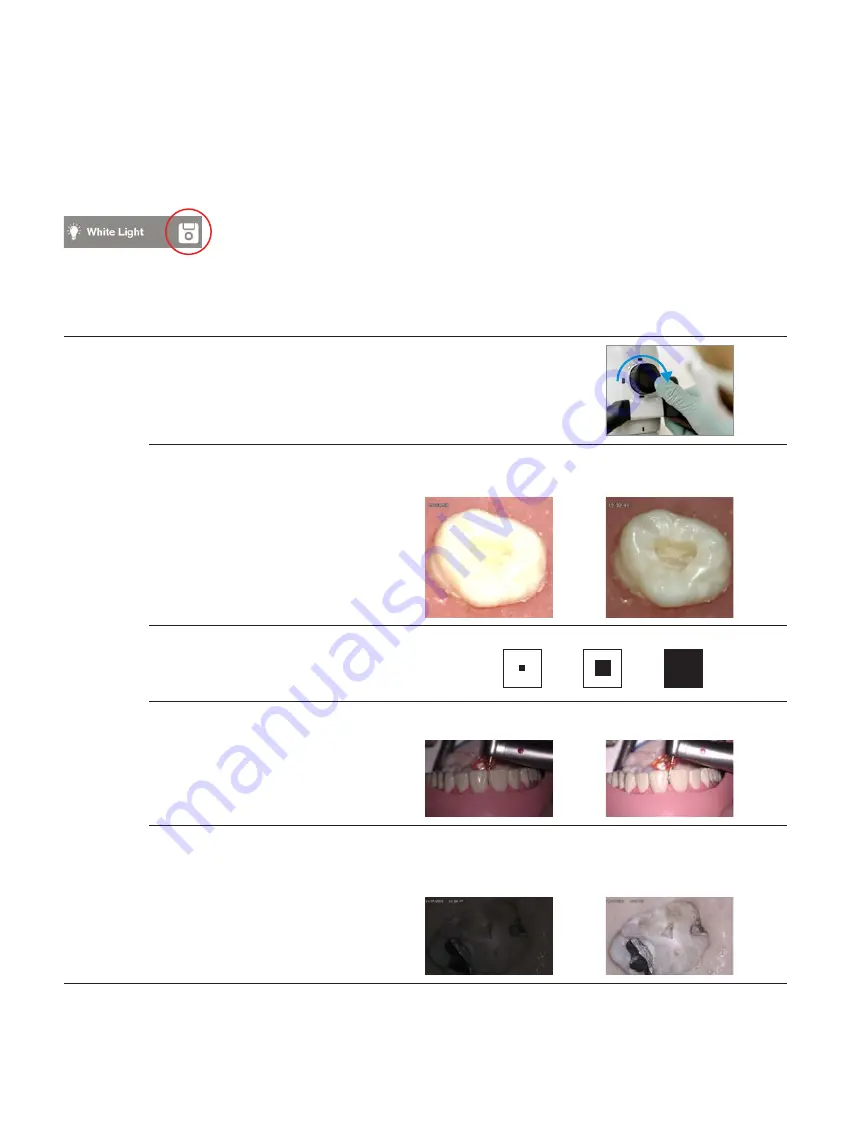
Brightness
Light Intensity
The front face of the OPMI features 5 white LED indicators arranged in an arc
above the Mode Control knob. These LEDs are designed to roughly indicate the
set intensity level of the illumination under the corresponding mode. Note that the
illumination intensity of each mode can be set independently and will be automatically
remembered by the microscope even after it is powered off.
Brightness
Adjust the brightness on the screen manually to
obtain a sharper image. Caution: This does not
affect the light intensity!
Overexposed image.
Details are not visible.
Recommended settings.
Details are visible.
Light Meter Field
The light exposure is measured in different areas
of the image. Choose between “small circle”, “big
circle” and “integral” to select the area.
Small
Big
Integral
Light Meter Mode
Select “Average” or “Peak” to select the exposure
limit. Choosing “Peak” allows you to adjust and
focus on the brightest point during the inspection.
Choosing “Average” provides a wider overview.
“Peak” setting
“Average” setting
Exposure Control
Adjust the exposure manually for longer exposure
times (for e.g. Fluorescence Mode ). When using
manual exposure, avoid bright light around the
teeth. Choose between “Auto” and “Manual”.
Very short exposure time –
details cannot be analyzed due
to the darkness of the image.
Longer exposure time –
details can now be
analyzed.


