OPERATION
Colibri 7
Controlling the Colibri 7 solid-state light source
ZEISS
02/2017
423052-7344-001
27
4.2.3
Operation with PC via the ZEN 2.3
(blue edition) software
Colibri 7 has been mounted on the
microscope, connected via CAN and
powered via the desktop power supply
unit.
The microscope and the PC have been
switched on.
The ZEN software (blue edition) has
been started.
4.2.3.1
Control of Colibri 7 with the
"Microscope Control" tool in the
"Locate" tab
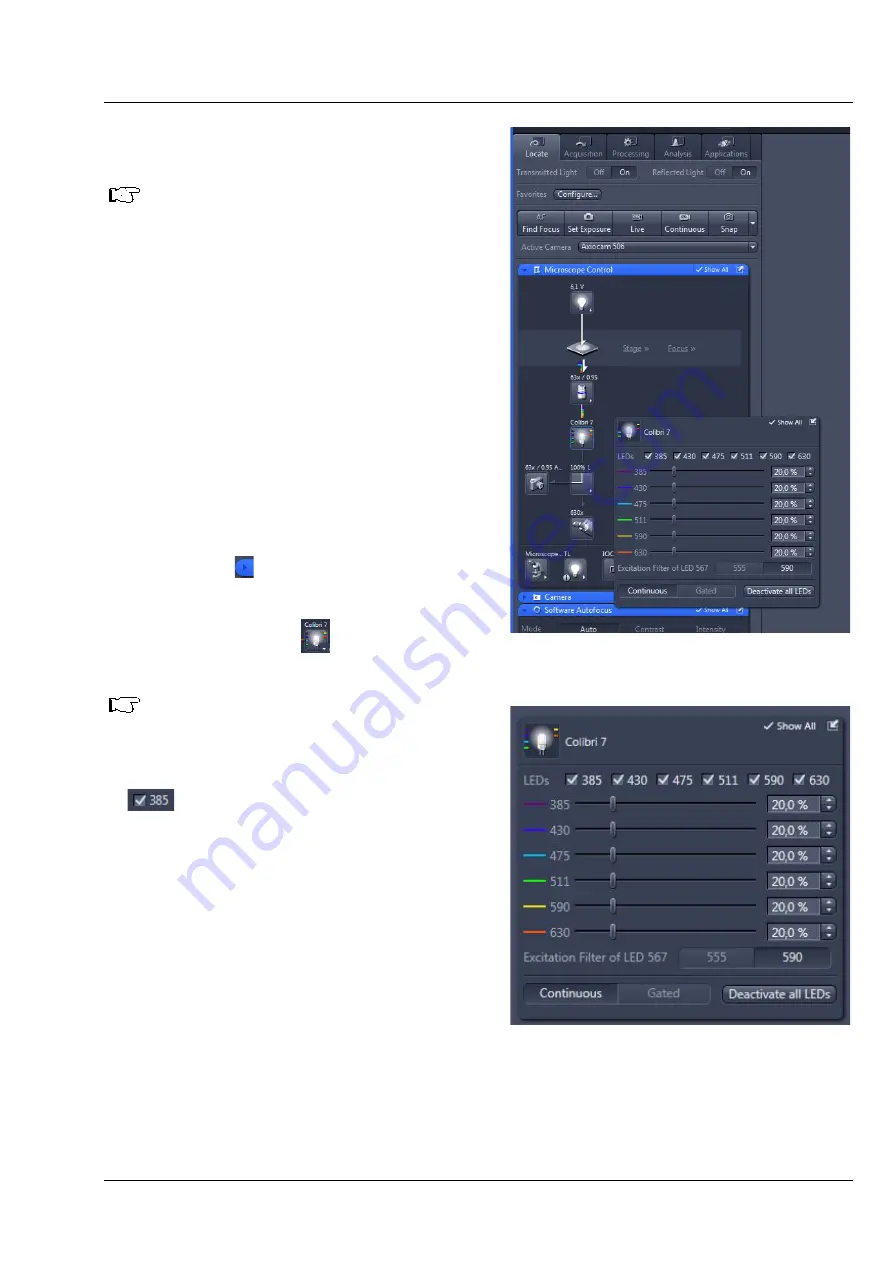
•
Click on the
Locate
tab in the software (see
•
Expand the
Microscope Control
tool by
clicking on the expander.
•
If required, activate the
Show All
option.
•
Click on the
Colibri 7
icon to open the
Colibri 7
control menu.
After opening, the default mode of the
control menu is
Continuous
.
•
Switch the LEDs on or off by activating /
deactivating the respective checkbox, e.g.
•
Adjust the brightness for the selected wave
length using the sliders, entry fields or arrow
buttons.
•
Activate the excitation filter for LED 567 by
clicking on the
555
or
590
button at
Excitation
filter for LED 567
.
•
Switch all LEDs simultaneously on or off by
clicking on
Deactivate all LEDs
or
Activate all
LEDs
.
•
Click on
Continuous
or
Gated
to select the
desired mode for image acquisition (see also
next page).
Fig. 16
Colibri 7 control via "Microscope
Components" tool
Fig. 17
Control menu for Colibri 7
Содержание Colibri 7
Страница 1: ...Colibri 7 Operating Manual ...


