Page 10
|
HDbridge3000 Configuration Guide
www.zeevee.com
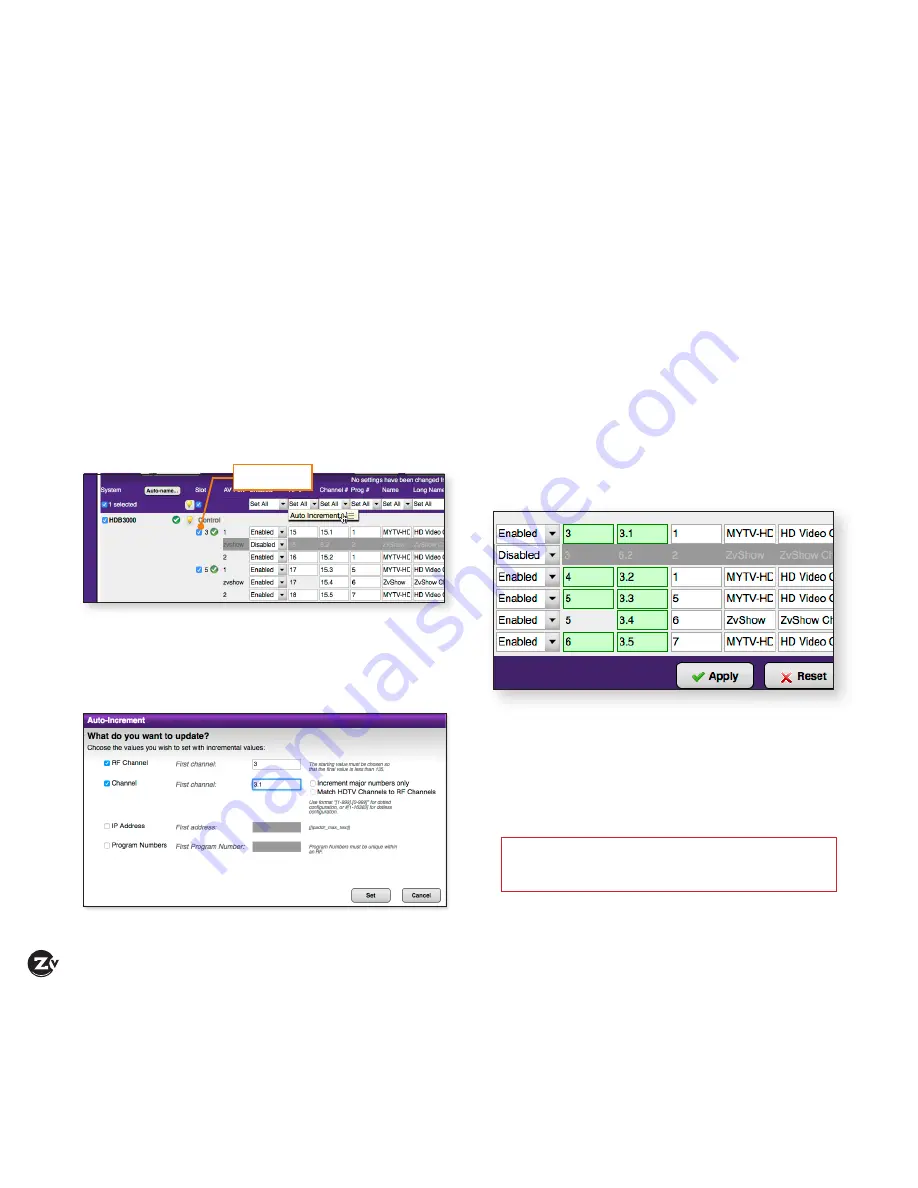
Using Auto Increment
When several cards are installed, manually entering the RF
# and Channel # can become a lengthy process. To aid in
this process, use the Auto Increment feature to automatically
populate the desired fields.
1. Make sure all cards, that will be affected by the Auto
Increment feature, are selected. Select a card by
checking the box next to the card, under the Slot column.
If the card is "grayed-out" then the Auto Increment feature
will not affect that card.
2. Click the RF # drop-down list and select
Auto
Increment
.
3. In the Auto-Increment dialog, enter the desired RF channel
in the First channel field.
4. Click the Channel check box and enter the desired channel
in the First channel field.
In this example, values
3
and
3.1
have been entered.
The value
3.1
may also be entered as
#3
.
5. Click the Set button to save the changes.
6. The Auto Increment dialog will indicate that the values
have been set.
7. Click the Close button.
8. The RF # and Channel # columns are now automatically
incremented, as shown.
9. Click the Apply button.
10. Maestro will apply the changes to each device. Once
all changes have been successfully applied, the Save
Configuration dialog will be displayed.
11. Click the Close button to dismiss the dialog.
NOTE: All saved settings are retained, even if the
HDbridge3000 is powered-off. Card settings are automatically
migrated when swapping cards of the same type.
check box
Содержание HDbridge3000
Страница 1: ...HDbridge3000 CONFIGURATION GUIDE NA ...


