background image


HDbridge™ Module Configuration Manual


Page 4 

www.zeevee.com

               Rev 1.0 

Basic Configuration (Front Panel) 

 
Factory default settings allow your module to broadcast a component video source with digital audio on Channel 
2.1. Tune the HDTV to channel 2.1 to view your new Zv channel. 


Channel Spacing 

 
None required for digital channels. Channels can be set directly adjacent to each other and any other well-formed 
digital channels and will not cause interference.  Spacing may be necessary when combining with other modulated 
analog channels. 


Unlocking the Setup Button 

 
After the unit boots up, it is ready for channel setup when the LED begins to show a steady blue. At that point, if 
channel setup is not started within 30 seconds, the LED will flash twice, and the unit will lock to prevent accidental 
reprogramming. 
 
If the unit is locked, the LED will continue to show a steady blue even when the button is pressed. 
 
To unlock, press and hold the button until the LED flashes twice (approximately 5 seconds). The LED will then flash 
the current channel. The unit is now ready for programming. 
 
Once unlocked, the unit will re-lock automatically if there is no activity within 30 seconds. 


Setting the Channel via the Front Panel Button 

 
RF and HDTV channels can be changed using just the front panel button, no PC or Ethernet connection is required. 
When using the Front Panel Button for configuration, RF and HDTV channels are linked; for example RF channel 50 
will  be  HDTV  channel  50.1.  To  change  the  HDTV  channel  or  to  make  other  changes,  refer  to  the  Advanced 
Configuration section on pages 8-9. 


Digits are entered from left to right. 


Each  digit  is  entered  by  pressing  the  front  panel 
button  multiple  times.  A  “zero”  is  entered  as  10 
presses. 


Wait for the LED to blink blue between digits. 


After all digits are entered, wait a few seconds and 
the programmed channel number is played back. 

o


The LED will blink red if an improper channel 
was selected. The original value is restored. 

o


If  the  channel  is  valid,  the  broadcast  is 
changed before playing back the new channel. 

Example: Programming Channel 50 


Press  the  Front  Panel  Button  5  times.  The 
LED blinks YELLOW at each press. 


Wait for the LED to flash BLUE once. 


Press the Front Panel Button 10 times. 


Wait for the LED to flash BLUE once. 


Wait 5 more seconds (exits channel setting 
mode). 


The  system  will  play  back  the  new  channel 
number. 


To read back the current channel (assume it is Channel 50): 


Press and Hold the button until the LED turns yellow, and then blue again. Release the button. 


The LED will flash yellow twice per second FIVE times. 


There will be a two second pause. 


The LED will flash yellow twice per second TEN times. 


The LED will return to a steady blue. 


Содержание HDbridge

Страница 1: ...Deploying Digital Signage Page 1 The Case for Coax HDbridge Advanced Configuration Manual...

Страница 2: ...annel via the Front Panel Button 4 Changing Modulation Standards 5 Restoring Factory Defaults 5 Advanced Configuration Using WebManager 5 Logging in to WebManager 6 Navigating in WebManager 6 Summary...

Страница 3: ...4db Power for 8 modules RF output of each module is 25db Not Provided Component cables Digital Audio cables optical or spdif Ethernet 8 way RF combiner RF amplifier Component cables Digital Audio cabl...

Страница 4: ...e changed using just the front panel button no PC or Ethernet connection is required When using the Front Panel Button for configuration RF and HDTV channels are linked for example RF channel 50 will...

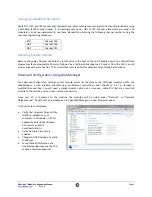
Страница 5: ...ctory defaults and go through a full reboot Advanced Configuration Using WebManager For advanced configuration settings and or remote access to the system the HDbridge modules utilize the WebManager a...

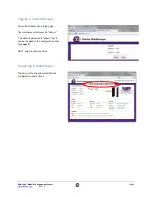
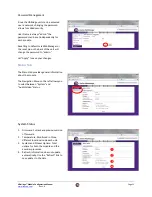
Страница 6: ...nager You will be directed to a login page The Username will always be admin The default password is admin but it can be changed in the configuration tool see page 8 NOTE Login is case sensitive Navig...

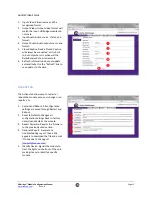
Страница 7: ...hows general information about the module 1 Serial number and current channel settings 2 General status information 3 Messages showing any errors or warnings WebManager has discovered Configuration Ta...

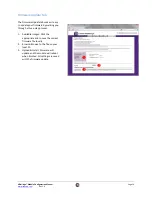
Страница 8: ...ule should use for broadcast By default they are linked so if the RF Channel is 2 the HDTV channel will default to 2 1 2 Long and Short channel names may be displayed by the HDTV 3 Hit Apply to save y...

Страница 9: ...3 RF Cable Plan Allows for changing between QAM 256 and QAM 64 as well as STD HRC and IRC 4 Hit Apply to save your changes For advanced channel settings 1 Click the Advanced Configuration link to dis...

Страница 10: ...es for the custom idle screen must have a resolution of 1280x720 or less Images with a resolution of 700x500 or less will bounce around the TV screen otherwise the image will be fixed in the center of...

Страница 11: ...top box instead of the HDTV tuner 5 Hit Apply to save your changes IMPORTANT NOTE Advanced Option changes for MPEG encoding are rarely needed It is strongly recommended that you avoid making changes u...

Страница 12: ...will change the password to admin Hit Apply to save your changes Status Tab The Status tab provides general information about the module The Navigation Menu on the left allows you to select between Sy...

Страница 13: ...automatically Use the Refresh link to see updates to the data Actions Tab The Actions tab allows you to restart or reboot the module save your changes run reports etc 1 Restart and Reboot All configu...

Страница 14: ...o update your firmware by walking you through a three step process 1 Available Images Click the appropriate link to save the correct firmware file locally 2 Browse Browse to the file on your local PC...

Страница 15: ...This message is displayed on the screen when the video source resolution exceeds the capability of your HDbridge module Set the video source to the appropriate resolution No Audio Verify that digital...

Отзывы: