GS Series Disk Skimmer Manual
Zebra Skimmers Corp.
Page 2
888-249-4855 • www.ZebraSkimmers.com • Zebra Skimmers Corporation
Installation Instructions
1. Before Installation, you must attach the motor
to the frame. Using the 3/4” 10-32 screws, which are
partially attached to the motor so you can see how
the motor attaches to the frame, mount the motor to
the unit.
DO NOT OVERTIGHTEN.
2. Place the unit on a table or level surface for
working. You may want to clamp it down because the
tank will hang over the edge while you are putting the
disk on.
3. Remove the (2) #8 screws from the collar on
the motor shaft.
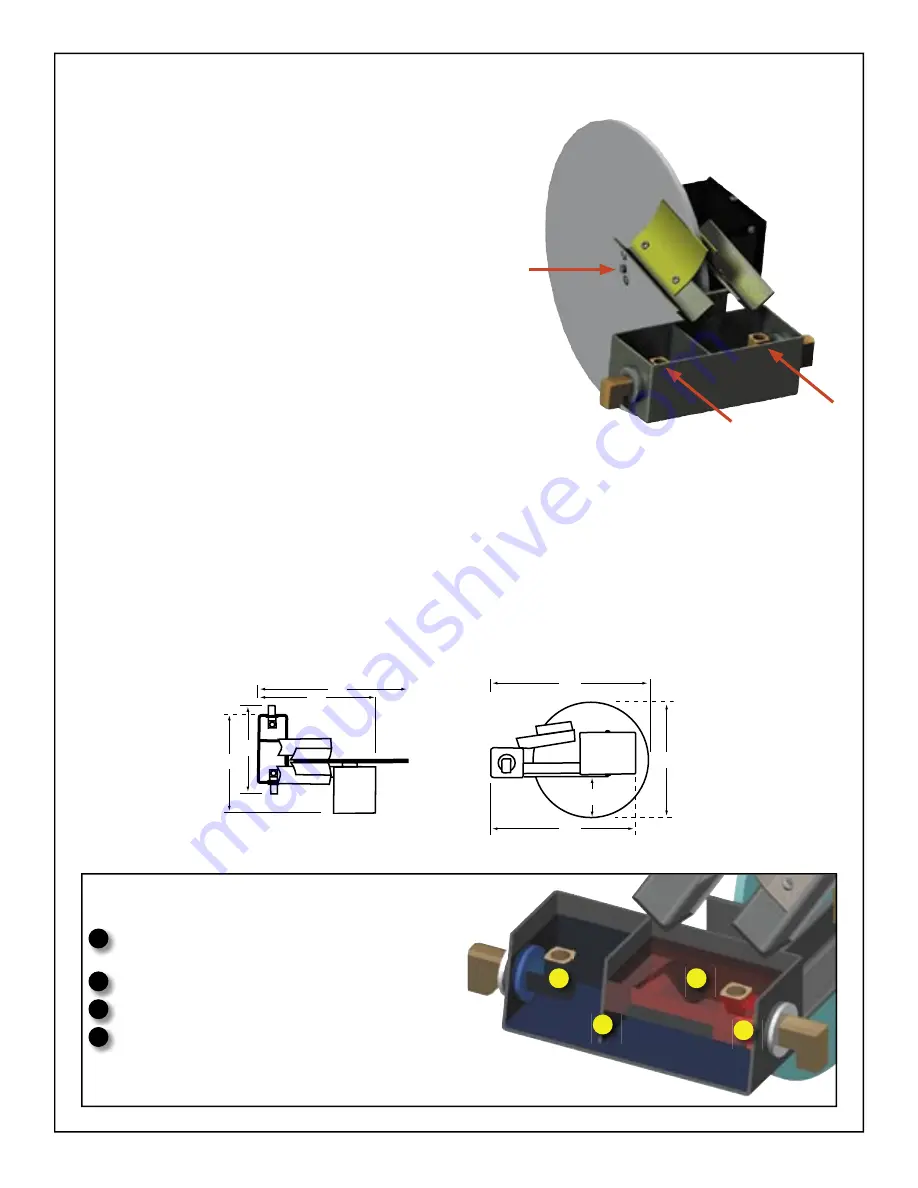
4. Slide the disk between the wiper blades and
mount the disk to the motor shaft via the center hole.
Refer to Figure at the right (A).
5. Replace and tighten the #8 screws through the
disk into the collar.
6. Mount the unit over the coolant tank.
7. Fill the separator tank with mixed coolant (about 2 cups). To verify the unit is level for proper op-
eration, keep adding coolant until it forms a lip around the coolant elbow rim (smaller of two reservoirs).
Refer to Figure at the right (B). The coolant should be about 1/16” (2mm) beneath the oil rim outlet. Re-
fer to Figure at the right (C).
8. If the level is wrong, shim the appropriate end of the tank with shims no thicker than 40 mils
(1mm) each. If the coolant is too close to the oil outlet, shim the oil side up.
9. Use the 4” nipple pipe fi ttings to direct the oil side to a discharge container, and the clean coolant
back to the sump. NOTE: The brass fi ttings on the inside of each of the reservoirs need to be kept paral-
lel to the top of the separation tank.
10. Plug the unit into a 110v outlet and let it work! CAUTION: This unit is only designed to handle the
small amounts of oil caused under normal conditions -approximately 2 qts. oil output per hour.
A
B
C
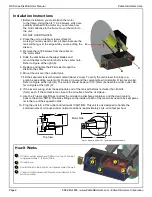
Oil and coolant enter here. Oil fl oats on top of coolant
to approximately 1” (22mm) thick.
Oil exits here.
Coolant sinks to the bottom, and passes under this weir.
Clean coolant passes over this elbow and returns to the
machine sump.
1
2
3
4
1
2
3
4
How It Works
Top View
Motor Side
15"
12"
12"
4.5"
15"
12"
10"
11"
Motor: .06 amp, 60Hz 110v 1ph 6 rpm continuous duty.


