background image

20

Installation Instructions

1

Safety instructions

Warning! This must be read!
The laws, ordinances, directives and standards 
in force in the country of use are to be followed 
(safety regulations, proper recycling in accord-
ance with the regulations, etc.)
Installation may only be carried out by a quali-
fied electrician.
The minimum distances to other appliances 
and units are to be observed.
Anti-shock protection must be provided by the 
installation, for example drawers may only be 
installed with a protective floor directly under-
neath the appliance.
The cut surfaces of the worktop are to be pro-
tected against moisture using a suitable seal-
ant.
The sealant seals the appliance to the work top 
with no gap.
Avoid installing the appliance next to doors and 
under windows. Otherwise hot cookware may 
be knocked off the rings when doors and win-
dows are opened.

z

Risk of injury from electrical cur-
rent.

The electrical mains terminal is live.

Make electrical mains terminal free of volt-
age.

Follow connection schematic.

Observe electrical safety rules.

Ensure anti-shock protection by installing 
correctly.

The appliance must be connected to the 
electrical supply by a qualified electrician.

z

Risk of injury from electrical cur-
rent.

Loose and inappropriate plug and socket 
connections can make the terminal overheat.

Have the clamping connections correctly in-
stalled by a qualified electrician.

Use strain relief clamp on cable.

In the event of single-phase or two-phase 
connection, the appropriate mains cable of 
type H05BB-F Tmax 90°C(or higher) or an 
equivalent type must be used.

If this appliance’s mains cable is damaged, it 
must be replaced by a special cable (type 
H05BB-F Tmax 90°C; or higher) or an equiv-
alent type. The latter is available from the 
Customer Care Department.

A device must be provided in the electrical in-
stallation which allows the appliance to be dis-
connected from the mains at all poles with a 
contact opening width of at least 3 mm.
Suitable isolation devices include line protect-
ing cut-outs, fuses (screw type fuses are to be 
removed from the holder), earth leakage trips 
and contactors.

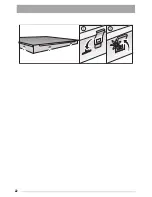
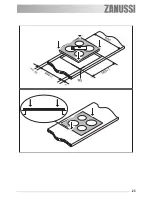
Sticking on the seal

Clean the worktop around the cut-out area.

Stick the single-sided adhesive sealing tape 
provided on the underside of the hob around 
the outside edge ensuring that it is not 
stretched.  The two ends of the tape should 
join in the middle of one side.  After trimming 
the tape (allow it to overlap by 2-3 mm), 
press the two ends together.

Содержание ZVH 66 F

Страница 1: ...User information Ceramic glass hob ZVH 66 F ...

Страница 2: ...and we hope that you will consider our brand again when purchasing household appliances Please read this user manual carefully and keep it throughout the product life cycle as a reference doc ument The user manual should be passed on to any future owner of the appliance The following symbols are used in this user information 1Warning This must be read Important advice for the safety of persons and...

Страница 3: ...on To avoid small children and pets unintention ally switching the appliance on we recom mend activation of the child safety device General safety The appliance may only be installed and connected by trained registered service en gineers Built in appliances may only be used after they have built in to suitable built in units and work surfaces that meet standards In the event of faults with the app...

Страница 4: ...across the surface Objects that melt and things that boil over can burn onto the glass ceramic and should be removed straightaway To avoid damaging cookware and glass ce ramics do not allow saucepans or frying pans to boil dry Do not use the cooking zones with empty cookware or without cookware Description of the Appliance Cooking surface layout Double ring cooking zone 600 1700 W Double ring cook...

Страница 5: ...h power indicator Timer display Cooking zone indicators Timer function Lock with pilot light Heat setting selection Timer Display Double ring cooking zone switch with pilot Double ring cooking zone switch with pilot light Sensor field Function On Off To switch the appliance on and off Increase settings Increasing heat setting time Decrease settings Decreasing heat setting time Timer Timer selectio...

Страница 6: ...n be used for melting and keeping food warm Display Description Cooking zone is switched off Keep warm setting Keep warm setting is set Heat settings Heat setting is set Automatic warm up function Automatic warm up function is activated Fault Malfunction has occurred Residual heat Cooking zone is still hot Child safety device Lock child safety device is engaged Automatic switch off Switch off is a...

Страница 7: ...ide rings on or off the ef fective heating surface can be matched to the size of the cookware 3 Before an outside ring can be switched on the inside ring must be switched on Control panel Display Pilot light Switch on Touch for 2 seconds lights up Switch off Touch for 1 second none goes out Control panel Indicator To increase Touch to To decrease Touch to To switch off Touch and at the same time D...

Страница 8: ...ld can be locked at any time in order to prevent the settings being changed e g by wiping over the panel with a cloth 3 When you switch the appliance off the locking function is automatically switched off Control panel Display Switch on Touch for 5 seconds Switch off Touch previously set heat setting ...

Страница 9: ...adjusted 3 If there is still residual heat on the cooking zone display the automatic warm up is not performed 3 If the power of a cooking zone is reduced by the Power Management the automatic warm up for this cooking zone is ended The length of time that the automatic warm up function operates depends on the heat setting selected Control panel possible heat settings Display Switch on only when sta...

Страница 10: ...approx 10 seconds otherwise the ap pliance automatically switches itself off Step Control panel Display Signal 1 Switch on appliance Do not set a heat setting 2 Touch for 4 seconds The child safety device is switched on Step Control panel Display Signal 1 Switch on appliance Do not set a heat setting 2 Touch for 4 seconds lights up 3 Switch appliance off The child safety device is switched off Ste...

Страница 11: ...on alternates for 1 minute between the heat setting set and the maximum possible heat setting During this period it is not possible to increase the heat setting Thereafter the ac tual heat setting is displayed Example heat setting 9 is selected on a cook ing zone Heat setting 9 is also set for another cooking zone If this exceeds the maximum out put the Power Management reduces the power of the la...

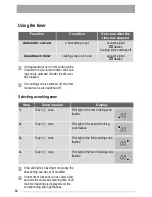
Страница 12: ...ew seconds the shortest remaining time of all the timer functions is displayed and the corresponding pilot light flashes Function Condition Outcome after the time has elapsed Automatic cut out a heat setting is set acoustic signal 00 flashes Cooking zone switches off Countdown timer cooking zones not in use acoustic signal 00 flashes Step Control panel Display 1 Touch once Pilot light of the first...

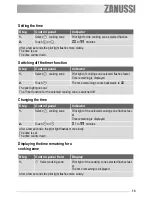
Страница 13: ...hes faster Time remaining is displayed 2 Touch The time remaining counts backwards to 00 The pilot light goes out The Timer function for the selected cooking zone is switched off Step Control panel Indicator 1 Select cooking zone Pilot light of the selected cooking zone flashes fast er Time remaining is displayed 2 Touch or 01 to 99 minutes After a few seconds the pilot light flashes more slowly T...

Страница 14: ...surface switches off automatically If all cooking zones are switched off the cooking surface automatically switches itself off after approx 10 seconds Cooking zones If one of the cooking zones is not switched off after a certain time or if the heat setting is not modified the relevant cooking zone switches off automatically is displayed Before being used again the cooking zone must be set to Step ...

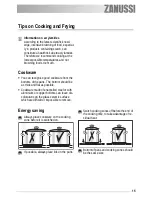
Страница 15: ...e good cookware from the bottoms of the pans The bottom should be as thick and flat as possible Cookware made of enamelled steel or with aluminium or copper bottoms can leave dis colorations on the glass ceramic surface which are difficult or impossible to remove Energy saving 2 Always place cookware on the cooking zone before it is switched on 2 If possible always place lids on the pans 2 Switch ...

Страница 16: ...ilk dishes part way through cooking 3 4 Steaming Braising Steaming vegetables fish braising meat 20 45 mins With vegetables add only a lit tle liquid a few tablespoons 4 5 Boiling Steaming potatoes 20 60 mins Use only a little liquid e g max l water for 750 g potatoes Cooking larger quantities of food stews and soups 60 150 mins Up to 3 l liquid plus ingredients 6 7 Gentle Frying Frying escalopes ...

Страница 17: ... Remove residues by sliding the blade over the surface 3 Wipe the appliance with a damp cloth and a little washing up liquid 4 Rub the appliance dry using a clean cloth Scrapers and cleaners for glass ceramic and stainless steel can be purchased in specialized shops 3 Remove stubborn residues with a cleaner for glass ceramic or stainless steel 3 Scratches or dark stains on the glass ce ramic that ...

Страница 18: ...laying anything The cooking zone was only on for a short time and is therefore not hot If the cooking zone is supposed to be hot call the Customer Service Department The automatic warm up function is not switching itself on There is still residual heat on the cooking zone Let the cooking zone cool down The highest heat setting is set The highest heat setting has the same power as the automatic war...

Страница 19: ...mbol Won the product or on its packaging indicates that this product may not be treated as household waste In stead it shall be handed over to the appli cable collection point for the recycling of electrical and electronic equipment By en suring this product is disposed of correctly you will help prevent potential negative consequences for the environment and hu man health which could otherwise be...

Страница 20: ...cted to the electrical supply by a qualified electrician z Risk of injury from electrical cur rent Loose and inappropriate plug and socket connections can make the terminal overheat Have the clamping connections correctly in stalled by a qualified electrician Use strain relief clamp on cable In the event of single phase or two phase connection the appropriate mains cable of type H05BB F Tmax 90 C ...

Страница 21: ...21 Assembly ...

Страница 22: ...22 ...

Страница 23: ...23 ...

Страница 24: ...24 ...

Страница 25: ...25 Rating Plate 55HAD64AO ZVH 66 F 2 4 kW 949 593 078 230 V 50 Hz ZANUSSI ...

Страница 26: ...26 ...

Страница 27: ...tment or one of our service partners In order to be able to assist you quickly we re quire the following information Model description Product number PNC Serial number S No for numbers see rating plate Type of fault Any error messages displayed by the appli ance three digit letter number combination for glass ceramic So that you have the necessary reference num bers from your appliance at hand we ...

Страница 28: ...www electrolux com www zanussi com www zanussi at www zanussi be 867 202 414 A 040808 01 Subject to change without notice ...

Отзывы: