background image

WARNING: The appliance and its accessible parts become hot

during use. Care should be taken to avoid touching heating

elements. Children less than 8 years of age shall be kept away

unless continuously supervised.

Always use oven gloves to remove or put in accessories or

ovenware.

Before maintenance cut the power supply.

Ensure that the appliance is switched off before replacing the

lamp to avoid the possibility of electric shock.

Do not use a steam cleaner to clean the appliance.

Do not use harsh abrasive cleaners or sharp metal scrapers to

clean the glass door since they can scratch the surface, which

may result in shattering of the glass.

If the mains power supply cable is damaged, it must be

replaced by the manufacturer, its Authorised Service Centre or

similarly qualified persons to avoid an electrical hazard.

To remove the shelf supports first pull the front of the shelf

support and then the rear end away from the side walls. Install

the shelf supports in the opposite sequence.

Safety instructions

Installation

WARNING!

Only a qualified person must install

this appliance.

• Remove all the packaging.

• Do not install or use a damaged appliance.

• Follow the installation instruction supplied

with the appliance.

• Always take care when moving the appliance

as it is heavy. Always use safety gloves and

enclosed footwear.

• Do not pull the appliance by the handle.

• Keep the minimum distance from the other

appliances and units.

• Make sure that the appliance is installed

below and adjacent safe structures.

• The sides of the appliance must stay

adjacent to appliances or to units with the

same height.

Electrical connection

WARNING!

Risk of fire and electrical shock.

• All electrical connections should be made by

a qualified electrician.

• The appliance must be earthed.

• Make sure that the electrical information on

the rating plate agrees with the power

supply. If not, contact an electrician.

• Always use a correctly installed shockproof

socket.

• Do not use multi-plug adapters and

extension cables.

• Make sure not to cause damage to the

mains plug and to the mains cable. Should

the mains cable need to be replaced, this

must be carried out by our Authorised

Service Centre.

• Do not let mains cables touch or come near

the appliance door, especially when the door

is hot.

www.zanussi.com

3

Содержание ZOB20601XK

Страница 1: ...EN ZOB20601XK ZOB20607XK User Manual Oven ...

Страница 2: ...8 years and above and persons with reduced physical sensory or mental capabilities or lack of experience and knowledge if they have been given supervision or instruction concerning the use of the appliance in a safe way and understand the hazards involved Do not let children play with the appliance Keep all packaging away from children and dispose of it appropriately Keep children and pets away fr...

Страница 3: ...ly a qualified person must install this appliance Remove all the packaging Do not install or use a damaged appliance Follow the installation instruction supplied with the appliance Always take care when moving the appliance as it is heavy Always use safety gloves and enclosed footwear Do not pull the appliance by the handle Keep the minimum distance from the other appliances and units Make sure th...

Страница 4: ... flammable products in near or on the appliance Do not use microwave function to preheat the oven WARNING Risk of damage to the appliance To prevent damage or discoloration to the enamel do not put ovenware or other objects in the appliance directly on the bottom do not put aluminium foil directly on the bottom of the appliance do not put water directly into the hot appliance do not keep moist dis...

Страница 5: ...lose to the appliance and dispose of it Remove the door catch to prevent children or pets from becoming trapped in the appliance Service To repair the appliance contact an Authorised Service Centre Use original spare parts only Product description General overview 2 1 4 3 6 5 7 8 9 5 4 3 2 1 10 1 Control panel 2 Knob for the oven functions 3 Knob for the temperature 4 Temperature indicator symbol ...

Страница 6: ...ls or indicators The lamp comes on when the appliance operates The symbol shows whether the knob controls the oven functions or the temperature The indicator comes on when the oven heats up 1 Turn the knob for the oven functions to select an oven function 2 Turn the knob for the temperature to select a temperature 3 To deactivate the appliance turn the knobs for the oven functions and temperature ...

Страница 7: ...h the deep pan between the guide bars of the shelf support Wire shelf and the deep pan together Push the deep pan between the guide bars of the shelf support and the wire shelf on the guide bars above and make sure that the feet point down Small indentation at the top increase safety The indentations are also anti tip devices The high rim around the shelf prevents cookware from slipping Additional...

Страница 8: ...cooking Clean the moisture after each use of the appliance Do not put the objects directly on the appliance floor and do not put aluminium foil on the components when you cook This can change the baking results and cause damage to the enamel Baking cakes Do not open the oven door before 3 4 of the set cooking time is up If you use two baking trays at the same time keep one empty level between them...

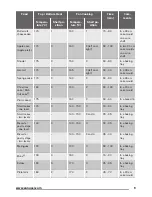
Страница 9: ...60 2 50 60 In a 26 cm cake mould Christmas cake Rich fruit cake1 160 2 150 2 90 120 In a 20 cm cake mould Plum cake1 175 1 160 2 50 60 In a bread tin Small cakes one level 170 3 140 150 3 20 30 In a baking tray Small cakes two levels 140 150 2 and 4 25 35 In a baking tray Biscuits pastry strips one level 140 3 140 150 3 30 35 In a baking tray Biscuits pastry strips two levels 140 150 2 and 4 35 40...

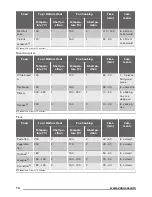
Страница 10: ...1 190 1 60 70 1 2 pieces 500 gr per piece Rye bread 190 1 180 1 30 45 In a bread tin Pizza1 230 250 1 230 250 1 10 20 In a baking tray or a deep pan Scones1 200 3 190 3 10 20 In a baking tray 1 Preheat the oven for 10 minutes Flans Food Top Bottom Heat Fan Cooking Time min Com ments Tempera ture C Shelf po sition Tempera ture C Shelf po sition Pasta flan 200 2 180 2 40 50 In a mould Vegetable flan...

Страница 11: ...glish roast beef medi um 210 2 200 2 60 70 On a wire shelf English roast beef well done 210 2 200 2 70 75 On a wire shelf Shoulder of pork 180 2 170 2 120 150 With rind Shin of pork 180 2 160 2 100 120 Two pieces Lamb 190 2 175 2 110 130 Leg Chicken 220 2 200 2 70 85 Whole Turkey 180 2 160 2 210 240 Whole Duck 175 2 220 2 120 150 Whole Goose 175 2 160 1 150 200 Whole Rabbit 190 2 175 2 60 80 Cut i...

Страница 12: ... 12 15 12 14 4 Beef steaks 4 600 max 10 12 6 8 4 Sausages 8 max 12 15 10 12 4 Pork chops 4 600 max 12 16 12 14 4 Chicken cut in 2 2 1000 max 30 35 25 30 4 Kebabs 4 max 10 15 10 12 4 Breast of chicken 4 400 max 12 15 12 14 4 Hamburger 6 600 max 20 30 4 Fish fillet 4 400 max 12 14 10 12 4 Toasted sandwiches 4 6 max 5 7 4 Toast 4 6 max 2 4 2 3 4 Drying Fan Cooking Cover trays with grease proof paper ...

Страница 13: ...ubborn dirt with a special oven cleaner Clean all accessories after each use and let them dry Use a soft cloth with warm water and a cleaning agent If you have nonstick accessories do not clean them using aggressive agents sharp edged objects or a dishwasher It can cause damage to the nonstick coating Stainless steel or aluminium appliances Clean the oven door with a damp cloth or sponge only Dry ...

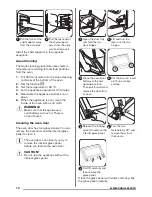
Страница 14: ...ouch it There is a risk of burns Cleaning the oven door The oven door has two glass panels You can remove the oven door and the internal glass panel to clean it The oven door can close if you try to remove the internal glass panel before you remove the oven door CAUTION Do not use the appliance without the internal glass panel Open the door fully and hold the two door hinges 1 Lift and turn the le...

Страница 15: ...lass cover counterclockwise to remove it 2 Clean the glass cover 3 Replace the lamp with a suitable 300 C heat resistant lamp 4 Install the glass cover Troubleshooting WARNING Refer to Safety chapters What to do if Problem Possible cause Remedy The oven does not heat up The oven is deactivated Activate the oven The oven does not heat up The fuse is blown Make sure that the fuse is the cause of the...

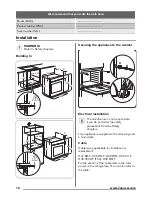
Страница 16: ...uring the appliance to the cabinet A B Electrical installation The manufacturer is not responsible if you do not follow the safety precautions from the Safety chapters This appliance is supplied with a main plug and a main cable Cable Cable types applicable for installation or replacement H07 RN F H05 RN F H05 RRF H05 VV F H05 V2V2 F T90 H05 BB F For the section of the cable refer to the total pow...

Страница 17: ...es ENVIRONMENTAL CONCERNS Recycle the materials with the symbol Put the packaging in applicable containers to recycle it Help protect the environment and human health and to recycle waste of electrical and electronic appliances Do not dispose appliances marked with the symbol with the household waste Return the product to your local recycling facility or contact your municipal office www zanussi c...

Страница 18: ...18 www zanussi com ...

Страница 19: ...www zanussi com 19 ...

Страница 20: ...www zanussi com shop 867323161 B 192016 ...

Отзывы: