background image

16

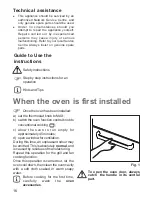
Guide to Use the
instructions

Safety Instructions

Step by step instructions for an
operation

Hints and Tips

)

Once the oven has been installed:

a) set the thermostat knob to MAX;
b) switch the oven function control knob to

conventional cooking (

);

c) allow the oven to run empty for

approximately 45 minutes;

d) open a window for ventilation.
During this time, an unpleasant odour may
be emitted. This is absolutely 

normal

, and

is caused by residues of manufacturing.
Repeat this operation for the grill and fan
cooking function.
Once this operation is carried out, let  the
oven cool down, then clean the oven cavity
with a soft cloth soaked in warm soapy
water.

Before cooking for the first time,
carefully wash the 

oven

accessories

.

When the oven is first installed

)

To open the oven door, always
catch  the handle in its central
part.

Technical assistance

z

This appliance should be serviced by an
authorized Network Service Centre, and
only genuine spare parts should be used.

z

Under no circumstances should you
attempt to repair the appliance yourself.
Repairs carried out by inexperienced
persons may cause injury or serious
malfunctioning. Refer to your local Service
Centre. Always insist on genuine spare
parts.

Fig. 1

Содержание ZBN 725

Страница 1: ...Einbau Backofen Built in oven ZOB 332 Bedienungs und Einbauanweisungen Instruction booklet ...

Страница 2: ...rous to alter the specifications or modify the product in any way z Appliances become very hot with use and retain their heat for a long period after use z Always ensure that the control knobs are in the off position when not in use z For hygiene and safety reasons this appliance should be kept clean at all times A build up of fats or foodstuffs could result in a fire z Never line any part of the ...

Страница 3: ...cookingfunction Once this operation is carried out let the oven cool down then clean the oven cavity with a soft cloth soaked in warm soapy water Before cooking for the first time carefully wash the oven accessories When the oven is first installed To open the oven door always catch the handle in its central part Technical assistance z This appliance should be serviced by an authorized Network Ser...

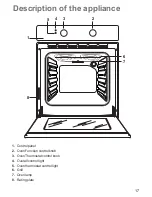
Страница 4: ...cription of the appliance 1 Control panel 2 Oven Function control knob 3 Oven Thermostat control knob 4 Overall control light 5 Oven thermostat control light 6 Grill 7 Oven lamp 8 Rating plate 4 2 3 1 7 5 6 8 ...

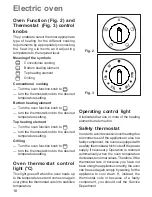
Страница 5: ...stat knob to the desired temperature setting Oven thermostat control light C This light goes off when the oven heats up to the temperature set and comes on again every time the thermostat cuts in to stabilize temperature Electric oven Operating control light It indicates that one or more of the heating elements are turned on Fig 2 Fig 3 Safety thermostat In order to avoid excessive overheating due...

Страница 6: ...e set cooking time is up Normal short pastry dough should be cooked in a mould or tin for 2 3 of total cooking time required and then garnished as desired before being cooked completely Clearly the remaining cooking time depends on the type of garnish used jam fruit etc Care should be taken to ensure that any dough and cake mixes are of the right consistency since an unduly moist mix lengthens coo...

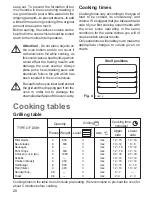
Страница 7: ...Shelf positions Fig 4 Cooking times Cooking times vary according to the type of food to be cooked its consistency and volume We suggest that you take particular note of your first cooking experiments with the oven since operating in the same conditions for the same dishes you will of course obtain similar results Only experience will enable you to make the appropriate changes to values given on ch...

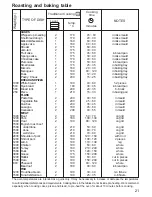
Страница 8: ...AT 1000 Beef 2 190 50 70 on grid 1200 Pork 2 180 100 130 on grid 1000 Veal 2 190 90 120 on grid 1500 English roast beef 1500 underdone 2 210 50 60 on grid 1500 done 2 210 60 70 on grid 1500 well done 2 210 70 80 on grid 2000 Shoulder of pork 2 180 120 150 with rind 1200 Shin of pork 2 180 100 120 2 pieces 1200 Lamb 2 190 110 130 leg 1000 Chicken 2 190 60 80 whole 4000 Turkey 2 180 210 240 whole 15...

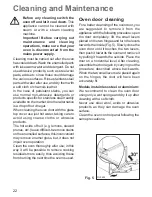
Страница 9: ...he enamelled surfaces this inconvenient may remove enamel gloss but it does not impair oven operation Clean the oven thoroughly after use in this way it will be possible to remove cooking residuals more easily thus avoiding these from burning the next time the oven is used Cleaning and Maintenance FO 0452 Fig 5 Oven door cleaning For a better cleansing of the oven door you are suggested to remove ...

Страница 10: ...urn the oven function control knob on a function Turn the oven function control knob on a function or Buy a new oven light bulb asking for it to your local Service Centre and replace it by following the instruction provided in this booklet Refer to the contents of this booklet especially to the chapter Electric oven Leave dishes inside the oven no longer than 15 20 minutes after the cooking is com...

Страница 11: ...ning the appliance model Mod the product number Prod No and the serial number Ser No marked on the identification plate This plate is placed on the front external edge of the oven cavity Original spareparts certified by the product manufacturer and carrying this symbol are only available at our Service Centre and authorized spare parts shops Service and Spare Parts ...

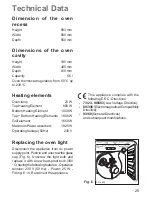
Страница 12: ...6 l Oven thermostat regulation from 50 C up to 230 C Heating elements Oven lamp 25 W Top Heating Element 800 W Bottom Heating Element 1000 W Top Bottom Heating Elements 1800 W Grill element 1650 W Maximum Power absorbed 1825 W Operating Voltage 50Hz 230 V Replacing the oven light Disconnect the appliance from its power supply point Push in and unscrew the glass cap Fig 6 Unscrew the light bulb and...

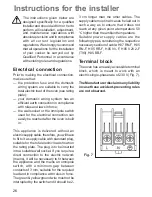
Страница 13: ...ble therefore you will have to fit to it a supply cable with standard plug suitable for the total electric load shown on the rating plate The plug is to be inserted into a suitable wall socket If you require a direct connection to the electric network mains it will be necessary to fit between the appliance and the mains an omnipole switch with a minimum gap between contacts of 3 mm suitable for th...

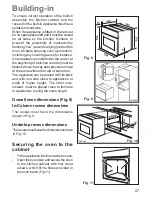
Страница 14: ...dinsuchawayastopreventremoval of the same without the aid of some tool The appliance can be placed with its back and with one side close to appliances or walls of higher height The other side instead must be placed close to furniture or appliances having the same height Overall oven dimensions Fig 8 In Column recess dimensions The recess must have the dimensions shown in Fig 9 Undertop recess dime...

Страница 15: ......

Отзывы: