background image

9

TOO WARM

CCOO2

ZANUSSI

Cool Check Guide

The guide consists of a temperature sensitive strip
sealed in a shelf trim.

When the fridge is operating at the safe temperature
to store food the guide will appear black. If the
temperature rises above this level the guide will
show the words TOO WARM.

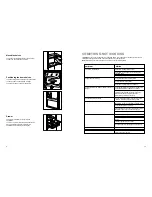
Positioning of the Cool Check 

The shelf with the cool check temperature guide
must be placed in the fridge according to the
instructions located on the fridge wall and always
ensure the guide is at the front.

If the Cool Check shows TOO WARM

In certain conditions the temperature guide may
show TOO WARM if:

The fridge is switched off

The door has been recently opened

A quantity of warmer food has been introduced to
the fridge

The fridge temperature is above the
recommended maximum for the safe storage of
food.

The cool check will change to show “TOO WARM“
very quickly after the door has been opened. It will
however take a number of hours to return to black,
indicating that the temperature is correct.

The appliance should be left overnight and the cool
check examined in the morning. If the cool check
shows TOO WARM, turn the thermostat to a colder
setting  leave overnight and examine again the
following morning.

Hints and Tips

The guide is only suitable for use in the model
supplied.

The guide will not operate in the freezer
compartment.

When cleaning the shelf take care not to immerse
in water, and wipe away any spills.

Freezing Calendar

The symbols show different types of frozen goods.
The numbers indicate storage times in months for the appropriate types of frozen goods.

12

Defrosting

Refrigerator

The refrigerator automatically defrosts every time the
compressor stops. The water is discharged, via a
pipe, into a tray located at the back of the appliance
above the compressor, where it evaporates.

Important

To avoid defrost water overflowing into the fridge,
periodically clean the water discharge hole in the
centre of the V shaped drip collector at the back of
the refrigerator compartment behind the salad
crispers. Use the defrost cleaner provided which you
will find already inserted into the discharge hole.

Remember to wash the defrost cleaner in hot soapy
water at regular intervals. Dry throughly before
replacing.

Freezer

When the frost has reached a thickness of up to
4mm it can be removed using the ice scraper
provided with the appliance. During this operation it
is not necessary to disconnect the appliance from
the mains and remove the food. Never use metal
tools for this operation.

For complete defrosting (once or twice a year)
proceed as follows:

-  turn the thermostat dial to the «OFF» position (O)

or disconnect the appliance from the mains.

-  Remove any food from inside the freezer and

fridge, wrap it in several sheets of newspaper and
store in a cool,dry place.

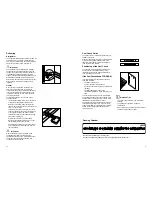
-  Leave the door open and insert the ice scraper

under the channel in the centre of the lower part
of the appliance; place a low-sided container
beneath the scraper to collect the water (see fig.).

-  Clean and dry thoroughly.

-  Replace the scraper in one of the drawers .

-  Reconnect the appliance to the mains or reset

the thermostat to the normal position.

-  After letting the appliance run for at least half an

hour, replace the previously removed food into
the compartment.

Important 

When defrosting the freezer, the fridge is also
controlled by the thermostat and will not be
operational during this period. A temperature rise of
the frozen food packs, during defrosting, may
shorten their safe storage life.

D068

D037

Содержание ZA98/3W

Страница 1: ...REFRIGERATOR FREEZER ZA 98 3 W INSTRUCTION BOOKLET 2222 183 71 Electrolux plc 2002 ...

Страница 2: ...uctions The cooling plate or refrigerated freezer shelves in this appliance contain channels through which the refrigerant passes If these are punctured this will cause substantial damage to the appliance and result in food loss DO NOT USE SHARP INSTRUMENTS to scrape off frost or ice Under NO circumstances should solid ice be forced off the lining or shelves Solid ice should be allowed to thaw whe...

Страница 3: ... in another part of your home Important The wires in the mains lead are coloured in accordance with the following code Green and Yellow Earth Blue Neutral Brown Live If you fit your own plug the colours of the wires in the mains lead of your appliance may not correspond with the markings identifying the terminals in your plug proceed as follows Connect the Green and Yellow earth wire to the termin...

Страница 4: ...the back and the top of the cabinet There must also be at least 100 mm 4 distance between the top of the cabinet and any overhanging kitchen furniture A Ideally the appliance should not be positioned beneath overhanging furniture B There should also be a gap of 25 mm either side of the appliance Do not obstruct the space underneath The back of the cabinet may be placed close to the wall but must n...

Страница 5: ...tion Insert the plug into the wall socket The pilot light D will illuminate to show that the appliance is on Turn the thermostat control G to a midway setting The pilot light F will illuminate Leave the appliance for approximately 4 hours for the correct temperature to be reached before placing food inside To switch off the appliance turn the thermostat control to position O Temperature control Th...

Страница 6: ...egin to thaw it must be consumed quickly and must not be re frozen 15 Standard guarantee conditions We Zanussi undertake that if within 12 months of the date of the purchase this Zanussi appliance or any part thereof is proved to be defective by reason only of faulty workmanship or materials we will at our option repair or replace the same FREE OF CHARGE for labour materials or carriage on conditi...

Страница 7: ...ctly immersed in boiling water ready cooked dishes can be placed directly in the oven in their aluminium wrapping A microwave oven is particularly suitable for thawing any type of frozen or deep frozen food follow the oven instructions particularly regarding the placement of aluminium wrapping or containers in the oven Defrosted cooked food must never be refrozen Cold accumulators The freezer cont...

Страница 8: ...ht switch is not jammed Check the thermostat control knob is turned to the correct setting relative to ambient conditions Check the ambient temperature is within the appliance s operating limits please refer to the installation section in this instruction book Relocate the appliance if necessary Has door just been opened If so leave for a few minutes to allow the air pressure to equalise Adjust th...

Страница 9: ...rosts every time the compressor stops The water is discharged via a pipe into a tray located at the back of the appliance above the compressor where it evaporates Important To avoid defrost water overflowing into the fridge periodically clean the water discharge hole in the centre of the V shaped drip collector at the back of the refrigerator compartment behind the salad crispers Use the defrost c...

Страница 10: ... unit Try to avoid keeping the door open for long periods or opening the door too frequently as warm air will enter the cabinet and cause the compressor to switch on unnecessarily often Ensure there are no obstructions preventing the door from closing properly In the Event of a Power Failure If there is a power failure during the storage of frozen foods keep the door closed If the temperature with...

Отзывы: