background image

26

Electrical connection

Any electrical work required to install this appliance
should be carried out by a qualified electrician or
competent person.

WARNING: THIS APPLIANCE MUST BE

EARTHED.

The manufacturer declines any liability should

this safety measure not be observed.

Before switching on, make sure the electricity supply
voltage is the same as that indicated on the appliance’s
rating plate. The rating plate is located at the top of the
rim of the open door.

The appliance is supplied with a 13amp plug fitted.
In the event of having to change the fuse in the plug
supplied, a 13amp ASTA approved (BS1363A) fuse
must be used.
Should the plug need to be replaced for any reason,
proceed as described below.

Mod. ..........
Prod. No. ...........

Ser. No. .........

Mod.
..........

Ser.

P0042

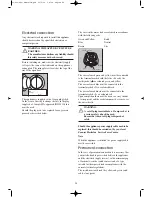
The wires in the mains lead are coloured in accordance
with the following code:

Green and Yellow

- Earth

Blue

- Neutral

Brown

- Live

The wire coloured green and yellow must be connected
to the terminal marked with the letter «E» or by the
earth symbol 

or coloured green and yellow.

The wire coloured blue must be connected to the
terminal marked «N» or coloured black.

The wire coloured brown must be connected to the
terminal marked «L» or coloured red.
Upon completion there must be no cut, or stray strands
of wire present and the cord clamp must be secure over
the outer sheath.

WARNING:

A cut off plug inserted into a 13 amp socket  is
a serious safety (shock) hazard.

Ensure that the cut off plug is disposed of
safely.

Should the appliance power supply cable need to be
replaced, this should be carried out by your local
Zanussi Electrolux  Service Force Centre.

Note

When the appliance is installed the power supply cable
must be accessible.

Permanent connection

In the case of permanent connection it is necessary that
you install a double pole switch between the appliance
and the electricity supply (mains), with a minimum gap
of 3mm between the switch contacts and of a type
suitable for the required load in compliance with the
current electrical regulations.

The switch must not break the yellow and green earth
cable at any point.

GREEN & YELLOW

BROWN

CORD CLAMP

BLUE

13

A

P1041

E

N

L

35.292.999…ZWF1211W.qxd  30/3/06  16:54  Página 26

Содержание ZWF1211W

Страница 1: ...WASHING MACHINE ZWF1211W INSTRUCTION BOOKLET 35 292 999 1 GB 35 292 999 ZWF1211W qxd 30 3 06 16 54 P gina 1...

Страница 2: ...tons and zips are fastened Avoid washing frayed or torn articles and treat stains such as paint ink rust and grass before washing Underwired bras must NOT be machine washed l Any objects such as coins...

Страница 3: ...e required option s 10 Start the programme 10 At the end of the programme 11 Washing Hints 12 13 Which detergent 13 And in which form 13 Wash Care Symbols 14 Washing Programmes 15 16 Guide to use the...

Страница 4: ...vironmental Health Office to see if there are facilities in your area for re cycling this appliance l When the appliance is to be scrapped cut off the power supply cable and make the door lock device...

Страница 5: ...1 Detergent dispenser drawer 2 Programme guide 3 Control panel 4 Door opening handle 5 Drain pump 6 Adjustable feet Detergent dispenser drawer Prewash Main wash Fabric softener C0069 35 292 999 ZWF12...

Страница 6: ...be spun l press Start Pause button The Control Panel 3 Prewash button Select this option if you wish your laundry to be prewashed before the main wash not available for wool The prewash ends with a sh...

Страница 7: ...garments are washed according to the instructions on the garment label and those issued by the manufacturer of this washing machine M9604 This is a complete programme to be used for lightly soiled lau...

Страница 8: ...sure out the detergent and the fabric softener Pull out the dispenser drawer until it stops Measure out the amount of detergent required pour it into the main wash compartment and into the compartment...

Страница 9: ...he programme has started First set the machine to pause by pressing the Start Pause button Wait two or three minutes for the door lock to released If the machine is already heating or the water level...

Страница 10: ...the compartment marked the amount used must not exceed the MAX mark in the drawer Close the drawer gently C0071 C0070 P0004 4 Select the required programme Turn the programme selector dial to the prog...

Страница 11: ...the programme selector dial to O and then to drain programme or spin programme In this case reduce the spin speed by means of the relevant button in order that the fabrics are spun at a suitable speed...

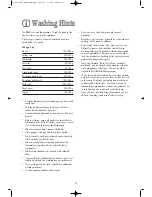
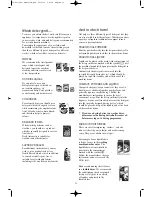
Страница 12: ...ould not be washed with coloured items l Very small items handkerchiefs ribbons socks etc should be washed in a washing bag or a pillow case l Use a good quality detergent suitable for automatic washi...

Страница 13: ...r The liquid fabric softener should be poured into the compartment marked with the symbol Follow the manufacturer s dosage instructions and never exceed the MAX level Bounce conditioning sheets for us...

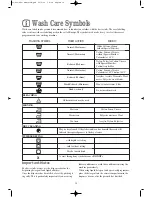
Страница 14: ...e prematurely When using liquid detergent and a prewash programme place the detergent into the correct compartment in the dispenser drawer after the prewash has finished 95 60 50 40 40 40 Chlorine ble...

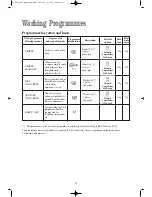
Страница 15: ...at 60 C 3 rinses Long spin Wash at 60 C 3 rinses Long spin Wash at 40 C 3 rinses Long spin Wash at 90 C 3 rinses Long spin Prewash Super Rinse Half Load Prewash Super Rinse Half Load Prewash Super Rin...

Страница 16: ...ics delicates and wool Max load Progr time mins 2 kg 2 kg 1 kg PREWASH SUPER RINSE HALF LOAD PREWASH SUPER RINSE HALF LOAD 90 85 80 50 1 kg 43 1 5 HALF LOAD HALF LOAD Cold wash 3 rinses Short spin 2 k...

Страница 17: ...t of the appliance with a mild solution of washing up liquid and water only and then dry thoroughly Cleaning the dispenser drawer The washing powder and additive dispenser drawer should be cleaned reg...

Страница 18: ...the inlet hose l Place the end of the emergency emptying hose and that of the inlet hose in a bowl placed on the floor and let water drain out l Screw the water inlet hose back on and reposition the e...

Страница 19: ...machine fills then empties immediately l The end of the drain hose is too low l The end of the drain hose is submerged in water l There is no vent in the end of the drain hose The machine does not emp...

Страница 20: ...se contact your local Zanussi Electrolux Service Force Centre by telephoning 0870 5 929929 Your telephone call will be automatically routed to the Service Force Centre covering your post code area For...

Страница 21: ...ments l Products of Zanussi Electrolux manufacture which are NOT marketed by Zanussi Electrolux European guarantee If you should move to another country within Europe then your guarantee moves with yo...

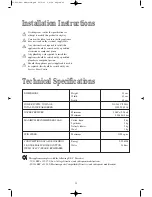
Страница 22: ...ould be carried out by our Service Force Centre DIMENSIONS Height 85 cm Width 60 cm Depth 60 cm POWER SUPPLY VOLTAGE 230 240 V 50 Hz TOTAL POWER ABSORBED 2100 W 10A WATER PRESSURE Minimum 50 kPa 0 5 b...

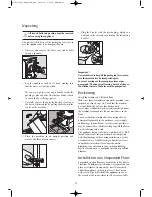
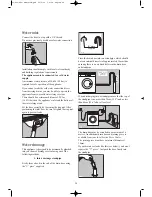
Страница 23: ...to your existing plumbing must be carried out by a competent person or qualified plumber Installation on a Suspended Floor Suspended wooden floors are particularly susceptible to vibration To help pre...

Страница 24: ...ermanently plumbed into your home s drainage system using one of the following methods 1 Into a drainage standpipe Firstly form a hook in the end of the drain hose using the U piece supplied P0021 P10...

Страница 25: ...splacement of the machine during operation Some vibration is inevitable especially if mounted on a wooden floor Sprung wooden floors are particularly susceptible to vibration For advice consult a buil...

Страница 26: ...bol or coloured green and yellow The wire coloured blue must be connected to the terminal marked N or coloured black The wire coloured brown must be connected to the terminal marked L or coloured red...

Страница 27: ...35 292 999 ZWF1211W qxd 30 3 06 16 54 P gina 27...

Страница 28: ...ed appliances for kitchen cleaning and outdoor use More than 55 million Electrolux Group products such as refrigerators cookers washing machines vacuum cleaners chain saws and lawn mowers are sold eac...

Отзывы: