background image

2.4    Connecting to Power

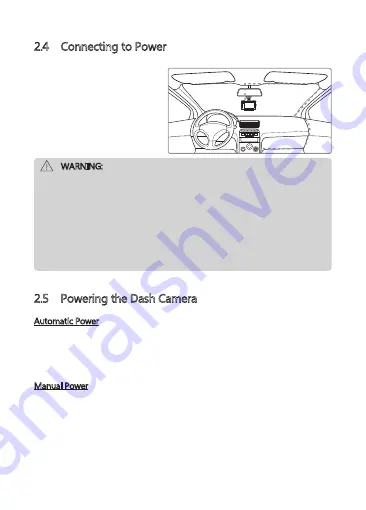
1. Plug one end of the Micro USB 

    charging cable into the Micro 

    USB Connector (1) on the dash 

    camera.

2. Plug the other end into the car 

    charger, and insert that into 

    your vehicles lighter socket.

            WARNING:

   •  Use only the supplied car charger to power the dash cam and charge the 

       built-in battery.

   •  Some car models supply power from the cigarette lighter even when the 

       vehicle's engine is switched off. We recommend you always unplug the 

       USB charger manually before leaving the vehicle to avoid any unwanted 

       car battery drainage.

   •  If the environment reaches 115-degrees Fahrenheit or above, the car 

       charger may stop charging the dash cam battery. This is characteristic of 

       a Lithium Polymer battery and is not a malfunction.

2.5    Powering the Dash Camera

Automatic Power

•  Once the vehicle's engine is switched on, the dash cam will automatically 

    power on.

•  When the vehicle's engine is switched off, the dash cam will automatically 

    save the recording and power off within 10 seconds.

Manual Power

•  To manually turn power on, press and hold the Power Button (4) for up to 3 

    seconds.

•  To manually turn the power off, press and hold the Power Button (4) for 3 

    seconds.

-6-

Содержание T4

Страница 1: ...Model T4...

Страница 2: ......

Страница 3: ...1 Home Screen 8 3 2 Shortcuts 8 3 3 Main Menu 9 3 4 Settings 10 4 OPERATION 10 4 1 Set Date Time 10 4 2 Recording Videos 11 4 3 Mode 11 4 4 Adjusting the Settings 12 4 5 Loop Recording 12 4 6 G Senso...

Страница 4: ...re using this product We hope you enjoy using this product 1 1 Features Full HD 1920 x 1080P Dual Recording 4 0 TFT LCD Color touchscreen Up to 155 degree wide angle lens Dual lenses for simultaneous...

Страница 5: ...ector Charging Car Mount Slot Mini USB Connector Rear Camera Power Button TF Micro SD Card Slot Microphone Front Camera Indicator Light 9 11 10 12 13 Speaker Display Screen Adhesive Mount Mini USB Con...

Страница 6: ...Supports up to 128GB Class 10 or above 2 2 Front Camera Installation 1 Slide the car mount into the slot on top of the device until a click sound is heard 2 Turn the camera on see 2 4 2 5 for more det...

Страница 7: ...lever clockwise 12 o clock to secure 5 For a more organized car environment the mini USB cable can be routed as indicated by the dashed line in the diagram See 2 4 WARNING Do not install the device o...

Страница 8: ...aving the vehicle to avoid any unwanted car battery drainage If the environment reaches 115 degrees Fahrenheit or above the car charger may stop charging the dash cam battery This is characteristic of...

Страница 9: ...the Shortcuts menu then tap the View icon H on the right hand side and select Rear Only 3 Whilst looking at the display screen and without removing the adhesive backing find a suitable location for in...

Страница 10: ...e of the following options 4 No Item Description 1 Recording A flashing red dot indicates the camcorder is currently recording 5 Indicates if motion detection is enabled 6 Battery Indicates the estima...

Страница 11: ...etails Instantly take a snapshot whilst recording or in standby mode D Microphone On Off Switch audio recording on off Go to Main Menu G Display Off Turn display screen off H View Switch between Front...

Страница 12: ...recommend you set the correct date and time Default Settings Item Setting Resolution 1920x1080P 30FPS Audio Recording ON G Sensor Normal Choose language English LCD Off Off Item Setting Loop Recording...

Страница 13: ...the recording and power off after the time set in Device Auto Off setting Alternatively tap the Play Pause icon B in the Shortcuts menu to stop start video recording manually 4 3 Mode Instantly optim...

Страница 14: ...to return to the Main Menu Tap icon to exit and return to the Home Screen 4 5 Loop Recording Videos are recorded and saved to the TF Micro SD card at set intervals Once the TF Micro SD card is full Lo...

Страница 15: ...o monitoring mode All recordings are automatically protected from being overwritten Enable disable feature Main Menu Settings Parking Mode Note In Parking Mode the device is powered by the internal re...

Страница 16: ...leted files cannot be recovered Please ensure you backup important files before deleting them 5 2 Preview Snapshots 1 Tap anywhere on the Home Screen to reveal the Shortcuts 2 Tap on the Main Menu ico...

Страница 17: ...automatically protected by Collision detection Parking mode or manually CARDV VIDEO Normal videos CARDV PHOTO Saved snapshots Recorded video and photo files are saved using the following naming rules...

Страница 18: ...ttings Enable disable a Driver ID stamp visible on saved video recordings and photos Driver ID Set the display frequency of the video recording Frequency 50Hz 60Hz Set the date time see 4 1 Date Time...

Страница 19: ...et the language of the user interface Choose language English French German Dutch Portugese Polish Select time taken for display screen to automatically turn off during operation Screen Auto Off Firmw...

Страница 20: ...may cause the dash cam to freeze or other related video recording erasing issues How do I turn off the screen audio during recording To turn off the screen tap the screen to reveal the Shortcuts and s...

Страница 21: ...o 128GB Class 10 or above 4 0 TFT LCD Touch Panel Viewing angle 155 F2 0 1 5m Infinity WQHD 1440P 2560 x 1440 FHD 1080P 1920 x 1080 HD 1280 x 720 MP4 2 Megapixel JPEG Yes Yes Yes Built in Li polymer r...

Страница 22: ...ct support zeroedgetechnology com Or visit our website www zeroedgetechnology com 10 WARRANTY We provide a 30 day money back guarantee and an 18 month replacement warranty for our products except for...

Страница 23: ......

Страница 24: ...T4Z18UM 01...

Отзывы: