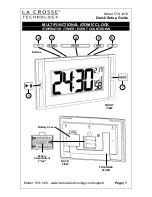
RADIO CONTROLLED CLOCK
WITH TEMPERATURE
Model: YC9369
USER MANUAL
Thank you for purchasing this delicate radio controlled clock with
temperature. Utmost care has gone into the design and manufacture
of the clock. This manual is used for MSF version. Please read the
instructions carefully according to the version you purchased and
keep the manual well for future reference.
Keep this clock well away from other electronics devices like
TV , Computer etc , to avoid the interface. This clock is self set
automatically, please plug in with mains adapter and press reset
button, RCC signal take time, depends on the location in UK , but
will pick up the signal within few minutes to few hours ( Max over the
course of Next 24h ). Clock will set UK time itself and then You don't
have to do anything ever .
MAIN FEATURES
1
4
2
3
5
13
12
14 15 16
17
18
6
7
8 9 10 11
19
1.
[ SNOOZE ]
key
- Stop the current alarm when it is sounding and enter into snooze
mode.
2.
[ REVERSE ]
key
- Press it to reverse the projected data.
3.
PROJECTOR
- Project the time and indoor/outdoor temperature ( switch
automatically between indoor and outdoor temperature in every
5 seconds. )
4.
LCD
display
5.
[ TIME ]
key
- Press it to switch between Month/Date and alarm time mode.
- Press and hold it for 2 seconds to enter normal time setting.
- In normal time setting, press it to step the setting mode.
6.
[ ALARM
]
key
- In normal time display, press it to turn on/off ALM 1 & ALM 2.
- In ALM 1 / ALM 2 mode, press it to turn on/off alarm and pre-
alarm function.
- Press it to stop the current alarm when the bell is ringing and
turn off the alarm and snooze function.
- In alarm time mode, press and hold it for 2 seconds to enter
alarm time setting.
- In alarm time setting, press it to step the setting mode.
7.
[ UP ]
key
- In setting mode, press it to increase the setting values.
8.
[
12/24 / DOWN ]
key
- In setting mode, press it to decrease the setting values.
- In normal time mode, press it to switch among 12/24 hour format.
9.
[
LOOP ]
key
- Press the
[
LOOP ]
key to turn on or turn off the backlight
colour change
.
10.
[
RAINBOW ]
key
- Turn off
the LOOP function and press
[
RAINBOW ]
key ,
the backlight will change its colour in this sequence: white>
red>orange>yellow>green>cyan>blue>purple.
11.
[
TUNE ]
key
- Turn off
the LOOP function and press
[
TUNE ]
key , the
backlight will display 256 colours.
12.
FOCUS
knob
- Adjust the quality of the projected data.
13.
[
MAX/MIN ]
key
- Press it to check the minimum and maximum temperature
records.
14.
[
RCC ]
key
- Press it to receive the RC signal for reception testing.
15.
°C/°F
key
- Press it to switch between Celsius and Fahrenheit.
16.
[
RESET ]
key
- Press it to reset all values to default values.
- In case of malfunction, the unit may be required to reset.
17.
[
OFF / LO / HI ]
slide switch
- Slide to the
[ HI ]
position for the brighter backlight.
- Slide to the
[ LO ]
position for the dimmer backlight.
- Slide to
[
OFF ]
position to turn off backlight function
.
18.
DC
jack
19.Battery door
- Accommodates lithium battery CR2032 for back-up.
TEMPERATURE CLOCK
1. Plug the adaptor into the DC jack.
2. Press
[
RESET ]
key to re-start the clock.


