background image

EPDT-098a


  -11- 

5. Installation 

5.1 Precautions for installation


Warning


(1)  Since  the  product  is  heavy,  securely  support  it  using  lifting  devices  or  the  like  when 

installing. See the product weight specified in “2. Dimensions and Weights”. 

* Failure to follow this notice may cause falling accident of the product, resulting in bodily 

injury. 

Caution


(1) Do not disassemble the valve unreasonably. 

* Disassembling the valve at your discretion may affect the original performance. 

(2) Before installing the product, remove foreign substances and scale from the piping. 

*  Failure  to  follow  this  notice  may  prevent  the  product  from  achieving  its  intended 

performance due to the ingress of foreign substances and scale into the product. 

(3) Install the valve so that the arrow on the valve body coincides with the direction of the fluid 

flow. 

* Failure to do so may prevent the valve from functioning. 

(4) Install the valve perpendicularly to horizontal lines with the diaphragm chamber located at 

the top. 

* Failure to do so may prevent the valve from functioning. 

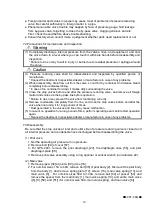
(5) Do not connect the sensing pipe close to valves and elbows. Choose the position with the 

least vibration. (Recommended straight length: 10 times the line pipe diameter) 

*  Failure  to  do  so  may  cause  inconsistent  reduced  pressure,  which  hampers  correct 

pressure control. 

(6) Do not apply excessive load, torque or vibration to the valve. 

* Doing so may result in malfunction or drastically shortened service life. 


5.2 Installing accessories 

Warning


(1) When installing the pressure reducing valve, be sure to connect the provided sensing pipe 

and joint. 

* Unless the sensing pipe is connected, the valve will not operate. Further, steam may blow 

off, resulting burns. 


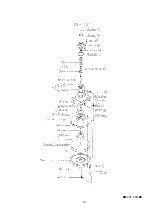
[Sensing pipe connection method] 


Connect the provided sensing pipe (φ8-2m) 
and  joint  (φ8-R1/4)  as  shown  in  the 
illustration on the left. 
1. Wind sealing tapes around the joint and 

insert the joint into the pressure sensing 
side. 

2.  Fully  insert  the  sensing  pipe  into  the 

valve and the pressure sensing side joint.   
Tighten the cap nut until it can no longer 
be  rotated  manually,  and  then  turn  the 
cap nut about one and quarter times with 
a tool. Note that the sensing pipe must be 
connected so that the valve side is higher 
than the pressure sensing side. 

Содержание GPK-2001

Страница 1: ...Nominal size selection calculation formula 10 5 Installation 5 1 Precautions for installation 11 5 2 Installing accessories 11 5 3 Piping before and after the pressure reducing valve 12 5 4 Example o...

Страница 2: ...sure 0 05 0 9 MPa JIS Rc JIS 20K 0 05 0 85 MPa JIS 10K 0 2 1 4 MPa JIS Rc JIS 20K 0 2 0 85 MPa JIS 10K 85 or less of inlet pressure gauge pressure System air pressure Refer to Standard Loading pressur...

Страница 3: ...nal Size Screw JIS Rc Flanged JIS 20K RF d L H H1 A Weight kg L H H1 A Weight kg 15A Rc 1 2 150 335 170 200 14 0 146 335 170 200 15 5 20A Rc 3 4 150 335 170 200 14 0 146 335 170 200 16 0 25A Rc 1 160...

Страница 4: ...17 5 146 353 170 200 19 5 25A Rc 1 160 359 175 226 22 0 156 359 175 226 24 5 32A Rc 1 1 4 180 389 192 226 25 0 176 389 192 226 27 5 40A Rc 1 1 2 180 389 192 226 25 0 196 389 192 226 28 0 50A Rc 2 230...

Страница 5: ...e Seat 23 Pilot Diaphragm 23 2 Air pressure sensing port 33 Tee 34 35 36 Pipe A B C 12 1 Main diaphragm chamber 23 1 Pilot diaphragm chamber 56 1 Reduced pressure sensing port 1 When the pressure redu...

Страница 6: ...36 This fluid also flows to the reduced side of the body 1 through the orifice of tee 33 and pipe 35 that connects to the body Fig 2 3 When the flow rate at the pilot valve exceeds the flow rate at th...

Страница 7: ...agm receives the reduced pressure to be balanced with the air pressure The pilot valve travel is controlled by the air pressure and pressure applied to the pilot diaphragm due to variations in reduced...

Страница 8: ...m performance cannot be obtained When reducing pressure in two stages maximize the distance between the valves at least 3 m 4 2 Safety valve setting pressure chart This chart is for setting the safety...

Страница 9: ...sidering pressure loss and heat loss of the gate valve and the strainer before and after the pressure reducing valve To fully utilize the flow characteristics of the valve do not select a small pipe s...

Страница 10: ...6 MPa reduced pressure P2 0 4 MPa flow rate 600 kg h When determining the nominal size find the point of intersection A of inlet pressure 0 6 MPa and reduced pressure 0 4 MPa Vertically proceed from p...

Страница 11: ...pressure reducing valve is calculated under the following conditions Nominal size 15A saturated steam Inlet pressure of 0 6 MPa 0 7 MPa A Reduced pressure of 0 4 MPa 0 5 MPa A you can find that Cv va...

Страница 12: ...alve from functioning 5 Do not connect the sensing pipe close to valves and elbows Choose the position with the least vibration Recommended straight length 10 times the line pipe diameter Failure to d...

Страница 13: ...stall a steam trap to the inlet sides of the valve to prevent drainage problems Failure to do so may result in drainage problem affecting the original performance 5 When installing quick open and clos...

Страница 14: ...is long the operating pressure set pressure basic diagram will deviate slightly In such cases change the operating pressure to achieve the required set pressure Standard operating circuit The standar...

Страница 15: ...ng screw to set pressure Incorrect adjustment may cause hunting water hammer etc resulting in damage to the valve and other equipment See 5 4 Example of piping 1 Check that all stop valves V1 to V7 ar...

Страница 16: ...in valve seat 12 or scratches exist 4 Foreign matter exists between pilot valve and pilot valve seat or scratches exist 5 Orifice of tee 33 is clogged 6 Reduced pressure is not adjusted correctly 7 Fo...

Страница 17: ...and remove all foreign matter and scales via the by pass line before operation Failure to do so may prevent the valve from functioning correctly 4 Remove condensate completely from the line and close...

Страница 18: ...ange the parts if scratches still exist after polishing Also in case any scratches are identified at pilot valve and pilot valve seat change into pilot valve assembly 2 Move the sliding section pilot...

Страница 19: ...n in the rectangle boxes are available as consumable supply Apply lubricant agent for heat steam resistance recommendation SOLVEST No 110 paste STT Inc to the bottom seal area of the pilot diaphragm a...

Страница 20: ...EPDT 098a 19...

Страница 21: ...improvement without any prior notice After the discontinuation of the product Yoshitake supplies the repair parts for 5 years otherwise individually agreed 3 This warranty does not cover the damage d...

Отзывы: