background image

1083287-UIM-A-0114

12

Johnson Controls Unitary Products

Annual Fuel Utilization Efficiency (AFUE) numbers are determined in accordance with DOE Test procedures.
Wire size and over current protection must comply with the National Electrical Code (NFPA-70-latest edition) and all local codes.
The furnace shall be installed so that the electrical components are protected from water.

SUPPLY VOLTAGE CONNECTIONS

1.

Provide a power supply separate from all other circuits. Install over-
current protection and disconnect switch per local/national electrical
codes. The switch should be close to the unit for convenience in
servicing. With the disconnect or fused switch in the OFF position,
check all wiring against the unit wiring label. Refer to the wiring dia-
gram in this instruction.

2.

Remove the wiring box cover screws. Route all power wiring
through a conduit connector or other proper bushing that is field
installed into the unit opening and the junction box. In the junction
box there is a black wire, a white wire and a green ground screw.
Connect the power supply as shown on the unit’s wiring label on
the inside of the blower compartment door or the wiring schematic
in this section. Connect the black wire to L1 (hot) from the power
supply. Connect the white wired to neutral. Connect the ground wire
(installer-supplied) to the green (equipment ground) screw. An
alternate wiring method is to use a field-provided 2” (5.1 cm) x 4”
(10.2 cm) box and cover on the outside of the furnace. Route the
furnace leads into the box using a protective bushing where the
wires pass through the furnace panel. After making the wiring con-
nections replace the wiring box cover and screws. Refer to Figure
17.

3.

The furnace's control system requires correct polarity of the power
supply and a proper ground connection. Refer to Figure 17.

LOW VOLTAGE CONTROL WIRING CONNECTIONS

Install the field-supplied thermostat by following the instructions that
come with the thermostat. With the thermostat set in the OFF position
and the main electrical source disconnected, connect the thermostat
wiring from the wiring connections on the thermostat to the terminal
board on the ignition module, as shown in Figure 17. Electronic thermo-
stats may require the common wire to be connected. Apply strain relief
to thermostat wires passing through cabinet. If air conditioning equip-
ment is installed, use thermostat wiring to connect the Y and C termi-
nals on the furnace control board to the proper wires on the condensing
unit (unit outside). 

The 24-volt, 40 VA transformer is sized for the furnace components
only, and should not be connected to power auxiliary devices such as
humidifiers, air cleaners, etc. The transformer may provide power for an
air conditioning unit contactor.

Table 6: 

Ratings & Physical / Electrical Data

Input

Output

Nominal

Airflow

AFUE

%

Air Temp. 

Rise

Max. Outlet

Air Temp

Blower

Blower 

Size

Max 

Over-Current 

Protect

Total Unit

Amps

Min. wire Size 

(awg) @ 75 ft 

one way

MBH

kW

MBH

kW

CFM m

3

/min

°F

°C

°F

°C

HP

Amps

40

11.7

38

11.1

800

22.7

95.5

30-60 17-33

160

71.1

1/3

4.8

11x8

15

8.0

14

60

17.6

57

16.7

1000

28.3

95.5

30-60 19-36

160

71.1

1/2

7.07

11x8

15

10.0

14

60

17.6

57

16.7

1200

34.0

95.5

30-60 19-36

160

71.1

1/2

7.07

11x8

15

10.0

14

80

23.4

76

22.3

1200

34.0

95.5

35-65 19-36

165

73.9

1/2

7.07

11x8

15

10.0

14

80

23.4

76

22.3

1600

45.3

95.5

35-65 19-36

165

73.9

3/4

8.8

11x10

15

11.5

14

80

23.4

76

22.3

2200

62.3

95.5

35-65 19-36

165

73.9

1

14.5

11x11

20

17.0

12

100

29.3

95

27.8

1600

45.3

95.5

35-65 19-36

165

73.9

3/4

8.8

11x10

15

11.5

14

100

29.3

95

27.8

2000

56.6

95.5

35-65 19-36

165

73.9

1

14.5

11x11

20

17.0

12

120

35.1

114

33.4

1600

45.3

95.5

40-70 22-39

170

76.7

3/4

8.8

11x10

15

11.5

14

120

35.1

114

33.4

2000

56.6

95.5

35-65 19-36

165

73.9

1

14.5

11x11

20

17.0

12

130

38.1 123.5 36.2

2000

56.6

95.5

45-75 28-44

175

79.4

1

14.5

11x11

20

17.0

12

 FIGURE 17:  

Electrical Wiring

Electrical Entry

Junction
Box

L1-Hot

Neutral

Connect ground
lead to screw

BLK

WHT

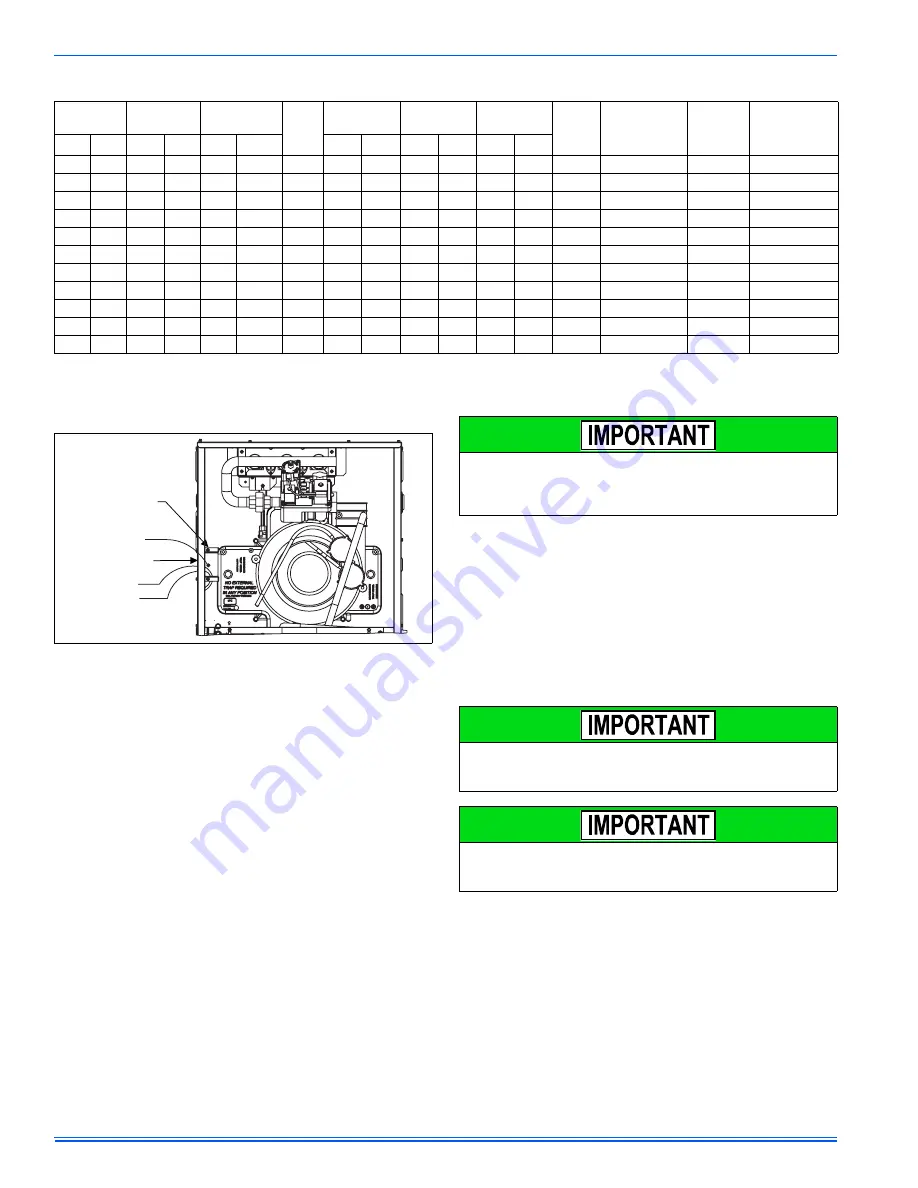
The power connection leads and wiring box may be relocated to the
opposite side of the furnace. Remove the screws and cut wire tie
holding excess wiring. Reposition on the opposite side of the furnace
and fasten using holes provided.

Set the heat anticipator in the room thermostat to 0.4 amps. Setting it
lower will cause short cycles. Setting it higher will cause the room
temperature to exceed the set points.

Some electronic thermostats do not have adjustable heat anticipa-
tors. They should be set to six cycles per hour. Follow the thermostat
manufacturer's instructions.

Содержание GG9S series

Страница 1: ...rtical installation 17 Upflow Configuration 18 Downflow Configuration 19 Horizontal Left Configuration 20 Horizontal Right Configuration 21 Dimensions 24 Home Layout 25 Termination Configuration 1 Pipe 26 Termination Configuration 2 Pipe 26 Termination Configuration 2 Pipe Basement 26 Double Horizontal Combustion Air Intake and Vent Termination 27 Double Vertical Combustion Air Intake and Vent Ter...

Страница 2: ... 55ºF 13ºC and 80ºF 27ºC The air filter must be replaced upon substantial completion of the construction process Clean furnace duct work and components upon substantial com pletion of the construction process and verify furnace operating conditions including ignition input rate temperature rise and venting according to the manufacturer s instructions 10 When installed in a non HUD Approved Modular...

Страница 3: ...r the following using the latest edition available STEP 1 Safety US National Fuel Gas Code NFGC NFPA 54 ANSI Z223 1 and the Installation Standards Warm Air Heating and Air Conditioning Systems ANSI NFPA 90B CANADA CAN CGA B149 1 National Standard of Canada Natu ral Gas and Propane Installation Codes NSCNGPIC STEP 2 General Installation US Current edition of the NFGC and NFPA 90B For copies con tac...

Страница 4: ...ion FOR FURNACES INSTALLED IN THE COMMON WEALTH OF MASSACHUSETTS ONLY For all side wall horizontally vented gas fueled equipment installed in every dwelling building or structure used in whole or in part for resi dential purposes including those owned or operated by the Com monwealth and where the side wall exhaust vent termination is less than seven 7 feet above finished grade in the area of the ...

Страница 5: ...er This access cover shall be attached in such a manner as to prevent leaks DUCT FLANGES Four flanges are provided to attach ductwork to the furnace These flanges are rotated down for shipment In order to use the flanges remove the screw holding an individual flange rotate the flange so it is in the upward position and reinstall the screw then repeat this for all 4 flanges If the flanges are not u...

Страница 6: ...tal left hand applications no conversion is required to an MC coil when used with a downflow horizontal furnace A mounting plate supplied with every coil should always be installed on the side desig nated as top side See Figures 4 5 FURNACE ASSEMBLY PC SERIES COILS These upflow coils are designed for installation on top of upflow fur naces only If the coil is used with a furnace of a different siz...

Страница 7: ...eakage through the unused bottom opening However if the furnace is to be installed on a surface that is uneven or if it is to be installed on blocks or otherwise raised off the floor it will be necessary to seal the edges of the bottom panel to the casing using tape or other appropriate gasket material to prevent air leakage BOTTOM RETURN AND ATTIC INSTALLATIONS Bottom return applications normally...

Страница 8: ...rts at three locations to properly sup port the furnace Place one support at the supply end of the furnace one support located approximately in the center of the furnace near the blower shelf and the third support should be at the return end of the fur nace Maintain a 6 15 2 cm minimum clearance between the front of the furnace and the support rods or straps All six suspension points must be level...

Страница 9: ...nd Duct Dimensions BTUH kW Input Nominal CFM m3 min Cabinet Size Cabinet Dimensions Illustrated in Figure 13 Approximate Operating Weights A in A cm B in B cm C in C cm Lbs kg 40 11 7 800 22 7 A 14 1 2 36 8 13 3 8 34 0 11 3 4 29 8 113 51 3 60 17 6 1000 28 3 A 14 1 2 36 8 13 3 8 34 0 11 3 4 29 8 118 53 5 60 17 6 1200 34 0 B 17 1 2 44 4 16 3 8 41 6 13 1 4 33 7 122 55 3 80 23 4 1200 34 0 B 17 1 2 44 ...

Страница 10: ...n this section specify the type of gas approved for this furnace only use those approved gases The instal lation of a drip leg and ground union is required Refer to Figure 16 FIGURE 14 Side Return Cutout Markings Some accessories such as electronic air cleaners and pleated media may require a larger side opening Follow the instructions supplied with that accessory for side opening requirements Do ...

Страница 11: ...n the octagon hub located on the gas inlet side of the valve Placing a wrench to the body of the gas valve will damage the valve causing improper opera tion and or the valve to leak Table 5 Nominal Manifold Pressure High Fire Manifold Pressures Manifold Pressures Gas Heating Value BTU cu ft Altitude feet Gas Heating Value MJ cu m Altitude m 0 7999 8000 8999 9000 9999 0 2437 2438 2742 2743 3048 in ...

Страница 12: ...as shown in Figure 17 Electronic thermo stats may require the common wire to be connected Apply strain relief to thermostat wires passing through cabinet If air conditioning equip ment is installed use thermostat wiring to connect the Y and C termi nals on the furnace control board to the proper wires on the condensing unit unit outside The 24 volt 40 VA transformer is sized for the furnace compon...

Страница 13: ...ioner Single Stage Furnace HM1 Humidistat Y Full Stage Compressor G Fan PP11C70224 THERMOSTAT RH 24 Volt Hot Heat XFMR RC 24 Volt Hot Cool XFMR W Full Stage Heat Clipping Jumper W914 for electric heat on thermostat is not necessary 24VAC Humidifier Relay Optional C 24 Volt Common Y Compressor Contactor SINGLE STAGE AIR CONDITIONER G8C L Y M 8S G 9F G 8 9 S ID MODELS G T GLS G T G 8 9 S LF8 GF 8 9 ...

Страница 14: ...P32H70124 THERMOSTAT W1 Second Stage Aux Heat E Emergency Heat W2 Third Stage Heat N A BP21H50124 BN21H00124 DP21H40124 DN21H00124 THERMOSTAT N A DN22U00124 THERMOSTAT E B E ZD E R OD MODELS HGD HP RHS O Reversing Valve Energized in Cool C 24 Volt Common R 24 Volt Hot W1 66 out Heat Y Compressor DEMAND DEFROST CONTROL X L Malfunction Light W Auxiliary Heat SINGLE STAGE HEAT PUMP 24VAC Humidifier R...

Страница 15: ...with no space between gas supplies must enter on the right and left respectively All gas piping must be in accordance with the national fuel gas code ANSI Z223 1 latest edition and or all local code or utility requirements TWINNING In applications where more heating capacity or more airflow capacity is needed than what one furnace can deliver twinning can be used to make two furnaces operate in ta...

Страница 16: ...e from the TWIN terminal of Furnace 1 to the TWIN terminal of Furnace 2 3 Install a separate 24V relay as shown in the diagram below Use of this relay is required as it ensures that the transformers of the two furnaces are isolated thus preventing the possibility of any safety devices being bypassed 4 Connect the 24V common between furnace 1 and furnace 2 Staging Operation Heating On a call for fi...

Страница 17: ...s been added to the pressure switch vacuum hose How ever ensure that all pressure switch hoses are routed such that they prevent any condensate from entering the pressure switch It is possible for condensation to form inside the combustion air intake pipe in the summer months if significant length of combus tion air pipe passes through conditioned space This problem can be averted by installing th...

Страница 18: ...ps will collect and hold condensate which will cause the furnace to not operate Shorten pressure switch hose Re route and shorten pressure switch hose Shorten rain gutter hose Move rain gutter hose to this position For 100 120 130K input furnaces the condensate drain is plumbed toward the left casing outlet from the factory For 040 060 080K input furnaces the condensate drain is plumbed toward the...

Страница 19: ...witch hose to this position NOTE May require the longer hose that is provided with wider cabinets Move condensate drain hose to this position May exit either side of the cabinet Move rain gutter hose to this position When drain hose routing changes are required be sure to cap all un used openings If rerouting hoses excess length should be cut off so that no sagging loops will collect and hold cond...

Страница 20: ...ure switch hose to this position NOTE May require the longer hose that is provided with wider cabinets Change condensate drain connection to the 90 fitting provided Move condensate drain hose to this position Move rain gutter hose to this position NOTE May require hose extension that is provided with wider cabinets Move condensate drain hose to this position Change condensate drain connection to t...

Страница 21: ...to the 90 fitting provided Move condensate drain hose to this position Move rain gutter hose to this position Change condensate drain connection to the 90 fitting provided Move condensate drain hose to this position AIRFLOW Move pressure switch hose to this position When drain hose routing changes are required be sure to cap all un used openings If rerouting hoses excess length should be cut off s...

Страница 22: ...sed any joint where ABS pipe is joined to PVC pipe must be glued with cement that is approved for use with BOTH materials Metallic materials must not be used for venting or air intake 5 If a flexible connector is used in the vent system it must be made of a material that is resistant to acidic exposure and to at least 225 F 107 C temperature Flexible connectors are also allowed in the combustion a...

Страница 23: ... 000 4 140 60 000 4 120 80 000 2 50 80 000 2 20 80 000 3 75 80 000 3 55 80 000 4 140 80 000 4 120 100 000 2 15 100 000 2 NA 100 000 3 75 100 000 3 55 100 000 4 140 100 000 4 120 120 000 3 75 120 000 3 55 120 000 4 140 120 000 4 120 130 000 3 70 130 000 3 50 130 000 4 140 130 000 4 120 Elevation 5001 6000 Elevation 9001 10000 Model Input BTUH Pipe Size in Max equivalent Length ft Model Input BTUH P...

Страница 24: ...G FIGURE 28 Dimensions TABLE 9 Elbow Dimensions Elbow A Dimension Illustrated in Figure 28 2 Standard 2 5 16 3 Standard 3 1 16 2 Sweep 3 1 4 3 Sweep 4 1 16 TABLE 10 Equivalent Length of Fittings Fitting Equivalent Length 2 90 sweep elbow 5 feet of 2 pipe 2 45 sweep elbow 2 1 2 feet of 2 pipe 2 90 standard elbow 7 feet of 2 pipe 2 45 standard elbow 3 1 2 feet of 2 pipe 3 90 sweep elbow 5 feet of 3 ...

Страница 25: ...requirements of the gas supplier 12 30 5 cm or in accordance with local installation codes and the requirements of the gas supplier F Clearance to outside corner 12 30 5 cm or in accordance with local installation codes and the requirements of the gas supplier 12 30 5 cm or in accordance with local installation codes and the requirements of the gas supplier G Clearance to inside corner 3 feet 91 4...

Страница 26: ...an the two vent pipes be tied together The combustion air side of the two pipe configuration shown in Figures 31 and 32 can be installed so the combustion air pipe terminates as described in outdoor combustion air or ventilated combustion air sec tions in these instructions Follow the instructions for outdoor combus tion air or ventilated combustion air and the instructions for installing the vent...

Страница 27: ...ons Refer to Ambient Combustion Air Supply for proper installa tion Refer to Figures 37 and 38 3 VENTILATED COMBUSTION AIR Combustion air is supplied through a PVC or ABS pipe that is connected to the PVC coupling attached to the burner box and is terminated in a ventilated attic or crawl space The combustion air and the vent pipes are not termi nated in the same atmospheric zone Refer to Figure 3...

Страница 28: ...ed for use 4 A automatically operated damper or automatically adjustable lou vers shall be interlocked so that the main burner cannot operate unless either the damper or the louver is in the fully open position FIGURE 37 Combustion Airflow Path Through The Furnace Casing This type of installation requires that the supply air to the appliance s be of a sufficient amount to support all of the applia...

Страница 29: ...t located in the enclosure b Not less than the sum of all vent connectors in the confined space 3 The duct shall be least the same cross sectional area as the free area of the air supply inlet opening to which it connects 4 The blocking effects of louvers grilles and screens must be given consideration in calculating free area If the free area of a specific louver or grille is not known refer to T...

Страница 30: ...ed to the venting system are not in operation 1 Inspect the venting system for proper size and horizontal pitch Determine that there is no blockage restriction leakage corrosion or other deficiencies which could cause an unsafe condition 2 Close all building doors and windows and all doors 3 Turn on clothes dryers and TURN ON any exhaust fans such as range hoods and bathroom exhausts so they shall...

Страница 31: ...urate mea surement of gas flow 4 Refer to Table 15 for cubic feet of gas per hour 5 Multiply cubic feet per hour by heating valve BTU cu ft to obtain input If clocked rate does not match the input rate from the unit nameplate follow steps in next section to adjust the manifold pressure Repeat steps 2 5 until correct input is achieved HOT SURFACE IGNITION SYSTEM Do not attempt to light this furnace...

Страница 32: ...0 300 750 78 46 92 231 25 144 288 720 80 45 90 225 26 138 277 692 82 44 88 220 27 133 267 667 84 43 86 214 28 129 257 643 86 42 84 209 29 124 248 621 88 41 82 205 30 120 240 600 90 40 80 200 31 116 232 581 92 39 78 196 32 113 225 563 94 38 76 192 33 109 218 545 96 38 75 188 34 106 212 529 98 37 74 184 35 103 206 514 100 36 72 180 36 100 200 500 102 35 71 178 37 97 195 486 104 35 69 173 38 95 189 4...

Страница 33: ...w the operating instruc tions to place the unit back in operation 3 Adjust manifold pressure by adjusting gas valve regulator screw for the appropriate gas per the following 4 After the manifold pressure has been adjusted re calculate the fur nace input to make sure you have not exceeded the specified input on the rating plate Refer to CALCULATING THE FURNACE INPUT NATURAL GAS 5 Once the correct B...

Страница 34: ... must be long enough to adequately cool the furnace but not so long that cold air is blown into the heated space The Blower Off Delay Timer may be adjusted by positioning the jumper on two of the four pins as shown in Figure 42 MANIFOLD PRESSURE U TUBE CONNECTION FIGURE 41 Reading Gas Pressure The temperature rise or temperature difference between the return air and the supply heated air from the ...

Страница 35: ...084 Medium Low 1232 1313 1291 1280 1250 1209 1207 1148 1055 937 Low 826 821 853 858 838 817 794 776 760 711 80 2200 C High 2529 2435 2338 2256 2162 2041 1920 1794 1654 1501 Medium High 2166 2111 2070 2001 1927 1849 1719 1614 1499 1344 Medium Low 1697 1685 1664 1631 1586 1531 1466 1393 1315 1185 Low 1383 1377 1358 1336 1285 1244 1199 1147 1048 925 100 1600 C High 1909 1880 1823 1776 1706 1637 1562 ...

Страница 36: ...73 1483 1353 1209 Medium High 1543 1543 1516 1504 1477 1446 1382 1309 1202 1099 Medium Low 1238 1241 1243 1241 1252 1242 1201 1140 1074 967 Low 906 902 903 910 888 866 859 829 795 743 80 2200 C High 2585 2492 2405 2321 2232 2137 2015 1902 1745 1577 Medium High 2098 2067 2036 1982 1928 1860 1767 1670 1549 1331 Medium Low 1619 1628 1614 1584 1545 1488 1424 1339 1216 1121 Low 1338 1347 1327 1301 1262...

Страница 37: ...mpleted between terminals R and W of the thermostat When the proper amount of combustion air is being provided the pressure switch will close the ignition control pro vides a 17 second ignitor warm up period the gas valve then opens the gas starts to flow ignition occurs and the flame sensor begins its sensing function The blower motor will energize 30 seconds after the gas valve opens if a flame ...

Страница 38: ...Red Flashes description below If the main limit switch opens five times within a single call for heat the control will also indicate 4 Red Flashes and will enter a one hour soft lockout 5 RED FLASHES This fault is indicated if the normally closed rollout switch opens The rollout control is manually reset Check for proper combustion air proper inducer operation and primary heat exchanger failure or...

Страница 39: ...flash three green flashes when the memory has been cleared then will resume the normal slow green flash after a five second pause SECTION XII REPLACEMENT PARTS LIST DESCRIPTION MOTOR MOTOR DIRECT DRIVE BLOWER BLOWER COMBUSTION ELECTRICAL CAPACITOR RUN SWITCH LIMIT CONTROL FURNACE IGNITER SENSOR FLAME SWITCHES PRESSURE SWITCH DOOR TRANSFORMER VALVE GAS CONTROL TEMPERATURE AIR MOVING HOUSING BLOWER ...

Страница 40: ...2 UWD A 0413 Fault Code Retrieval To retrieve fault codes push and release ERROR button on control board The LED will flash the last five error codes beginning with the most recent If there are no fault codes in memory the LED will give two green flashes To clear the fault code memory push and hold the ERROR button for at least five seconds The LED will give three green flashes when the memory has...

Страница 41: ...f 90 Degree Ells Polarity is correct black is L1 hot white is N neutral Ground wire is connected Line voltage value to furnace volts AC Low voltage value between R and C on furnace control board volts AC Thermostat Type Other System Equipment and Accessories Owner Information Equipment Data Furnace Configuration Condensate Management Venting Electrical Line Voltage Outdoor Unit Model Outdoor Unit ...

Страница 42: ...Not Selectable Explain the importance of regular filter replacement and equipment maintenance Gas Side Air Side System External Static Pressure Owner Education Additional Job Detail Supply static before evaporator coil in w c Calculated input in btuh clock the gas meter Nat Gas Only Manifold Gas Pressure in w c Inlet Gas Pressure in w c LP Gas Conversion Kit Part Used Burner flame inspected flames...

Отзывы: