


BEFORE YOU START
Product Instruction
3
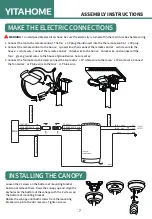
ASSEMBLY INSTRUCTIONS
Tools and Materials Required
SCREWS BAG
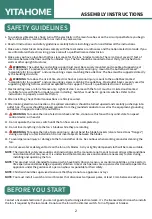
Contact a licensed electrician if you
are not good at performing electrical
work. It’s the licensed electrician
who installs the fan, if required by
the local code. Do not use the fan
with a dimmer switch. Turn off
power at breaker.
External Hexagonal
Wrench
Wire Stripper
Phillips
Screwdriver
Step Ladder
OFF
OFF
MED
1H
STOP
LOW
LIGHT
HI
ON/OFF
2H
4H
8H
ST5x35
Setscrew
4 pcs
Expansion
Screw
2 pcs
Setscrew Stopper
4 pcs
Wire
Connectors
3 pcs
#8-32
Setscrew
2 pcs
Screw
Washer
2 pcs
Screw Spring
Washer
2 pcs
Balance Pack
1 pc
Fabric
Washer
16 pcs
Screws
for Blades
16 pcs
Mounting Bracket
ST5x35 Setscrew
Downrod
Canopy
M4x14 Screws
Hair Clip Pin
Clevis Pin
Blades
Screws for Blade Bracket
Remote Control
and Receiver
Fan Motor Assembly
Blade Bracket
Light Kits
Glass Shade
Содержание TLCFLS-1002
Страница 1: ...ASSEMBLY INSTRUCTIONS CEILING FAN WITH LIGHT TLCFLS 1002...
Страница 14: ...Pure Easy...