background image

DROPOUT SYSTEM

Make sure your tools are in good condition. 
A worn allen key can round the hex on a bolt 
not allowing for proper torque.

Torque settings are listed throughout the 
instructions. It is also import to prep all bolt 
threads. The instructions denote whether to 
use a blue Loctite compound or grease.

YETI TIPS

TOOLS NEEDED

Warning: Service on Yeti bicycles requires special knowledge 
and tools. Yeti Cycles recommends that all service and 
repairs be performed by an authorized Yeti Dealer

• 2.5mm allen key
• Blue loctite

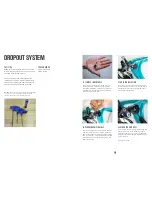
The Shimano 12 x 142 axle nut allows you to 
position the quick release lever for consistant, 
easy wheel installation.  Above are the parts you 
will need ot set that position. Alxe nut, clocking 
chip and chip retaining bolt.

With you wheel in the frame and your derailleur 
set up install the axle and nut.  Close the lever to 
proper tension and in the angle desired without 
the clocking chip installed. 

To fit the clocking chip you may have to open the 
lever and rotate the axle nut slightly.  Once the 
Axle nut is positioned properly place the clocking 
chip into its recess .  This piece will fit snugly and 
will prevent the axle nut form rotating while the 
axle is off the bike.

Once the chip is in place install the retaining bolt 
and you are all set.  If you are having trouble 
installing the bolt you may want to try adjusting 
the Axle nut position slightly to allow the chip to 
move into place.

*Apply blue Loctite

02. AXLE INSTALLATION

04. CLOCKING CHIP BOLT

01. 12MM X 142MM AXLE

03. CLOCKING CHIP INSTALL

Содержание ARC Carbon

Страница 1: ...YETI CYCLES 621 Corporate Circle Unit B Golden CO 80401 888 576 9384 www yeticycles com OWNER SMANUAL 2014YETI ARCCARBON...

Страница 2: ...TABLEOFCONTENTS BRAND OVERVIEW 01 FRAME FEATURES 04 GEOMETERY 08 MAINTENANCE SCHEDULE 10 CABLE SETUP 11 DROPOUT OVERVIEW 16 WARRANTY LEGAL 18 CONTACT INFORMATION 19...

Страница 3: ...every situation or condition that may occur during the assembly setup and maintenance of your bicycle Yeti recommends that all service and repairs be performed by your local authorized Yeti Dealer Thi...

Страница 4: ...bon is easier than ever This also allows the derailleur to move with the drivetrain while the suspension cycles giving you more consistant shifting 6 The dedicated 142mm x 12mm Shimano thru axle gives...

Страница 5: ...25 8 C 69 5 69 5 70 0 70 0 70 0 D 72 0 72 0 72 0 72 0 72 0 E 16 9 16 9 17 1 17 1 17 1 F 40 6 41 6 43 3 44 3 45 3 G 11 8 11 8 12 0 12 0 12 0 H 26 5 27 7 28 9 29 9 30 9 I 3 90 3 90 3 90 5 10 5 90 X SMA...

Страница 6: ...ION IF NECESSARY CHECK CHAIN FOR WEAR AND REPLACE IF NECESSARY COMPLETE TUNE UP PERFORMED BY AN AUTHORIZED YETI DEALER SCHEDULE Begin by removing the cable stop retaining bolt with a 2 5mm allen whenc...

Страница 7: ...ailleur above right as shown Make sure that the arc of the front derailleur housing is smooth so it will not bind the cable The cable should move freely up through the frame to the derailleur The rear...

Страница 8: ...you will need ot set that position Alxe nut clocking chip and chip retaining bolt With you wheel in the frame and your derailleur set up install the axle and nut Close the lever to proper tension and...

Страница 9: ...does this limited warranty include the cost of travel or shipment to and from an authorized Yeti dealer In order to exercise your rights under these limited warranties the bicycle or frameset must be...

Отзывы: