


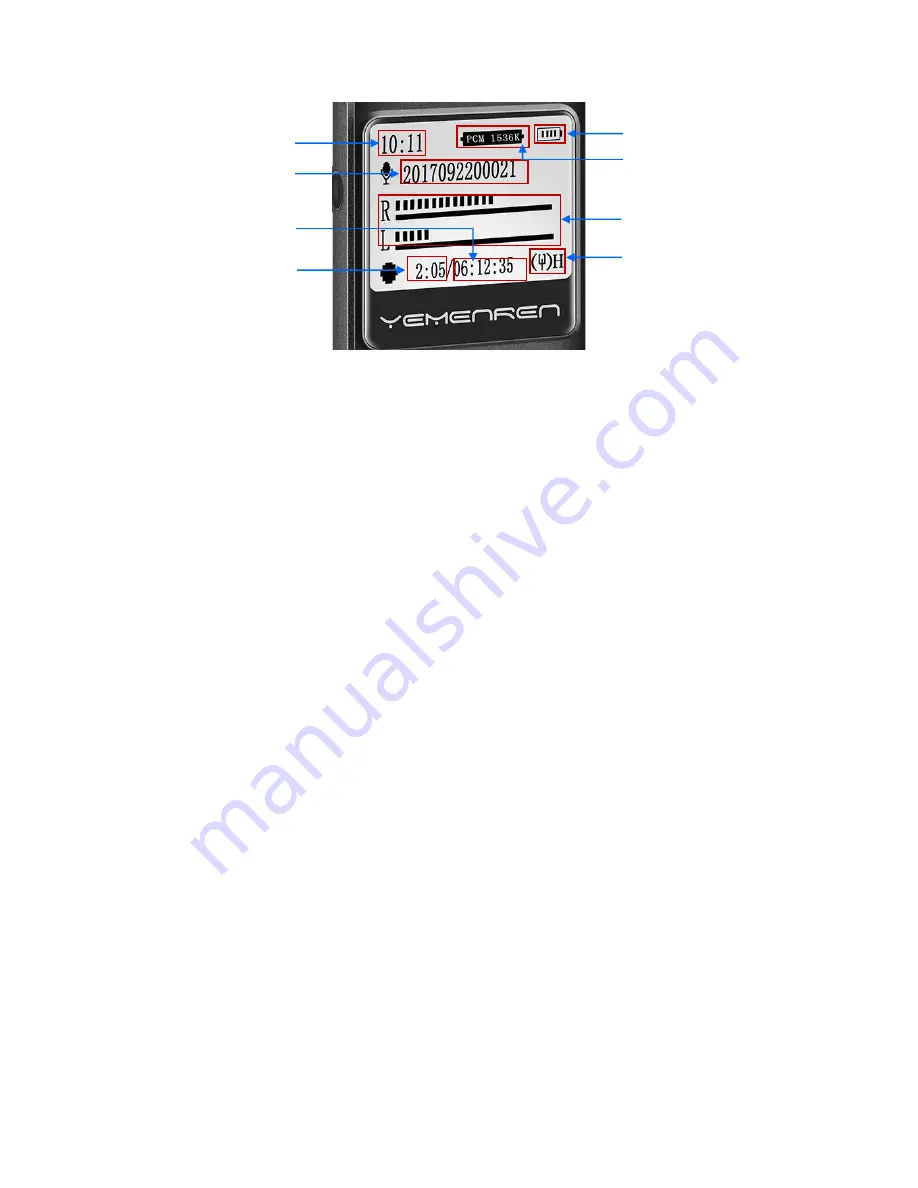
Remaining battery
Current recording rate
Mic sensitivity, will
turn to L when set Mic
sensitivity as Low
Denote volume of sound picked
up by Right and Left mic
Recording Screen
Menu definitions
1.
Rec subsection
: Store a long recording as smaller files automatically. Say you are going to record a lecture of 3
hours long. If you set the Record subsection as 30M, the recorder will save the recording as a separate file every 30
minutes. So you get 6 recordings of 30 minutes long instead of one recording of 3 hours long.
2.
Noise Reduction
: When you turn on Record Reduction Mode, the recorder will omit some high-pitch sound and
takes down more mellow and deep voice.
3.
Recording Monitor
: To monitor the quality of the recording. When Rec Monitor is Open, you can hear what the
recorder picks up via headphones during recording. It tells you exactly how the recording is, so you can know if there
is too much noise, if the sound is too low for the recorder, thus to further set the Noise Reduction or move the
recorder closer to sound source.
4.
VOR Voice Control
: Voice activated recording. In VOR mode, the recorder only records voice loud enough to
activate recording and will omit silence to save storage space. You can adjust the threshold via Mic Sensitivity. The
higher the value, the more sensitive the microphones. That means it will picks up lower voice. Please note, you still
need to turn on the recorder, press the Record Button to initiate/save the recording.
5.
Mic Sensitivity
: It works together with VOR Voice Control, only functions in VOR mode. It's the threshold of VOR
mode.
6.
Timing-Rec
: Set up a specific time for the recorder to start recording automatically.
Basic points in setting up the recorder:
1.
All setting options are included in the Menu list.
2.
Hold down the Menu button for about 3 seconds to bring up the Menu list.
3.
Press Backward/Forward button to highlight the item needed, press Menu button to enter the setting of that
item.
4.
If there needs a numerical value, for example in setting up time and date, scroll the Volume Button to change
the value.
5.
Once you’ve set a specific value for a menu item, please always remember to click the Menu button to have
the recorder save the settings. There won’t be always a prompt message to remind you the settings are done,
but as soon as you press down the Menu button, the setting value is recorded.
System time
File name
Remaining file length when
continue recording at current rate
Recording length


