MyPBX U5XX Administrator's Guide
www.yeastar.com
Page164
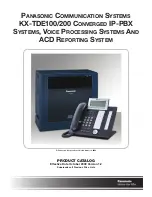
FigureE-2
Step3.
Configure phones on MyPBX auto-provision page.
1. Login MyPBX web interface, „PBX‟ ->„Extensions‟ ->„Phone Provisioning‟
->„Add Phone‟.
FigureE-3
2. Fill in the phone detail message on the pop-up windows.
Input IP Phone‟s MAC address, configure Name, Callwaiting, Line,
Extension,Label, Line active for the phone.And also you can configure other
features on the phone, like codecs, memory keys etc.
Содержание MyPBX U520
Страница 18: ...U5 series Administrator s Guide Version 14 18 0 22 Yeastar Technology Co Ltd ...
Страница 105: ...MyPBX U5XX Administrator s Guide www yeastar comPage88 Figure 6 42 Add Edit Queue Queue Name A name for the Queue ...
Страница 150: ...MyPBX U5XX Administrator s Guide www yeastar comPage133 9 Logout Click to log out safely ...
Страница 183: ...MyPBX U5XX Administrator s Guide www yeastar comPage166 FigureE 5 Step5 Finish ...
Страница 185: ...MyPBX U5XX Administrator s Guide www yeastar comPage168 Figure F 2 Step3 Finish ...
Страница 191: ...MyPBX U5XX Administrator s Guide www yeastar comPage174 Figure H 3 ...
Страница 204: ...MyPBX U5XX Extension User s Guide Yeastar Technology Co Ltd www yeastar com 7 9 Figure 1 4 ...