background image

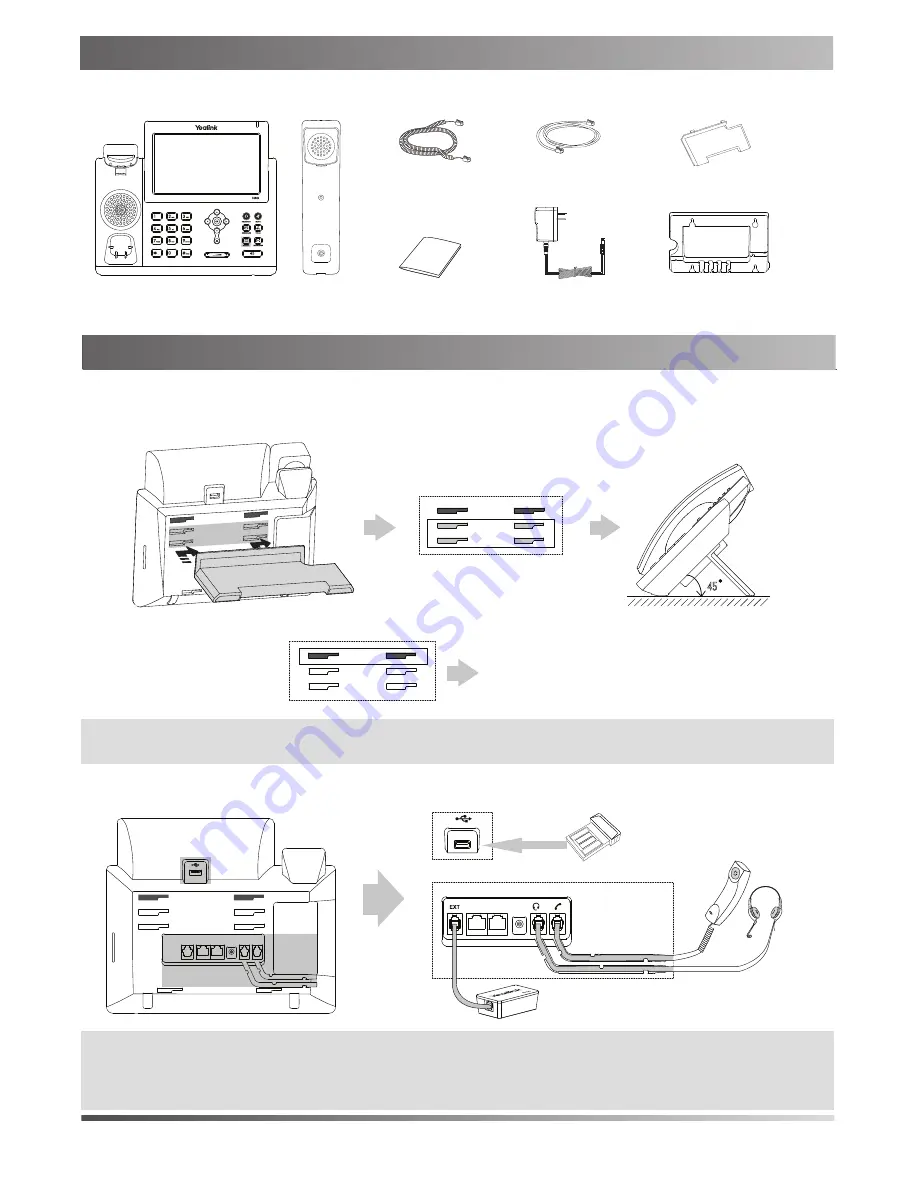
The following items are included in your package. If you find anying missing, contact your system administrator.

Assembling the Phone

Stand

Handset Cord

Handset

IP Phone

Ethernet Cable

Wall Mount Bracket

Power Adapter    

10

Bluetooth USB Dongle BT40

Wireless Headset Adapter EHS36

The two wall mount slots are plugged up by 
silica gel. You can pull out the silica gel when 
mounting your IP phone to a wall.

Optional

Optional

1

Quick Start Guide

Packaging Contents

Packaging Contents

Assembling the Phone

Note: 

The headset, Bluetooth USB dongle BT40 and wireless headset adapter EHS36 should be purchased

         separately. The EXT port can also be used to connect the expansion module EXP40. For more information on

         how to use the EHS36, EXP40 and BT40, refer to Yealink EHS36 User Guide, Yealink EXP40 User Guide 

         and Yealink Bluetooth USB Dongle BT40 User Guide.

2.Connect the handset and optional headset, as shown below:

1.Attach the stand,as shown below:

Note: 

For more information on how to mount the IP phone to a wall, refer to Yealink Wall Mount Quick Installation

         Guide for SIP-T4X IP Phones.

Desk Mount Method

45

Содержание Yealink SIP-T48G

Страница 1: ...Quick Start Guide www yealink com Applies to firmware version 35 73 0 40 or later V73 40 Ultra elegant Gigabit IP Phone SIP T48G...

Страница 2: ...Contents Packaging Contents Assembling the Phone Note The headset Bluetooth USB dongle BT40 and wireless headset adapter EHS36 should be purchased separately The EXT port can also be used to connect t...

Страница 3: ...ion for network and power connections Your system administrator will advise you on which one to use Note If inline power PoE is provided you don t need to connect the power adaper Make sure the hub sw...

Страница 4: ...lick on Account Register Account X X 1 2 3 15 16 Parameters of the account Register Status Line Active Label Display Name Register Name User Name Password Server Host It is provided by ITSP for regist...

Страница 5: ...en Entering and Updating Data To enter data Tap the field you want to edit Tap the IME soft key to switch input modes Enter data using the keypad Tap the Save soft key To select a field option To sele...

Страница 6: ...he Transfer soft key when the second party answers 2 Enter the number you want to transfer to and then press 3 Press or tap the Transfer soft key when you hear the ring back tone 3 Press or tap the Tr...

Страница 7: ...ct 4 Tap the Save soft key to accept the change 4 Tap the Save soft key to accept the change 3 Enter a unique contact name in the Name field and contact numbers in the corresponding fields 2 Tap after...

Страница 8: ...and USB phones With a worldwide market in more than 140 countries the company has also established a first class international service network Our priorities are quality functionality ease of use cus...

Отзывы: