background image


Quick Start Guide 


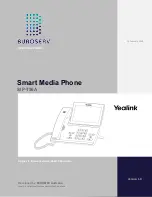
Smart Media Phone – SIP-T56A 


SIP-T56A 

Smart Media Phone 


Developed by:

 BUROSERV Australia


Level 2, 9 Help Street Chatswood NSW 2067. Australia 


Version 1.0 


QUICK START GUIDE


14 February 2020


Applies to firmware version 58.80.0.10 or later. 

Содержание SIP-T56A

Страница 1: ...Media Phone SIP T56A SIP T56A Smart Media Phone Developed by BUROSERV Australia Level 2 9 Help Street Chatswood NSW 2067 Australia Version 1 0 QUICK START GUIDE 14 February 2020 Applies to firmware ve...

Страница 2: ...interface 9 Using Your Phone 9 Status Icons 9 Using the Touch Screen 10 Control Center and Notification Center 10 Entering and Updating Data 11 Basic Call Features 12 Placing a Call 12 Answering a Cal...

Страница 3: ...e following items are included in your package If you find anything missing contact your system administrator Note We recommend that you use the accessories provided or approved by Yealink The use of...

Страница 4: ...nd as shown below 2 Attach the optional wall mount bracket as shown below Note The hookswitch tab has a lip that allows the handset to stay on hook when the IP phone is mounted vertically For more inf...

Страница 5: ...rt can also be used to connect the color screen expansion module EXP50 or USB headset For more information on how to use EXP50 refer to the Yealink EXP50 User Guide For more information on how to use...

Страница 6: ...to the wired network Note If you are connecting a PC to your phone we recommend that you use the Ethernet cable provided by Yealink b Connect to the wireless network 1 Swipe down from the top of the...

Страница 7: ...7 Quick Start Guide Smart Media Phone SIP T56A HARDWARE COMPONENT INSTRUCTIONS...

Страница 8: ...d DNS address Static IP Address If the phone cannot contact a DHCP server for any reason you need to configure IP address subnet mask gateway address primary DNS address and secondary DNS address for...

Страница 9: ...NE USER INTERFACE Configuring Network Settings 1 Swipe down from the top of the screen to enter the control center 2 Tap Settings Advanced default password admin Network WAN Port VLAN Webserver Type 8...

Страница 10: ...k to the previous screen To change the wallpaper 1 Long tap the empty spot on the idle screen 2 Tap WALLPAPERS 3 Select the desired picture 4 Tap Set wallpaper To add a widget to the idle screen 1 Lon...

Страница 11: ...on screen keyboard 1 Tap the input field the onscreen keyboard will display on the touch screen 2 When you finish entering tap to hide the onscreen keyboard To use keypad Dial or enter number To sele...

Страница 12: ...et Hang up the handset or tap the EndCall soft key Using the speakerphone Press or EndCall Using the headset Tap the EndCall soft key REDIAL Press to enter the Placed Calls list and then tap the desir...

Страница 13: ...n press 3 Press or Transfer soft key when the second party answers CALL FORWARD To enable call forward 1 Swipe down from the top of the screen to enter the control center 2 Tap Settings Features Call...

Страница 14: ...ap Blacklist to add the entry to the blacklist Tap Delete to delete the entry from the list CONTACT DIRECTORY To add a contact 1 Tap and then select the desired group on the left 2 Tap to add a contac...

Страница 15: ...als that include IP video phones IP phones and USB phones With a worldwide market in more than 140 countries the company has also established a first class international service network Our priorities...

Отзывы: