background image

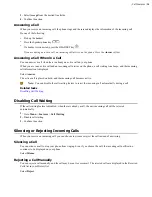
 | Call Features | 

11

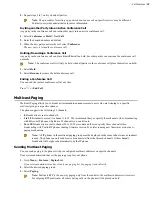
4.

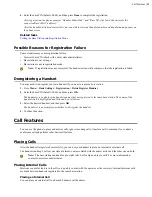
Enter the base PIN (default: 0000), and then press 

Done

 to complete the registration.

After registration, the phone prompts “Handset Subscribed” and “Base NO. (the last 4 characters of the

connected Base’s MAC address)”.
After the handset initialized successfully, an icon with the internal handset number and handset name appears on

the phone screen.

Related tasks

Putting the Base Station into Registration Mode

Possible Reasons for Registration Failure

Some scenarios may cause registration failure.
• Incorrect base PIN (check with your system administrator).
• Base station is out of range.
• Base station is not in registration mode.

Note: 

 If registration was not successful, the handset screen will prompt you that the registration is failed.

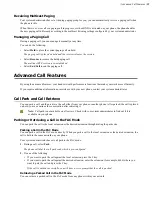
Deregistering a Handset

You may need to de-register your own handset if you want to replace a base station.

1.

Go to 

Menu

 > 

Basic Settings

 > 

Registration

 > 

Delete Register Handset

.

2.

Enter the base PIN (default: 0000), and then press 

OK

.

The handset screen displays the handsets names that are registered to the same base station. The name of the

handset itself is highlighted and followed by a left arrow.

3.

Select the desired handset, and then press 

OK

.

The handset screen prompts you whether to de-register the handset.

4.

Confirm the action.

Call Features

You can use the phone to place and answer calls, ignore incoming calls, transfer a call to someone else, conduct a

conference call and perform other basic call features.

Placing Calls

After the handset is registered successfully, you can use your handset to place an internal or external call.
The handset can keep 2 calls at one time at almost, one (associated with the audio) active and the other one on hold.

Note: 

 The base station can handle up to eight calls, but for Opus, only six calls. For more information,

contact your system administrator.

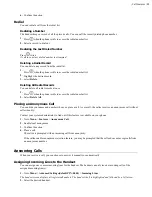
Placing Internal Calls

Intercom is a useful feature in the office to quickly contact with the operator or the secretary. Internal intercom calls

are made between handsets registered to the same base station.

Placing an Internal Call

You can place an internal call to a desired handset or all handsets.

Содержание DD10K

Страница 1: ...Yealinkl亿联网络 DECT Desk Phone User Guide Version 85 65 I Date Sep 2020 ...

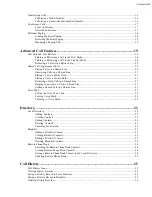
Страница 2: ...Call Features 11 Placing Calls 11 Placing Internal Calls 11 Placing External Calls 12 Placing a Call from the Call History 12 Placing a Call from the Directory 12 Speed Dial on the DD Phone 12 Redial 13 Placing an Anonymous Call 13 Answering Calls 13 Assigning Incoming Lines to the Handset 13 Answering a Call 14 Answering a Call When in a Call 14 Disabling Call Waiting 14 Silencing or Rejecting In...

Страница 3: ... Held Call on a Shared Line 21 Barging in an Active Call on a Shared Line 21 Pulling a Shared Call on a Shared Line 21 Voice Mail 21 Setting the Voice Mail Code 22 Leaving Voice Mails 22 Listening to Voice Mails 22 Directory 22 Local Directory 22 Adding Contacts 22 Viewing Contacts 22 Editing Contacts 22 Deleting Contacts 23 Searching for Contacts 23 Blocklist 23 Adding a Blocklist Contact 23 View...

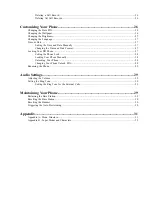
Страница 4: ...Phone 27 Setting the Phone Lock 28 Locking Your Phone Manually 28 Unlocking Your Phone 28 Changing Your Phone Unlock PIN 28 Renaming the Phone 29 Audio Settings 29 Adjusting the Volume 29 Setting the Ring Tone 29 Setting the Ring Tone for the External Calls 29 Maintaining Your Phone 29 Restarting the Base Station 29 Resetting the Base Station 30 Resetting the Handset 30 Triggering the Auto Provisi...

Страница 5: ...llowing types of related documents are available on each support page on Yealink support page Release Notes which details bug fixes and feature enhancements when an update is released Quick Start Guide which describes how to assemble your phone and configure the basic phone features Administrator Guide which provides detailed information on how to configure phone features for the system administra...

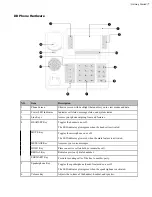
Страница 6: ... the registration mode Resets the base station to factory settings 2 Registration LED Indicates the handset registration status or the base station is in the paging mode 3 Network Status LED Indicates the network status 4 Power LED Indicator Indicates the power status of the base station ...

Страница 7: ...n when the headset is activated MUTE Key Toggles the microphone on or off The LED indicator glows red when the mute feature is activated MESSAGE Key Accesses your voice messages HOLD Key Places an active call on hold or resume the call REDIAL Key Redials a previously dialed number 4 FORWARD Key Forward incoming calls of the line to another party 5 Speakerphone Key Toggles the speakerphone hands fr...

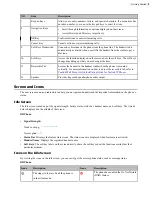
Страница 8: ...he reversible tab refer to Yealink Wall Mount Quick Installation Guide for Yealink IP Phones 12 Speaker Provides ringer and speakerphone audio output Screen and Icons The user screens and icon indicators can help you navigate and understand the important information on the phone s status Idle Screen The idle screen is made up of the signal strength battery status status bar handset name and soft k...

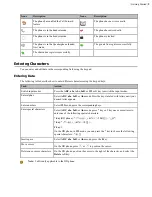
Страница 9: ...des Press the ABC abc Abc 2aB or 123 soft key to switch the input modes Enter alphas Select ABC abc 2aB or Abc mode Press the keys labeled with letters until your desired letter appears Enter numbers Select 123 mode press the corresponding keys Enter special characters Select ABC abc 2aB or Abc mode press key or key one or more times to enter one of the following special characters key DD phone _ ...

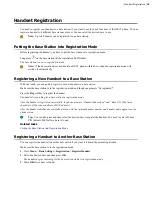
Страница 10: ... mode and the phone prompts Unregistered Press the Reg soft key to register the handset The handset is searching for a base station in registration mode After the handset is registered successfully the phone prompts Handset Subscribed and Base NO The last 4 characters of the connected Base s MAC address After the handset initialized successfully an icon with the internal handset number and handset...

Страница 11: ...ress OK The handset screen displays the handsets names that are registered to the same base station The name of the handset itself is highlighted and followed by a left arrow 3 Select the desired handset and then press OK The handset screen prompts you whether to de register the handset 4 Confirm the action Call Features You can use the phone to place and answer calls ignore incoming calls transfe...

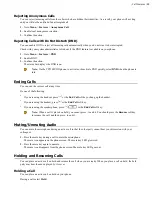
Страница 12: ...lect a contact from the directory to dial out Placing a Call from the Call History You can place calls to contacts from the History list which contains the calls that were recently placed answered or missed 1 Press History 2 Select the desired call list 3 Highlight a contact and press the Send key Placing a Call from the Directory You can place a call to a contact directly from your directory 1 Go...

Страница 13: ...our name and number when you place a call As a result the callee receives an anonymous call without caller identity Contact your system administrator to find out if this feature is available on your phone 1 Go to Menu Features Anonymous Call 2 Enable local anonymous 3 Confirm the action 4 Place a call The callee is prompted with an incoming call from anonymity If the callee enables anonymous rejec...

Страница 14: ...n hold and the incoming call becomes active Note You can disable the call waiting feature to reject the incoming call automatically during a call Related tasks Disabling Call Waiting Disabling Call Waiting If the call waiting feature is disabled when there is already a call the new incoming call will be rejected automatically 1 Go to Menu Features Call Waiting 2 Disable call waiting 3 Confirm the ...

Страница 15: ...ng If you are using the handset press or the End Call soft key or hang up the handset If you are using the headset press or the End Call soft key If you are using the speakerphone press or the End Call soft key Note When a call is placed on hold you cannot press to end it You should press the Resume soft key to resume the call and then press to end it Muting Unmuting Audio You can mute the microph...

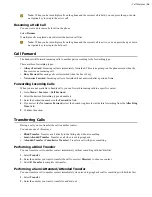
Страница 16: ...ard incoming calls to a specific contact 1 Go to Menu Features Call Forward 2 Select the desired forwarding type and enable it 3 Enter the destination number in the Forward to field 4 If you select the No Answer Forward select the desired ring time to wait before forwarding from the After Ring Time field 5 Confirm the action Transferring Calls During a call you can transfer the call to another con...

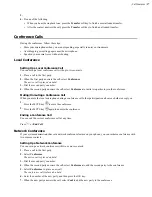
Страница 17: ...erence Muting Unmuting a Conference Call When you mute the local microphone during a conference call other participants can hear each other except you 1 Press the MUTE key to mute the conference 2 Press the MUTE key again to unmute the conference Ending a Conference Call You can end the current conference call at any time Press or End Call Network Conference If your system administrator has set a ...

Страница 18: ... group on a specific channel The phone supports the following 31 channels 0 Broadcasts are sent to channel 0 1 to 25 Broadcasts are sent to channel 1 to 25 We recommend that you specify these channels when broadcasting with Polycom IP phones which have 25 channels you can listen to 26 to 30 Broadcasts are sent to channel 26 to 30 We recommend that you specify these channels when broadcasting with ...

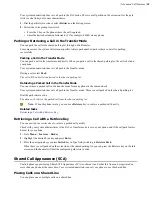
Страница 19: ... can park a call and then retrieve the call either from your phone or another phone After parked the call is placed on hold you can continue the conversation after retrieving it Note Call park is not available on all servers Check with your system administrator to find out if it is available on your phone Parking or Retrieving a Call in the FAC Mode You can park the call to the local extension or ...

Страница 20: ...in the same network Your system administrator has set call park in the Transfer mode There is a call parked on the shared parking lot Dial the park retrieve code The phone will retrieve the parked call from the shared parking lot Note When the phone is idle you can use a Retrieve key to retrieve a parked call directly Related tasks Retrieving a Call with a Retrieve Key Retrieving a Call with a Ret...

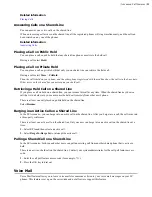
Страница 21: ... a call that is in a held state you can resume the held call remotely from other user s phone There is at least one call placed on public hold on the shared line Select Resume Barging in an Active Call on a Shared Line In the SCA scenario you can barge into an active call on the shared line After you barge into a call the call turns into a three party conference There is at least one active call o...

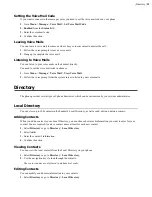
Страница 22: ...e phone provides several types of phone directories which can be customized by your system administrator Local Directory You can store up to 100 contacts in the handset s Local Directory as well as add edit and delete a contact Adding Contacts When you add a contact to your Local Directory you can choose how much information you want to enter for your contact You are required to enter a contact na...

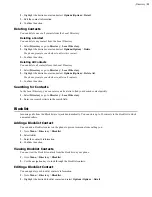
Страница 23: ...arching for Contacts In the Local Directory you can enter search criteria to find your desired contact quickly 1 Select Directory or go to Directory Local Directory 2 Enter your search criteria in the search field Blocklist Incoming calls from the Blocklist are rejected automatically You can store up to 30 contacts in the blocklist to block unwanted callers Adding a Blocklist Contact You can add a...

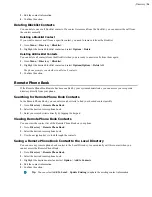
Страница 24: ...istrator you can access your corporate directory directly from your phone Searching for Remote Phone Book Contacts In the Remote Phone Book you can enter search criteria to find your desired contact quickly 1 Go to Directory Remote Phone Book 2 Select the desired remote phone book 3 Enter your search criteria directly by tapping the keypad Viewing Remote Phone Book Contacts You can view the contac...

Страница 25: ...aves the call information such as the caller s name and number local line and call duration 1 Press History 2 Select the desired list 3 Highlight the desired entry and select Options Option Detail Saving a History Record to Local Directory To identify someone s call the next time you can save a history record to the Local Directory 1 Press History 2 Select the desired list 3 Highlight the desired ...

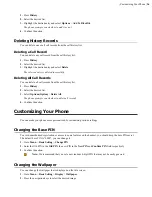
Страница 26: ...red list 3 Select Options Option Delete All The phone prompts you whether to delete all records 4 Confirm the action Customizing Your Phone You can make your phone more personalized by customizing various settings Changing the Base PIN To avoid unauthorized registration or access to some features on the handset you should keep the base PIN secret The default base PIN is 0000 you can change it 1 Go...

Страница 27: ...o to Menu Basic Setting Language 2 Select the desired language The phone prompts you whether to change the language 3 Confirm the action The phone language is changed to the selected one Time Date You can set the time and date manually The time and date formats are also variable Setting the Time and Date Manually If your phone cannot obtain the time and date automatically you can set it manually 1...

Страница 28: ... Unlock PIN field and confirm the action 3 Select Enabled from the Lock Enable field 4 Select the desired type from the Lock type field 5 Enter the desired interval 0 3600 seconds in the Auto Lock field If the value is set to 0 the phone will not be automatically locked 6 Confirm the action Locking Your Phone Manually You can lock the phone manually before the phone is automatically locked Make su...

Страница 29: ...ntify callers when the phone rings 1 Go to Menu Basic Settings Sound Ring Tones Common 2 Select the desired ring tone The ring tone is played automatically 3 Confirm the action Maintaining Your Phone When your phone cannot operate properly you need to investigate or troubleshoot issues along with other tasks that your administrator may ask you to perform Restarting the Base Station The improper op...

Страница 30: ...station glow green after startup Important Base station reset may take a few minutes Do not power off until the base station starts up successfully Resetting the Handset You can reset individual settings that you have configured on the handset Except the settings of directory call history voice mail and the handset registration the handset will reset all customized settings to factory after the re...

Страница 31: ... Appendix 31 Appendix Appendix A Menu Structure ...

Страница 32: ... JKLjkl5 5 JKL5 Jkl5 ΚΛΜ5 JKL5 jkl5 JKLŁĹĽ5 jklłĺľ5 МНОП5 мноп5 יכךל MNO mno6 6 MNO6 mno6 ΝΞΟ6 MNÑOÒ ÓÔÕÖØ6 mnñoò óôõöø6 MNŃŇO ÓÖŐ6 mnńňo óöő6 РСТУ6 рсту6 זחט PQRS pqrs7 7 PQRS7 pqrs7 ΠΡΣ7 PQRSŞß7 pqrsşß7 PQRŔŘ SŚŠ7 pqrŕř sśš7 ФХЦЧ7 фхцч7 רשת TUVtuv8 8 TUV8 tuv8 ΤΥΦ8 TUÙÚÛ ÜŨV8 tuùúû üũv8 TŤUÚÜ ŰŮV8 tťuúü űův8 ШЩ ЪЫ8 шщъы8 צץק WXYZ wxyz9 9 WXYZ9Wxyz9 ΧΨΩƔ9 WŴX YŶZ9 wŵx yŷz9 WXYỲÝ ZŹŻŽ9 wxyỳý zźżž9...

Отзывы: