
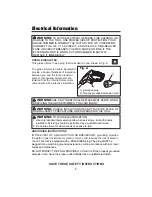


General Safety Rules
Safety is a combination of common sense, staying alert and knowing how to
use your grass trimmer.
1. READ and become familiar with this entire instruction manual. LEARN about
the tool’s applications, limitations and
possible hazards.
2. AVOID DANGEROUS CONDITIONS. DO NOT use in wet or damp areas
or expose to rain.
3. DO NOT use in the presence of flammable liquids or gases.
4. KEEP BYSTANDERS AT A SAFE DISTANCE. NEVER allow children near
the tool.
5. DRESS FOR SAFETY. DO NOT wear loose clothing, gloves, neckties, or
jewellery (rings, watches, etc.) when operating the tool. Loose clothing can
get caught and draw you into moving parts.
6. ALWAYS WEAR EYE PROTECTION.
7. ALWAYS remove the
extension
cord plug from the electric outlet when making
adjustments, changing parts or cleaning.
8. AVOID ACCIDENTAL START-UPS. Make sure the power switch is in the
OFF position before plugging in the
extension
cord.
9. TREAT the
extension
cord with care. Do not use it to carry the tool. Keep cord
away from heat, oil, sharp edges, or moving parts. Replace damaged cords
immediately; they may create a shock or fire hazard.
10. NEVER LEAVE A RUNNING TOOL UNATTENDED. Turn the power switch
to OFF. Do not leave the tool until it has come to a complete stop.
11. DO NOT OVERREACH. Keep proper footing and balance at all times.
SAVE THESE SAFETY INSTRUCTIONS
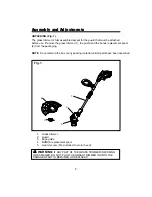
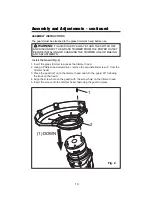
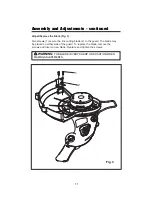
⁄
WARNING:
TO AVOID MISTAKES THAT COULD CAUSE SERIOUS
INJURY, DO NOT PLUG IN THE GRASS TRIMMER UNTIL THE
FOLLOWING STEPS HAVE BEEN READ AND UNDERSTOOD.
3
!
Содержание 60-2271-8
Страница 23: ...EXPLODED VIEW 23 ...


