15
Assembly
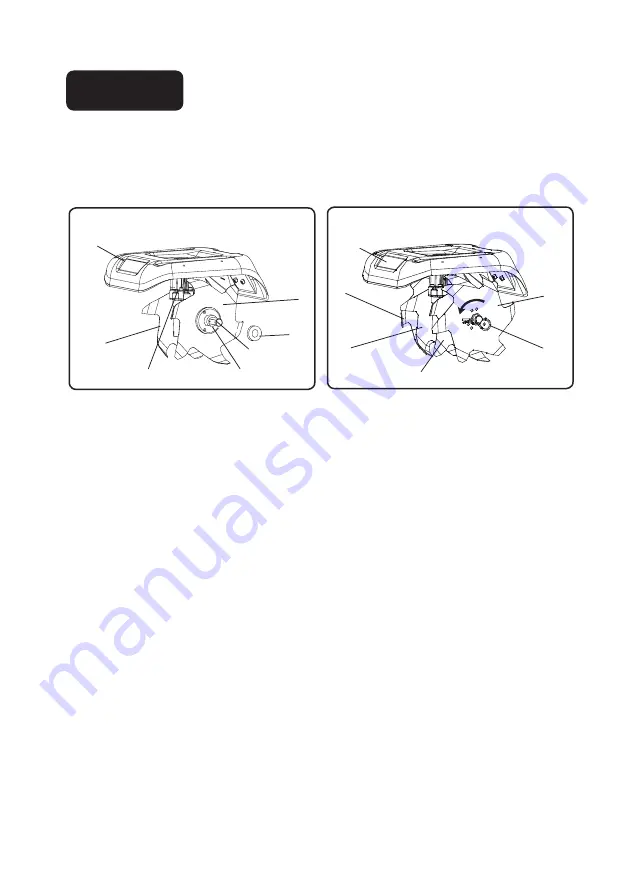
INSTALLING THE TINES (Fig. 5.1-5.6)
The tiller comes with four tines — For correct operation of the unit, the tines must be installed
in the correct order. The tiller may be used with four tines or two tines.
•
Disconnect from power source.
•
Lean the unit back on its wheels so that it is resting securely with the handlebar on the ground.
5.
4. Place the felt onto the shaft (Fig. 5.5).
Place the tine (D) onto the shaft. The flute of
tine (D) should face in toward tine (C). Insert
the hitch pin into the holes that are located on
the shaft in order to secure the tines (Fig. 5.6).
C
B
A
D
D
FRONT
Fig. 5.6
Fig. 5.5
HITCH PIN
FLUTE
FELT
TINE SHAFT
GEAR BOX
B
C
FRONT
Содержание 060-3801-2
Страница 2: ......
Страница 6: ...Read Instructions Ear Protection Always wear safety headphone when operating this product ...
Страница 8: ......
Страница 22: ...EXPLODED VIEW 22 ...
Страница 23: ...EXPLODED VIEW 23 ...
Страница 26: ...26 57 36101285 Motor ...