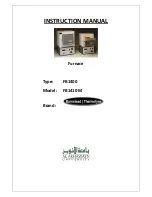
manualshive.com logo in svg
background image


Muffle Furnace 

Model 

FP 100/300/310/410 

Instruction Manual 


- First Edition -


Yamato Scientific Co. LTD.


Thank you for purchasing " Muffle Furnaces, FP 
Series" of Yamato Scientific Co., Ltd. 

To use this unit properly, read this "Instruction 
Manual" thoroughly before using this unit. 
Keep this instruction manual around this unit for 
referring at anytime. 
 

WARNING!: 

Carefully read and thoroughly understand the 
important warning items described in this manual 
before using this unit. 

Содержание FP 100

Страница 1: ...Furnaces FP Series of Yamato Scientific Co Ltd l To use this unit properly read this Instruction Manual thoroughly before using this unit Keep this instruction manual around this unit for referring at anytime WARNING Carefully read and thoroughly understand the important warning items described in this manual before using this unit ...

Страница 2: ...nstructions for program menu 24 Create New Program 26 Edit Program 27 Delete Program 34 Function menu 35 Calibration Offset Function 45 Independent overheating prevention device 46 Temperature Rise Fall Reference Data 47 u Handling Precautions 48 u Maintenance Method 50 Daily Inspection and Maintenance 50 u Long storage and disposal 51 When not using this unit for long term When disposing 51 u In ...

Страница 3: ...nger of a problem that may cause a serious accident or even fatality CAUTION If the caution is ignored there is the danger of a problem that may cause injury damage to property or the unit itself Meaning of Symbols This symbol indicates items that urge the warning including the caution A detailed warning message is shown adjacent to the symbol This symbol indicates items that are strictly prohibit...

Страница 4: ...Caution electrical shock Caution scald Caution no road heating Caution not to drench Caution water only Caution deadly poison Prohibit Prohibit generally Prohibit inflammable Prohibit to disassemble Prohibit to touch Compulsion Compulsion generally Compulsion connect to the grounding terminal Compulsion install on a flat surface Compulsion disconnect the powerplug Compulsion periodical inspection ...

Страница 5: ...epair work yourself since it is dangerous and not recommended Do not use the power cord if it is bundled or tangled Do not use the power cord if it is bundled or tangled If it is used in this manner it can overheat and fire may be caused Do not process bend wring or stretch the power cord forcibly Do not process bend wring or stretch the power cord forcibly Fire or electrical shock may result Subs...

Страница 6: ...sure to prepare the power switchboard with the specific grand earth or specific receptacle FP310 410 model is the 200V single phase mode Be sure to connect this model to the specific power switchboard or receptacle for 200V 2 Choose a proper place for installation Do not install this unit in a place where Rough or dirty surface Flammable gas or corrosive gas is generated Ambient temperature exceed...

Страница 7: ...erated when the power switch is turned ON or OFF and fire explosion may result Refer to page 62 List of Dangerous Substances 4 Do not modify Modification of this unit is strictly prohibited This could cause a failure 5 Installation on horizontal surface Set this unit to the flattest place Not setting this unit with its legs contacted to the setting place surface evenly could cause the vibration or...

Страница 8: ...rson if this unit falls down or moves by the earthquake and the impact etc To prevent take measures that the unit cannot fall down and not install to busy place Touching the unit may cause a burn during and after the operation To prevent take measures that putting up a notice of operating making an enclosure etc 8 Handling of power code Do not entangle the power cord This will cause overheating an...

Страница 9: ...Main Unit Control panel Power cord Power cord FP100 Production plate Mounting area for exhaust device unit Earth leakage breaker Cooling fan Furnace casing Door furnace material Independent overheating prevention device l Front view Rear view ...

Страница 10: ...ure is indicated on the main indicator Error Lamp Blinks when any trouble occurs Door Lamp Lights on while the door is open not provided on this unit Standby Lamp Lights on while the device is in standby condition Blinks while it is in startup wait state End Lamp Blinks at autostop or end of the program operation Heater Lamp Lights on while the heater is active Fan Lamp Lights on while the fan is ...

Страница 11: ... it works at the temperature of 1010 if the dial is set to 101 and 1110 if set to 111 In case there is a small difference between the set values of temperature for independent overheating prevention device and that of controller the independent overheating prevention device may be activated when the temperature reaches to the set value of controller Set the temperature of independent overheating p...

Страница 12: ...g 2000 09 17 12 01 the fun rotates and the fan lamp lights on 2000 09 17 12 01 STANDBY END HEATER FAN FIXED TEMP AUTO START AUTO STOP PROGRAM NOTE The clock on device is not set at the factory shipment Set the date and time referring to the instruction shown on Page 42 Put clock right Press power key 2000 09 17 12 00 FIXED TEMP AUTO START AUTO STOP PROGRAM POWER MODE PROGRAM NU Pressing the power ...

Страница 13: ...sub indicator displays standing by and the standby lamp lights on This state is called the standby state Pressing the power key again turns off the power Setting with jog dial Jog dial is used to select the operation mode or to set temperature and clock Turn jog dial Turning to clockwise plus Turning to counterclockwise minus Press jog dial Pressing the jog dial determines the setting and shows th...

Страница 14: ...P OP mode choice STANDBY END HEAT FAN FIXED TEMP AUTO START AUTO STOP PROGRAM The operation mode on the sub indicator blinks and the corresponding lamp blinks The indication can be changed in the order of Fixed temperature operation Auto start Auto stop program operation by turning the jog dial to the right The corresponding lamp also blinks Press the menu key again to cancel the selection The ope...

Страница 15: ...to set temperature after the fixed temperature operation is determined The sub indicator indicates Setup Temp The numerical characters that indicate temperature blinks Indicate the desired temperature Setup Temp 0 Fixed temp FIXED TEMP AUTO S TART AUTO S TOP PROGRAM Start operation Pressing the jog dial determines the set temperature and starts the operation Setup Temp1150 Fixed temp FIXED TEMP AU...

Страница 16: ...furnace temperature Setup Temp 1150 2000 09 17 13 25 STANDBY END HEATER FAN FIXED TEMP AUTO START AUTO STOP PROGRAM The current state of temperature control is shown with the indications below at the right end of sub indicator rising falling stable within 2 5 Stop operation Press the power key to stop the operation POWER ...

Страница 17: ... PROGRAM Set temperature The screen displays the window to set temperature after the auto start is determined The sub indicator indicates Setup Temp The numerical characters that indicate temperature blinks Indicate the desired temperature Setup Temp 0 Auto start OP FIXED TEMP AUTO START AUTO STOP PROGRAM Press the jog dial to determine the set temperature Setup Temp 1000 Auto start OP FIXED TEMP ...

Страница 18: ...window Wait Time 30min Auto start OP Start time input window Start Time 13 00 Auto start OP For the input of startup wait time the indication varies as shown below depending on the time range to be indicated Time Range Indication 0minute to 59minutes 0min to 59min 1hour to 99hours59minutes 1h00m to 99h59m 100hours to 999hours 100hr to 999hr Turn the jog dial to set the desired time Wait Time 0min ...

Страница 19: ...up Temp 1000 start rear 10min STANDBY END HEATER FAN FIXED TEMP AUTO START AUTO STOP PROGRAM Start operation The device starts fixed operation when the remaining time shows 0 The standby lamp lights off when the operation is started The sub indicator shows the same indication as in the fixed temperature operation Setup Temp 1000 2000 09 17 12 10 STANDBY END HEATER FAN FIXED TEMP AUTO START AUTO ST...

Страница 20: ...O START AYTO STOP PROGRAM Set temperature The screen displays the window to set temperature after the auto stop is determined The sub indicator indicates Setup Temp and the numerical characters that indicate temperature blinks Setup Temp 0 Auto stop OP FIXED TEMP AUTO START AUTO STOP PROGRAM Press the jog dial to determine the set temperature Setup Temp 1000 Auto stop OP FIXED TEMP AUTO START AUTO...

Страница 21: ...ut window OP time 30min Auto stop OP Operation stop hour input window Stop Hour 13 00 Auto stop OP For the input of operation time the indication varies as shown below depending on the time range to be indicated Time Range Indication 0minute to 59minutes 0min to 59min 1hour to 99hours59minutes 1h00m to 99h59m 100hours to 999hours 100hr to 999hr Turn the jog dial to set the desired time OP time 0mi...

Страница 22: ... function is determined Blinking auto stop lamp lights on and the sub indicator shows the set temperature and remaining time before operation stop Setup Temp 1000 Stop after 30min STANDBY END HEATER FAN FIXED TEMP AUTO START AUTO STOP PROGRAM If the wait function is set the sub indicator indicates Waiting with blinking if the in furnace temperature is lower than set temperature by 3 or more or hig...

Страница 23: ...dicator and then press the dial Program OP OP mode choice FIXED TEMP AUTO START AUTO STOP PROGRAM If no program is set to the device the buzzer sounds and the sub indicator indicates a message In this case register a program with Create New Program refer to the Page 26 and try registration again A program isn t Registered Select program mode number Select the program number with the jog dial and t...

Страница 24: ...e start time is determined In this situation the blinking program lamp changes to lighting and the standby lamp blinks instead The sub indicator shows the program number and remaining time to startup Program P01 Start rear 30min STAND BY END HEATER FAN FIXED TEMP AUTO START AUTO STOP PROGRAM The device starts operation when the remaining time shows 0 The standby lamp lights off when the operation ...

Страница 25: ...on Setup Temp 100 Soak after 30min Waiting state Setup Temp 100 Waiting 30min When a segment in repeating section is executed the segment number and the remaining repeating time are indicated alternately Remaining repeating time Setup Temp 100 Rep rest 10 Complete operation The end lamp blinks when the operation is completed The sub indicator shows the operation end time OP stop time 2000 09 17 15...

Страница 26: ... the power is turned on Press the program key ME PROGRAM The program menu is activated and the screen changes to the function selecting window Prepare Program Entry 0 rest 16 STANDBY END HEATER FAN FIXED TEMP AUTO START AUTO STOP PROGRAM The sub indicator indicates the number of programs already registered and the remaining number of segments Also the function name currently selected is indicated ...

Страница 27: ...uctions for program menu Turn the jog dial to select the desired program menu Press the dial to determine menu The screen changes to the menu input window Cancel operation Press the program key to cancel the program menu selected PROGRAM ...

Страница 28: ...PROGRAM Select program number The screen changes to the program number selecting window The sub indicator indicates Prepare and the number in the screen which shows the program number blinks Turn the jog dial to select the desired program number from P01 to P99 NOTE The program numbers already registered is not indicated here Program number selecting window Prepare P01 Entry 0 rest 16 Press the jo...

Страница 29: ...on window The sub indicator indicates Editing and the number in the screen which shows the program number blinks Turn the jog dial to select the desired program number to be edited The segment number the selected program uses and remaining numbers of segment are indicated at the bottom of sub indicator Program number selecting window Editing P01 Use 5 rest 10 Press the jog dial to determine the nu...

Страница 30: ...gure below The Initial Temperature means the in furnace temperature when executing segment No 1 just after the program operation is started and also means the set temperature of segment executed last in the case other than mentioned above Lamp time Sork time Time Setup temp Temp Start temp The conception of a repeat is shown in the figure below The first execution of the repeat interval is not cou...

Страница 31: ...Wait OFF P01 01 rest 10 Repeat start segment Rep Start S01 P01 01 rest 10 Repeat count Rep count 9999 P01 01 rest 10 Segment addition Append seg P01 01 rest 10 Program end Program End P01 01 rest 10 NOTE The program number and segment number under edition and remaining number of segment are displayed at the bottom of sub indicator Turning the jog dial shows the details for all segments registered ...

Страница 32: ...time is in End or soak time is in Hold Repeat Starting Segment Not indicated when the ramp time is in End or soak time is in Hold Not indicated when it is between the repeat intervals specified with the other segments Repeat Time Not indicated when the repeat starting segment is not indicated or in None Segment Addition Not indicated when the ramp time is in End or soak time is in Hold NOTE The co...

Страница 33: ...k Item selecting window Ramp time STEP P01 01 rest 10 Edit window Ramp time STEP P01 01 rest 10 Turn the jog dial to indicate the desired set item then press it to determine the value and go back to the item selecting Determine input Ramp time 12h34m P01 01 rest 10 Edit window Ramp time 12h34m P01 01 rest 10 Cancel setting Press the program key to cancel the setting The input value is cancelled an...

Страница 34: ...remaining number of segment decreases The screen goes back to the item selecting and the ramp time corresponding to the added segment number is indicated Segment addition Append Seg P01 01 rest 10 Edit window Ramp time STEP P01 02 rest 9 The initial settings of newly added segment are listed below The settings of first segment when creating new program are the same as them Item Initial value Note ...

Страница 35: ...program edition Select the Program End on the items selecting window and then press the jog dial Program End P01 01 rest 10 FIXED TEMP AUTO START AUTO STOP PROGRAM NOTE Pressing the program key on the item selecting window is also possible ...

Страница 36: ...UTO STOP PROGRAM Select program number The screen changes to the program number selecting window Turn the jog dial to select the desired program number to be deleted then press it program number selecting window Delete P01 Use 5 rest 10 Check the number and select Yes The screen changes to the window to check the program number Make sure that the correct program number to be deleted is indicated a...

Страница 37: ...bration offset temperature 40 5 Total Operating Hours Indicates the total operating hours 41 6 Date Time Sets the date and time 42 7 Communication Lock out Mode Sets the communication lock out mode 44 Select item from function menu Make sure that the power is on Press the mode key PROGR MODE The function menu is activated and the item selection window appears Timer mode time STANDBY END HEATER FAN...

Страница 38: ... lock mode OFF Buzzer mode Buzzer mode ON P01 01 rest 10 Calibration offset Calibrate 0 Total operating hours Acc Time 49999hr Date Time Date 2000 12 31 Time 23 59 Communication lock out mode Comm Lockout OFF Press the jog dial to select the function with the mode indicated Cancel function setting Press the mode key again to cancel the item selection PROGR MODE ...

Страница 39: ...D TEMP AUTO START AUTO STOP PROGRAM Select Time Clock The cursor disappears and the current mode blinks Turn the jog dial to indicate time or Clock Timer mode time Timer mode Clock Determine mode Press the jog dial Timer mode Clock FIXED TEMP AUTO START AUTO STOP PROGRAM The timer mode is determined and the screen goes back to the item selection window in function menu ...

Страница 40: ...F FIXED TEMP AUTO START AUTO STOP PROGRAM Select ON OFF The cursor disappears and the current mode blinks Turn the jog dial to indicate ON or OFF Key lock mode ON Key lock mode OFF Determine mode Press the jog dial Key lock mode ON FIXED TEMP AUTO START AUTO STOP PROGRAM The key lock mode is determined and the screen goes back to the item selection window in function menu ...

Страница 41: ...N FIXED TEMP AUTO START AUTO STOP PROGRAM Select ON OFF The cursor disappears and the current mode blinks Turn the jog dial to indicate ON or OFF Buzzer mode ON Buzzer mode OFF Determine mode Press the jog dial Buzzer mode OFF FIXED TEMP AUTO START AUTO STOP PROGRAM The buzzer mode is determined and the screen goes back to the item selection window in function menu ...

Страница 42: ...START AUTO STOP PROGRAM Input offset temperature The cursor disappears and the current offset temperature blinks Turn the jog dial to indicate desired temperature Calibrate 0 Calibrate 5 Determine mode Press the jog dial Calibrate 5 FIXED TEMP AUTO START AUTO STOP PROGRAM The calibration offset temperature is determined and the screen goes back to the item selection window in function menu ...

Страница 43: ... Acc Time Acc time 100hr FIXED TEMP AUTO START AUTO STOP PROGRAM The total operating hour from the factory shipment to the current time is indicated Acc Time 100hr NOTE The total operating hour means the total lapsed time when the power of device is not off Standby state startup wait state and operation end state are included in it Press the mode key to cancel the function menu when the check is c...

Страница 44: ... key to stop the operation and reset the clock Turn the jog dial on the item selection window in function menu to indicate the Date and Time Date 1999 09 22 Time 17 30 FIXED TEMP AUTO START AUTO STOP PROGRAM The window indicates the current date and time Date 2000 09 22 Time 17 30 Turning the jog dial moves the cursor on the window in the order of Year Month Date Hour and Minute Date 2000 09 22 Ti...

Страница 45: ...ars and the current set value blinks Turn the jog dial to change the value Date 2000 09 22 Time 17 30 Date 2001 09 22 Time 17 30 Press the jog dial Date 2001 09 22 Time 17 30 FIXED TEMP AUTO START AUTO STOP PROGRAM The setting is determined and the window goes back to the item selection window in function menu ...

Страница 46: ...N FIXED TEMP AUTO START AUTO STOP PROGRAM Select ON OFF The cursor disappears and the current mode blinks Turn the jog dial to indicate ON or OFF Comm Lockout ON Comm Lockout OFF Determine mode Press the jog dial Comm lockout ON FIXED TEMP AUTO START AUTO STOP PROGRAM The communication lockout mode is determined and the screen goes back to the item selection window in function menu ...

Страница 47: ...perature In Fig 2 DSV is a display temperature of the operation panel under the condition that the temperature in the chamber is constant for a set temperature It is natural to say that this value is equal to the target set temperature DPV is a measurement temperature of a voluntary point in the chamber under this condition The difference between DPV and DSV including the sign is defined as the ca...

Страница 48: ...ve when the earth leakage breaker is ON When the independent overheating prevention device is activated Er 07 blinks on the main indicator with the ERROR lamp blinks Activation Setting Method Usually set the temperature 100 higher than the set temperature of the controller In the case of the program operation set it at least 100 higher than the maximum set value of the temperature pattern of the p...

Страница 49: ...epending on the quantity of sample or an ambient temperature Use the data for temperature rise fall when creating programs Temperature rising characteristics in FP series 0 200 400 600 800 1000 1200 1400 0 20 40 60 80 100 120 lapsed time min in furnace temp Temperature falling characteristics in FP series 0 500 1000 0 2 4 6 8 10 lapsed time hour in furnace temp FP410 FP310 FP100 FP300 FP100 FP300 ...

Страница 50: ...a thunderstorm turn off the power key immediately then turn off the circuit breaker and the main power If this procedure is not followed fire or electrical shock may be caused About the amount of samples If the excessive amount of sample is set it could be impossible to control the temperature normally To keep the temperature control accuracy do not use this unit in overload Return after power fai...

Страница 51: ... sensor on this unit R thermocouple is very sensitive Do not contact it to samples when loading or unloading them Do not touch the sensor with bare hands which may cause the degradation Sensor corrosion The sensor used on this unit can be corroded at high temperature with reducing substances such as alkali metal metal steam metal oxide carbon monoxide carbon phosphorus selenium or arsenicum or oth...

Страница 52: ...he red test switch by a ballpoint pen etc 4 If there is no problem the earth leakage breaker will be turned off Check the movement of overheating prevention device Perform the fixed temperature operation of device with certain preset temperature Then set the operation temperature of overheating prevention device to the value approximately 5 lower than the preset temperature of device In normal con...

Страница 53: ...idering to the environmental protection The feature components of this unit and materials used are listed below Component Name Material Main body Body Steel Melamine Epoxy composite resin coating Stainless steel SUS304 Furnace and Door Ceramic fiber Plates Polyethylene PET resin film Electrical Parts Switch Relays Resin Copper and other composites Operation panel Alkyl benzene sulfide ABS Board Gl...

Страница 54: ...error Communication Er Ex a connection Er 01 Temperature sensor error Sensor Error Calls a service Er 02 TRIAC short circuit SSR Error Calls a service Er 03 Heater disconnection Heat Error Calls a service Er 07 Independent overheating protection device is activated Overheat Error Calls a service Er 08 Timer element error Controller Er Calls a service Er 10 Main relay error Main relay Er Calls a se...

Страница 55: ...nnection Contact to our service division Triac short circuit detector Prevents overtemperature due to heater uncontrollability Heater circuit is cut off Warning buzzer ERROR lamp lights on Er 02 is indicated Triac short circuit Contact to our service division Main relay defect detector Gives a warning against incapability Heater circuit is cut off Warning buzzer ERROR lamp lights on Er 10 is indic...

Страница 56: ...tion of the controller Instable indication of temperature Bad condition of the sensor Replace the part Noisy Cooling fan deterioration Replace the part Please contact to the shop of your purchase or nearest branch office of Yamato Science for the troubleshooting of items with the mark When an error occurs In case these error code mentioned above is displayed recode the error code and shut off the ...

Страница 57: ...ales office Check following items before contact Model Name of Product Production Number Purchase Date About Trouble in detail as possible Minimum Retention Period of Performance Parts for Repair The minimum retention period of performance parts for repair of this unit is 7 years after discontinuance of this unit The performance part for repair is the part that is required to maintain this unit Se...

Страница 58: ...n Triac short circuit Automatic overheating prevention Sensor R thermocouple W sensor Heater Pyromax Nominal capacity of heater 1 1KW 2 4KW 2 4KW 3 25KW Cooling fan Condenser motor 14W Exhaust opening Internal diameter φ18 Furnace casing Single piece vacuum ceramic fiber Internal dimensions W D H mm Approx 100 150 100 Approx 200 250 150 Approx 200 250 150 Approx 300 250 150 External dimensions 2 W...

Страница 59: ...ng Diagram FP100 FP300 Symbol Part name Symbol Part name ELB Earth leakage breaker P1 Terminal block FM Fan motor X1 Relay CN Connector Tr Transformer F Fuse OH Independent overheating prevention device AC220 ...

Страница 60: ...iring Diagram FP310 FP410 Symbol Part name Symbol Part name ELB Earth leakage breaker P1 Terminal block FM Fan motor X1 Relay CN Connector Tr Transformer F Fuse OH Independent overheating prevention device ...

Страница 61: ...entific FP100 Part Name Code No Specification Manufacturer SSR 2160000026 YLT SSR 01 Yamato Scientific Power code DN003 T2 3c Yamato Scientific Earth leakage breaker 2060000020 FG32R 20 30MA 20A Fuji Denki Thermal fuse 2100030002 100V 15A 180 Sakaguchi Dennetsu Tranceformer 2180000040 IVCR2 220V Yamato Scientific Fan motor 2150000010 UF12A10BTH FULLTECH Heater A FP21S32180 Hachikou Syoji Heater B ...

Страница 62: ... pieces FP32S40120 Yamato Scientific Fiber for the bottom FP31S41431 Yamato Scientific Fiber for the rear FP31S41440 Yamato Scientific FP310 Part Name Code No Specification Manufacturer SSR 2160000026 YLT SSR 01 Yamato Scientific Power code 2130010010 T3 3d Yamato Scientific Earth leakage breaker 2060000020 FG32R 20 30MA 20A Fuji Denki Thermal fuse 2100030003 200V 15A 180 Sakaguchi Dennetsu Trance...

Страница 63: ...o Scientific Fan motor 2150040007 4715PS 20T b30 100 Minebea Heater C FP41S42280 Hachikou Syoji Heater D FP41S42290 Hachikou Syoji Heater E 2 pieces FP41S42300 Hachikou Syoji Door furnace material FP41030110 FP400 type Nichiasu Furnace material FP41S22010 FP400 type Nichiasu Furnace port material FP41S32051 FP400 type Nichiasu Furnace front plate FP41S32040 FP400 type Kurata Taika Fiber for ceilin...

Страница 64: ...um perchlorate and other perchlorate Potassium peroxide Sodium peroxide Barium peroxide and other inorganic peroxide Potassium nitrate Sodium nitrate Ammonium nitrate and other nitrate Sodium chlorite and other chlorites OXIDIZING Calcium hypochlorite and other hypochlorites Ethyl ether Gasoline Acetaldehyde Propylene chloride Carbon disulfide and other flammable substances having a flash point of...

Страница 65: ...nt forbids Unexpected accidents or breakdown may result in Note The contents of this document may be changed in future without notice Any books with missing pages or disorderly binding may be replaced Instruction Manual for Muffle Furnace Model FP100 300 310 410 First Edition Jan 30 2001 Yamato Scientific Co Ltd 2 1 6 Nihonnbashi Honcho Chuo ku Tokyo 103 8432 Japan Customer Support Center toll fre...

Отзывы: