


30
AZ7000SDR-8, 7500SDR-8
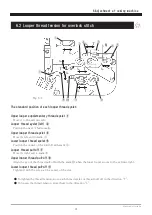
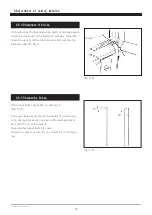
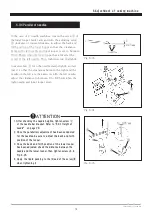
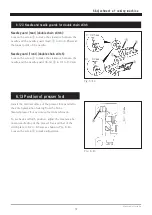
6.9.3 Distance between needle and lower looper
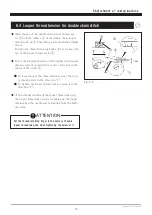
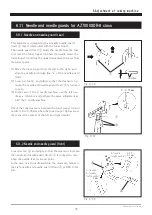
6.9.2 Installing angle of lower looper
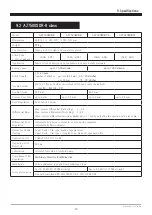
The standard installation angle of lower looper ① is value
A in Table 12 .
Make adjustment by loosening the screw ② to make the
height difference between the rear and the tip of the lower
looper to value B in Table 12. (Fig. 6-21)
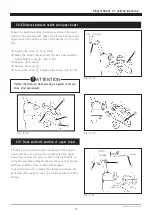
Fig. 6-22
Rotate the machine pulley clockwise and move the lower
looper ① to the extreme left. Make the distance between
the lower looper tip and the center of the needle to 3.3 to
3.8 mm.
Loosen the screw ③ on the lower looper holder to adjust
it.
Table 11
6.Adjustment of sewing machine
Table 12
AZ7000SDR-8 class
single needle
AZ7020SDR-8 class
AZ7120SDR-8 class
2-needle
AZ7500SDR-8/-31 class
AZ7520SDR-8/-31 class
Fig. 6-20-1
Fig. 6-20-4
Fig. 6-20-3
Fig. 6-20-2
N
N
N
N
3.3-3.8㎜
3.3-3.8㎜
①
③
②
Fig. 6-21
A
B
①
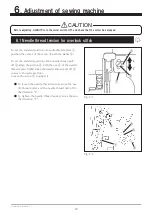
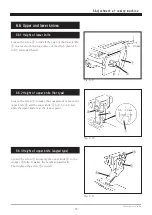
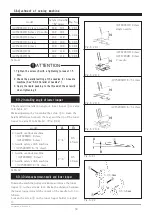
model
height of needle
“N” (mm)
Fig. No.
AZ7000SDR-8 class 1-needle
10.0 - 10.3
6-20-1
AZ7020SDR-8 class 2-needle
10.0 - 10.3
6-20-2
AZ7120SDR-8 class
10.7 - 11.0
AZ7500SDR-8 class
10.0 - 10.3
6-20-3
AZ7520SDR-8 class
10.0 - 10.3
6-20-4
AZ7500SDR-31
10.7 - 11.0
6-20-3
AZ7520SDR-31
10.7 - 11.0
6-20-4
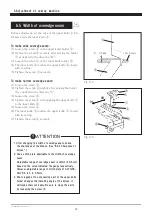
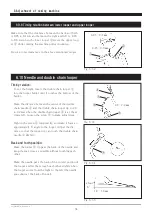
model
A
B
2-needle overlock machine
( AZ7020SDR-8 class,
AZ7120SDR-8 class )
3-needle safety stitch machine
( AZ7520SDR-8/-31 class)
2~4°
0.5 -
1.5 mm
1-needle overlock machine
( AZ7000SDR-8 class )
2-needle safety stitch machine
( AZ7500SDR-8/-31 class )
2~3°
0.5 -
1.0 mm
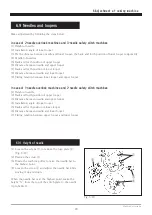
1. Tighten the screw ④ with a tightening torque of 1.5
N・m.
2. Check the parallel setting of the needles for 3-needle
machine (See“6.9.4 Parallel of needles”).
3. Apply the liquid packing to the thread of the screw ③
when tightening it.
ÁÔÔÅÎÔÉÏÎ


