background image

PERIODIC MAINTENANCE AND ADJUSTMENT

7

-

26

7

EAUM2700

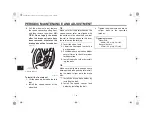
Lubricating the swingarm 
pivots

The swingarm pivots must be lubricat-
ed at the intervals specified in the pe-
riodic  maintenance  and  lubrication
chart.

EAU23272

Checking the front fork

The  condition  and  operation  of  the
front fork must be checked as follows
at the intervals specified in the period-
ic maintenance and lubrication chart.

To check the condition

Check  the  inner  tubes  for  scratches,
damage and excessive oil leakage.

To check the operation

1. Place  the vehicle  on  a  level  sur-

face and hold it in an upright posi-
tion.  WARNING!  To  avoid
injury, securely support the ve-
hicle so there is no danger of it
falling over. 

[EWA10751]

2. While  applying  the  front  brake,

push  down  hard  on  the  handle-
bars several times to check if the
front  fork  compresses  and  re-
bounds smoothly.

ECA10590

NOTICE

If any damage is found or the front
fork  does  not  operate  smoothly,
have a Yamaha dealer check or re-
pair it.

Recommended lubricant:

Molybdenum disulfide grease

54CF8199E1.book  Page 27  Thursday, April 1, 2010  1:24 PM

Содержание YZF-R15

Страница 1: ......

Страница 2: ...Read this manual carefully before operating this vehicle This manual should stay with this vehicle if it is sold EAU46090 54CF8199E1 book Page 1 Thursday April 1 2010 1 24 PM ...

Страница 3: ...ition the many tips given in this manual will help keep your motorcycle in the best possible condition If you have any further questions do not hesitate to contact your Yamaha dealer The Yamaha team wishes you many safe and pleasant rides So remember to put safety first Yamaha continually seeks advancements in product design and quality Therefore while this manual contains the most cur rent produc...

Страница 4: ...l safety messages that follow this symbol to avoid possible injury or death A WARNING indicates a hazardous situation which if not avoided could result in death or serious injury A NOTICE indicates special precautions that must be taken to avoid damage to the vehicle or other property A TIP provides key information to make procedures easier or clearer WARNING NOTICE TIP EAU10122 54CF8199E1 book Pa...

Страница 5: ...0 by India Yamaha Motor Pvt Ltd 1st edition August 2010 All rights reserved Any reprinting or unauthorized use without the written permission of India Yamaha Motor Pvt Ltd is expressly prohibited Printed in India 54CF8199E1 book Page 2 Thursday April 1 2010 1 24 PM ...

Страница 6: ...bricating the cables 7 23 Multi function display 4 3 General maintenance and Handlebar switches 4 4 lubrication chart 7 3 Clutch lever 4 6 Removing and installing the Shift pedal 4 6 cowlings and panel 7 6 Brake lever 4 6 Checking the spark plug 7 7 Brake pedal 4 7 Engine oil and oil filter Fuel tank cap 4 7 element 7 9 Fuel 4 8 Coolant 7 11 Catalytic converter 4 9 Cleaning the air filter element ...

Страница 7: ...Front wheel 7 32 Rear wheel 7 34 Troubleshooting 7 35 Troubleshooting charts 7 36 MOTORCYCLE CARE AND STORAGE 8 1 Matte color caution 8 1 Care 8 1 Storage 8 4 SPECIFICATIONS 9 1 CONSUMER INFORMATION 10 1 Motorcycle noise regulation Identification numbers 10 1 for Australia 10 2 INDEX 11 1 Replacing the tail brake light bulb 7 30 ...

Страница 8: ...f the labels on your vehicle They contain important information for safe and proper operation of your vehicle Never remove any labels from your vehicle If a label becomes difficult to read or comes off a replacement label is available from your Yamaha dealer 1 1 1 ...

Страница 9: ...LOCATION OF IMPORTANT LABELS 1 1 2 1 WARNING Before you operate this vehicle read the owner s manual 2 NOTICE Do not place any combustible material like cloth paper etc near the AIR SCOOP ...

Страница 10: ... page 5 1 for a list of pre operation checks This motorcycle is designed to carry the operator and a passen ger The failure of motorists to detect and recognize motorcycles in traf fic is the predominating cause of automobile motorcycle acci dents Many accidents have been caused by an automobile driver who did not see the motorcycle Making yourself conspicuous ap pears to be very effective in re d...

Страница 11: ...Never ride under the influence of alcohol or other drugs This motorcycle is designed for on road use only It is not suitable for off road use Protective Apparel The majority of fatalities from motorcy cle accidents are the result of head in juries The use of a safety helmet is the single most critical factor in the prevention or reduction of head inju ries Always wear an approved helmet Wear a fac...

Страница 12: ...motorcycle is changed To avoid the possibility of an accident use extreme caution when adding car go or accessories to your motorcycle Use extra care when riding a motorcy cle that has added cargo or accesso ries Here along with the information about accessories below are some general guidelines to follow if loading cargo to your motorcycle The total weight of the operator passenger accessories an...

Страница 13: ...so ries or modifications are not suitable because of potential safety hazards to you or others Installing aftermarket products or having other modifications performed to your vehicle that change any of the vehicle s design or opera tion characteristics can put you and others at greater risk of serious injury or death You are responsible for inju ries related to changes in the vehicle Keep the foll...

Страница 14: ...cifications and more information on replacing your tires Transporting the motorcycle Be sure to observe following instruc tions before transporting the motorcy cle in another vehicle Remove all loose items from the motorcycle Check that the fuel cock if equipped is in the OFF position and that there are no fuel leaks Point the front wheel straight ahead on the trailer or in the truck bed and choke...

Страница 15: ...1 3 EAU10410 Left view 1 Coolant reservoir page 7 11 2 Battery page 7 28 3 Fuse page 7 29 4 Owner s tool kit page 7 1 5 Shift pedal page 4 6 1 DESCRIPTION EAU10401 54CF8199E1 book Page 1 Thursday April 1 2010 1 24 PM ...

Страница 16: ...Front brake fluid reservoir page 7 20 2 Engine oil filter element page 7 9 3 Dipstick page 6 9 4 Idle adjusting screw page 7 13 5 Rear brake fluid reservoir page 7 20 6 Brake pedal page 4 7 54CF8199E1 book Page 2 Thursday April 1 2010 1 24 PM ...

Страница 17: ...e 4 6 2 Left handlebar switches page 4 4 3 Multi function display page 4 3 4 Main switch steering lock page 4 1 5 Tachometer page 4 3 6 Right handlebar switches page 4 5 7 Throttle grip page 7 14 8 Brake lever page 4 6 54CF8199E1 book Page 3 Thursday April 1 2010 1 24 PM ...

Страница 18: ...eering is locked and all electri cal systems are off The key can be re moved To lock the steering 1 Turn the handlebars all the way to the left or right 2 Push the key in from the OFF position and then turn it to LOCK while still pushing it 3 Remove the key To unlock the steering Push the key into the main switch and then turn it to OFF while still pushing it ZAUE0004 OFF LOCK ON 1 Push 2 Turn ZAU...

Страница 19: ...The electrical circuit of the warning light can be checked by turning the key to ON The warning light should come on for a few seconds and then go off If the warning light does not come on initially when the key is turned to ON or if the warning light remains on have a Yamaha dealer check the electrical circuit ECA10021 NOTICE Do not continue to operate the en gine if it is overheating TIP For rad...

Страница 20: ...he rid er to monitor the engine speed and keep it within the ideal power range When the key is turned to ON the ta chometer needle will sweep once across the r min range and then return to zero r min in order to test the electri cal circuit ECA10031 NOTICE Do not operate the engine in the ta chometer red zone Red zone 10500 r min and above EAUE0360 Multi function display EWA12312 WARNING Be sure t...

Страница 21: ... the fuel re serve tripmeter mode F TRIP and start counting the distance traveled from that point and the last segment of the fuel meter will start flashing The fuel reserve tripmeter will reset itself automatically and the display will re turn to the prior mode after refueling and traveling 5 km 3 mi Fuel meter The fuel meter indicates the amount of fuel in the fuel tank The display seg ments of ...

Страница 22: ...al a left hand turn push this switch to When released the switch returns to the center position To cancel the turn sig nal lighs push the switch in after it has returned to the center position Engine stop switch Set this switch to before starting the engine Set this switch to to stop the engine in case of an emer gency such as when the vehicle over turns or when the throttle cable is stuck Start s...

Страница 23: ...tch switch which is part of the ignit ion circuit cut off system See page 4 11 EAU12870 Shift pedal The shift pedal is located on the left side of the engine and is used in com bination with the clutch lever when shifting the gears of the 6 speed con stant mesh transmission equipped on this motorcycle EAU12890 Brake lever The brake lever is located at the right handlebar grip To apply the front br...

Страница 24: ...To install the fuel tank cap 1 Push the fuel tank cap into posi tion with the key inserted in the lock 2 Turn the key counterclockwise to the original position and then remove it 3 Close the lock cover TIP The fuel tank cap cannot be installed unless the key is in the lock In addi tion the key cannot be removed if the cap is not properly installed and locked EWA11141 WARNING Make sure that the fue...

Страница 25: ...mediately wipe off spilled fuel with a clean dry soft cloth since fuel may deteriorate painted surfac es or plastic parts ECA10071 4 Be sure to securely close the fuel tank cap EWA15151 WARNING Gasoline is poisonous and can cause injury or death Handle gaso line with care Never siphon gaso line by mouth If you should swallow some gasoline or inhale a lot of gasoline vapor or get some gasoline in y...

Страница 26: ...he vehicle in a place where pedestrians or children are not likely to touch the hot exhaust system Make sure that the exhaust system has cooled down be fore doing any maintenance work Do not allow the engine to idle more than a few minutes Long idling can cause a build up of heat ECA10701 NOTICE Use only unleaded gasoline The use of leaded gasoline will cause ic converter EAU13790 Seat To remove t...

Страница 27: ...cated under the seat To secure a helmet to the helmet holder 1 Remove the seat See page 4 9 2 Attach the helmet to the helmet holder and then securely install the seat WARNING Never ride with a helmet attached to the helmet holder since the helmet may hit objects causing loss of control and possibly an acci dent EWA10161 To release the helmet from the helmet holder Remove the seat remove the helme...

Страница 28: ...trol Yamaha s ignition circuit cut off system has been designed to assist the operator in fulfilling the respon sibility of raising the sidestand be fore staring off Therefore check this system regularly as described below and have a Yamaha dealer re pair it if it does not function proper ly EAU44892 Ignition circuit cut off system The ignition circuit cut off system com prising the sidestand swit...

Страница 29: ...le should not be ridden until checked by a Yamaha dealer NO YES With the engine still running 6 Move the sidestand up 7 Keep the clutch lever pulled 8 Shift the transmission into gear 9 Move the sidestand down Does the engine stall The clutch switch may not be working correctly The motorcycle should not be ridden until checked by a Yamaha dealer The system is OK The motorcycle can be ridden YES NO...

Страница 30: ...l level in fuel tank Refuel if necessary Check fuel line for leakage 4 8 Engine oil Check oil level in engine If necessary add recommended oil to specified level Check vehicle for oil leakage 7 9 Coolant Check coolant level in reservoir If necessary add recommended coolant to specified level Check cooling system for leakage 7 11 Front brake Check operation If soft or spongy have Yamaha dealer blee...

Страница 31: ... operation is smooth Lubricate if necessary 7 23 Drive chain Check chain slack Adjust if necessary Check chain condition Lubricate if necessary 7 21 7 22 Wheels and tires Check for damage Check tire condition and tread depth Check air pressure Correct if necessary 7 15 7 17 Brake and shift pedals Make sure that operation is smooth Lubricate pedal pivoting points if necessary 7 24 Brake and clutch ...

Страница 32: ...ds then go off Neutral indicator light Turn signal indicator light High beam indicator light Coolant temperature warning light Engine trouble warning light ar Failure to familiarize yourself with the controls can lead to loss of con trol which could cause an acciden or injury 2 Shift the transmission into the neutral position See page 6 2 The neutral indicator light should come on If not ask a Yam...

Страница 33: ...s running Inade quate lubrication may damage the transmission Always use the clutch while changing gears to avoid dam aging the engine transmis sion and drive train which are not designed to withstand the shock of forced shifting EAU16800 Tips for reducing fuel consumption Fuel consumption depends largely on your riding style Consider the follow ing tips to reduce fuel consumption Turn the starter...

Страница 34: ...i Avoid prolonged operation above 7500 r min Rev the engine freely through the gears but do not use full throttle at any time NOTICE After 1000 km 600 mi of operation the engine oil must be changed the oil filter car tridge or element replaced and the oil strainer cleaned ECA10321 1000 km 600 mi and beyond The vehicle can now be operated nor mally ECA10310 NOTICE Keep the engine speed out of the t...

Страница 35: ...erform ing maintenance unless otherwise specified A running engine has moving parts that can catch on body parts or clothing and electrical parts that can cause shocks or fires Running the engine while ser vicing can lead to eye injury burns fire or carbon monox ide poisoning possibly lead ing to death See page 2 2 for more information about carbon monoxide EWA15460 WARNING Brake discs calipers dr...

Страница 36: ......

Страница 37: ......

Страница 38: ......

Страница 39: ......

Страница 40: ...emove the screws pull the cowling outward and then take it off 3 Disconnect the turn signal light lead coupler To install the cowling 1 Connect the turn signal light lead coupler 2 Fit the projection on the cowling into the hole and then push the cowling inward 3 Install the screws 4 Install the panel EAUE0370 Cowling B To remove the cowling 1 Remove cowling A and panel A 2 Remove the screws and t...

Страница 41: ...anel off To install the panel 1 Place the panel in the original po sition and then install the nut 2 Install the rider seat EAU19604 Checking the spark plug The spark plug is an important engine component which is easy to check Since heat and deposits will cause any spark plug to slowly erode the spark plug should be removed and checked in accordance with the peri odic maintenance and lubrication ...

Страница 42: ...asure the spark plug gap with a wire thickness gauge and if necessary adjust the gap to specification To install the spark plug 1 Clean the surface of the spark plug gasket and its mating sur face and then wipe off any grime from the spark plug threads 2 Install the spark plug with the spark plug wrench and then tight en it to the specified torque TIP If a torque wrench is not available when insta...

Страница 43: ...insert it back into the oil filler hole without screwing it in and then remove it again to check the oil level NO TICE Do not operate the vehi cle until you know that the engine oil level is sufficient ECA10011 TIP The engine oil should be between the minimum and maximum level marks 4 If the engine oil is below the mini mum level mark add sufficient oil of the recommended type to raise it to the c...

Страница 44: ...l filter element cov er by removing the bolts 6 Remove and replace the oil filter element and O ring 7 Install the oil filter element cover by installing the bolts then tight ening them to the specified torque TIP Make sure that the O ring is properly seated 8 Install the engine oil strainer compression spring O ring and the engine oil drain bolt and then tighten it to the specified torque 1 Engin...

Страница 45: ...d check for the cause 11 Turn the engine off and then check the oil level and correct it if necessary EAU20070 Coolant The coolant level should be checked before each ride In addition the cool ant must be changed at the intervals specified in the periodic maintenance and lubrication chart EAU20092 To check the coolant level 1 Place the vehicle on a level sur face and hold it in an upright posi tio...

Страница 46: ...with coolant as soon as possible otherwise the cooling system will not be protected against frost and corrosion If water has been added to the coolant have a Yamaha dealer check the antifreeze content of the coolant as soon as possible otherwise the effectiveness of the coolant will be reduced ECA10472 EAU33031 Changing the coolant The coolant must be changed at the intervals specified in the peri...

Страница 47: ...cification by turning the idle adjusting screw To in crease the engine idling speed turn the screw in direction a To decrease the engine idling speed turn the screw in direction b TIP If the specified idling speed cannot be obtained as described above have a Yamaha dealer make the adjustment 1 Idle adjusting screw Engine idling speed 1300 1500 r min Air filter element The air filter element must b...

Страница 48: ...n the locknut 2 To increase the throttle cable free play turn the adjusting nut in di rection a To decrease the throt tle cable free play turn the adjusting nut in direction b 3 Tighten the locknut EAU21401 Valve clearance The valve clearance changes with use resulting in improper air fuel mix ture and or engine noise To prevent this from occurring the valve clear ance must be adjusted by a Yamaha...

Страница 49: ...t of rider passen ger cargo and accessories ap proved for this model EWA10511 WARNING Never overload your vehicle Oper ation of an overloaded vehicle could cause an accident Tire inspection The tires must be checked before each ride If the center tread depth reaches the specified limit if the tire has a nail or glass fragments in it or if the sidewall is cracked have a Yama ha dealer replace the t...

Страница 50: ...h cast wheels and tubeless tires with valves EWA10901 WARNING The front and rear tires should be of the same make and de sign otherwise the handling characteristics of the motorcy cle may be different which could lead to an accident Always make sure that the valve caps are securely in stalled to prevent air pressure leakage Use only the tire valves and valve cores listed below to avoid tire deflat...

Страница 51: ...n unbalanced wheel can result in poor performance adverse handling characteristics and a shortened tire life EAU22043 Adjusting the clutch lever free play The clutch lever free play should mea sure 10 0 15 0 mm 0 39 0 59 in as shown Periodically check the clutch lever free play and if necessary ad just it as follows 1 Slide the rubber cover back at the clutch lever 2 Loosen the locknut Front tire ...

Страница 52: ...turn the ad justing nut in direction b 7 Tighten the locknut at the crank case 8 Tighten the locknut at the clutch lever and then slide the rubber cover to its original position EAUT1221 Checking the front brake lever free play The brake lever free play should measure 6 2 18 0 mm 0 24 0 71 in as shown Periodically check the brake lever free play and if necessary have a Yamaha dealer check the brak...

Страница 53: ... chart EAU22440 Front brake pads 1 Remove the front brake caliper by removing the bolts 2 Check each front brake pad for damage and measure the lining thickness If a brake pad is dam aged or if the lining thickness is less than 0 8 mm 0 03 in have a Yamaha dealer replace the brake pads as a set 3 Install the front brake caliper by installing the bolts then tighten ing them to the specified torque ...

Страница 54: ...l ity brake fluid otherwise the rub ber seals may deteriorate causing leakage and poor braking performance Refill with the same type of brake fluid Mixing fluids may result in a harmful chemical reaction and lead to poor braking performance Be careful that water does not en ter the brake fluid reservoir when refilling Water will significantly lower the boiling point of the fluid and may result in ...

Страница 55: ... stand TIP When checking and adjusting the drive chain slack there should be no weight on the motorcycle 2 Shift the transmission into the neutral position 3 Move the rear wheel by pushing the motorcycle to locate the tight est portion of the drive chain and then measure the drive chain slack as shown 4 If the drive chain slack is incor rect adjust it as follows EAUE0440 To adjust the drive chain ...

Страница 56: ...per bracket bolt to their speci fied torques EAUE0140 Cleaning and lubricating the drive chain The drive chain must be cleaned and lubricated at the intervals specified in the periodic maintenance and lubrica tion chart otherwise it will quickly wear out especially when riding in dusty or wet areas Service the drive chain as follows ECA10583 NOTICE The drive chain must be lubricated after washing ...

Страница 57: ...cable to rust Re place a damaged cable as soon as possible to prevent unsafe condi tions EWA10721 EAU23113 Checking and lubricating the throttle grip and cable The operation of the throttle grip should be checked before each ride In addition the cable should be lubri cated by a Yamaha dealer at the inter vals specified in the periodic maintenance chart The throttle cable is equipped with a rubber ...

Страница 58: ...dal The operation of the brake and shift pedals should be checked before each ride and the pedal pivots should be lubricated if necessary EAU23142 Checking and lubricating the brake and clutch levers Brake lever Clutch lever Recommended lubricant Lithium soap based grease 54CF8199E1 book Page 25 Thursday April 1 2010 1 24 PM ...

Страница 59: ...stand pivot and metal to metal contact surfaces should be lubricated if necessary EWA10731 WARNING If the sidestand does not move up and down smoothly have a Yamaha dealer check or repair it Otherwise the sidestand could contact the ground and distract the operator resulting in a possible loss of control Recommended lubricants Brake lever Silicone grease Clutch lever Lithium soap based grease Reco...

Страница 60: ... tubes for scratches damage and excessive oil leakage To check the operation 1 Place the vehicle on a level sur face and hold it in an upright posi tion WARNING To avoid injury securely support the ve hicle so there is no danger of it falling over EWA10751 2 While applying the front brake push down hard on the handle bars several times to check if the front fork compresses and re bounds smoothly E...

Страница 61: ...jury securely support the vehicle so there is no dan ger of it falling over EWA10751 2 Hold the lower ends of the front fork legs and try to move them forward and backward If any free play can be felt have a Yamaha dealer check or repair the steer ing EAU23291 Checking the wheel bearings The front and rear wheel bearings must be checked at the intervals spec ified in the periodic maintenance and l...

Страница 62: ...the battery and pro vide sufficient ventilation when charging it in an enclosed space KEEP THIS AND ALL BATTER IES OUT OF THE REACH OF CHILDREN To charge the battery Have a Yamaha dealer charge the battery as soon as possible if it seems to have discharged Keep in mind that the battery tends to discharge more quickly if the vehicle is equipped with optional electrical accessories ECA16520 NOTICE T...

Страница 63: ...s blown replace it as fol lows 1 Turn the key to OFF and turn off all electrical circuits 2 Remove the blown fuse and then install a new fuse of the specified amperage WARNING Do not use a fuse of a higher amper age rating than recommended to avoid causing extensive damage to the electrical sys tem and possibly a fire EWA15131 3 Turn the key to ON and turn on the electrical circuits to check if th...

Страница 64: ...tail brake light bulb 1 Remove the seat See page 4 9 2 Remove the socket together with the bulb by turning it counter clockwise 3 Remove the burnt out bulb by pushing it in and turning it coun terclockwise 4 Insert a new bulb into the socket push it in and then turn it clock wise until it stops 5 Install the socket together with the bulb by turning it clockwise 6 Install the seat 1 Bulb socket 1 1...

Страница 65: ...to the socket 4 Install the socket together with the bulb by pushing it in EAU24350 Supporting the motorcycle Since this model is not equipped with a centerstand follow these precau tions when removing the front and rear wheel or performing other mainte nance requiring the motorcycle to stand upright Check that the motorcy cle is in a stable and level position be fore starting any maintenance A st...

Страница 66: ...e vehicle so there is no danger of it falling over 1 Loosen the front wheel axle and the brake caliper bolts 2 Lift the front wheel off the ground according to the procedure on page 7 31 3 Remove the speed sensor lead holder by removing the bolt 4 Remove the brake hose holder by removing the bolt 5 Remove the brake caliper by re moving the bolts 1 Axle nut 1 Speed sensor cable 1 Brake hose holder ...

Страница 67: ... fits over the retainer on the fork leg 3 Insert the wheel axle 4 Lower the front wheel so that it is on the ground 5 Push down hard on the handlebar several times to check for proper fork operation 6 Install the brake caliper by install ing the bolts TIP Make sure that there is enough space between the brake pads before install ing the brake caliper onto the brake disc 7 Install the brake hose ho...

Страница 68: ...up ward enough to remove the drive chain from the rear sprocket The drive chain cannot be disas sembled 6 While supporting the brake cali per bracket pull the wheel axle out together with the drive chain adjusting plate from the left side of the swingarm and then re move the wheel NOTICE Do not apply the brake after the wheel has been removed to gether with the brake disc oth erwise the brake pads...

Страница 69: ...d easy procedures for checking these vital systems your self However should your motorcycle require any repair take it to a Yamaha dealer whose skilled technicians have the necessary tools experience and know how to service the motorcycle properly Use only genuine Yamaha replace ment parts Imitation parts may look like Yamaha parts but they are often inferior have a shorter service life and can le...

Страница 70: ...heck the vehicle Remove the spark plug and check the electrodes 3 Ignition Wipe off with a dry cloth and correct the spark plug gap or replace the spark plug Have a Yamaha dealer check the vehicle The engine does not start Have a Yamaha dealer check the vehicle The engine does not start Check the battery Operate the electric starter 4 Battery The engine turns over quickly The engine turns over slo...

Страница 71: ...ssure to escape When the hissing sound has stopped press down on the cap while turning it counterclockwise and then remove the cap Wait until the engine has cooled Check the coolant level in the reservoir and radiator The coolant level is OK The coolant level is low Check the cooling system for leakage Have a Yamaha dealer check and repair the cooling system Add coolant See TIP Start the engine If...

Страница 72: ... its life and optimize its performance Before cleaning 1 Cover the muffler outlet with a plastic bag after the engine has cooled down 2 Make sure that all caps and covers as well as all electrical couplers and connectors including the spark plug cap are tightly in stalled 3 Remove extremely stubborn dirt like oil burnt onto the crankcase with a degreasing agent and a brush but never apply such pro...

Страница 73: ...he product on a small hidden part of the wind shield to make sure that it does not leave any marks If the wind shield is scratched use a quali ty plastic polishing compound after washing _ After normal use Remove dirt with warm water a mild detergent and a soft clean sponge and then rinse thoroughly with clean water Use a toothbrush or bottlebrush for hard to reach areas Stubborn dirt and insects ...

Страница 74: ...e brakes or tires can cause loss of control Make sure that there is no oil or wax on the brakes or tires If necessary clean the brake discs and brake linings with a regular brake disc cleaner or ac etone and wash the tires with warm water and a mild deter gent Before riding at higher speeds test the motorcycle s braking performance and cor nering behavior _ ECA10800 NOTICE _ Apply spray oil and wa...

Страница 75: ...orating 5 Perform the following steps to pro tect the cylinder piston rings etc from corrosion a Remove the spark plug cap and spark plug b Pour a teaspoonful of engine oil into the spark plug bore c Install the spark plug cap onto the spark plug and then place the spark plug on the cylinder head so that the electrodes are grounded This will limit spark ing during the next step d Turn the engine o...

Страница 76: ...and charge it once a month Do not store the battery in an ex cessively cold or warm place less than 0 C 30 F or more than 30 C 90 F For more informa tion on storing the battery see page 7 28 TIP _ Make any necessary repairs before storing the motorcycle _ 54BF8199E0 book Page 5 Friday July 9 2010 1 17 PM ...

Страница 77: ...ard MA Engine oil quantity Without oil filter element replacement 0 95 L 1 00 US qt 0 84 Imp qt with oil filter element replacement 1 00 L 1 06 US qt 0 88 Imp qt 20 10 0 10 20 30 40 0 50 C SAE 10W 30 SAE 10W 40 SAE 10W 50 SAE 15W 40 SAE 20W 40 SAE 20W 50 Cooling system Coolant reservoir capacity up to the maximum level mark 0 25 L Radiator capacity including all routes 0 59 L 73 24 3 042 Transmiss...

Страница 78: ...n Recommended fluid DOT 3 or DOT 4 DOT 3 or DOT 4 Front suspension Type Telescopic fork Spring shock absorber type Coil spring oil damper Wheel travel 130 0 mm Rear suspension Type Swingarm link suspension Spring shock absorber type Coil spring oil damper Wheel travel 105 0 mm 9 2 Rear tyre Type Tubeless Size 100 80 17M C 52P Manufacturer model MRF ZAPPER Loading Maximum load 200 kg 441 lb accesso...

Страница 79: ... W X 2 Front turn signal light 12 V 10 0 W X 2 Rear turn signal light 12 V 10 0 W X 2 Position light 12 V 5 0 W X 2 Meter lighting LED Neutral indicator light LED High beam indicator light LED Turn signal indicator light LED Coolant temperature warning light LED Fuse Main fuse 20 0 A Engine trouble warning light LED Til brake light 12V 5 0 W 21 0W X 1 9 ...

Страница 80: ...e vehicle identification number is stamped into the frame TIP The vehicle identification number is used to identify your motorcycle and may be used to register your motorcy cle with the licensing authority in your area EAU26470 Model label 1 Vehicle identification number ZAUE0143 xx xx xx x xx xx xx x 1 1 Model label 1 CONSUMER INFORMATION EAU26344 The model label is affixed to the frame under the...

Страница 81: ...l or rendering inipera tive by any person other than for purposes of maintenance repair or replacement of any device or element of design incorporated into any new vehicle for the pur pose of noise control prior to its sale or delivery to the ultimate pur chaser or while it is in use and b The use of the vehicle after such device or element of design has been removed or rendered inoper ative by an...

Страница 82: ...ting 7 23 I Care 8 1 Identification numbers 10 1 Catalytic converter 4 9 Starting circuit cut off system 4 11 Ignition circuit cut off system 4 11 Clutch lever 4 6 Steering checking 7 27 Indicator and warning lights 4 2 M Coolant 7 11 Main switch steering lock 4 1 Coolant temperature warning light 4 2 Matte color caution 8 1 Cowlings and panel removing and Maintenance emission control installing 7...

Страница 83: ...ER INFORMATION 11 2 11 Turn signal light bulb replacing 7 31 Turn signal switch 4 5 V Valve clearance 7 1 Vehicle identification number 10 1 W Wheel bearing checking 7 27 Wheel front 7 32 Wheel rear 7 34 Wheels 7 17 ...

Страница 84: ...1Y18 OM 01 355 08 10 E ...

Отзывы: