background image

8-55

8

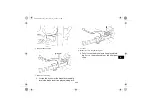
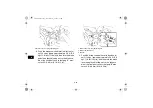
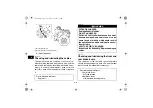
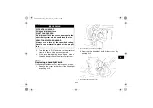
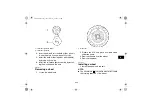
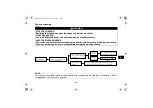
3. Remove the headlight bulb holder by pushing

it in and turning it counterclockwise.

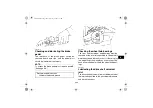
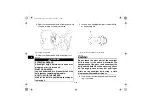
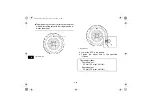
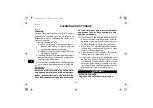
4. Remove the defective bulb by pulling it out.

WARNING

EWB02180

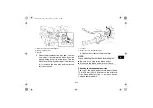
5. Insert a new headlight bulb into the bulb hold-

er by pushing it in.

CAUTION:

ECB00650

Do not touch the glass part of the headlight
bulb to keep it free from oil, otherwise the
transparency of the glass, the luminosity of the
bulb, and the bulb life will be adversely affect-
ed. Thoroughly clean off any dirt and finger-
prints on the headlight bulb using a cloth
moistened with alcohol or thinner.

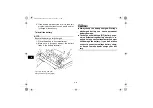
6. Install the bulb holder by pushing it in and turn-

ing it clockwise.

1. Headlight bulb holder

POTENTIAL HAZARD
A headlight bulb is hot when it is on and im-
mediately after it is turned off.
WHAT CAN HAPPEN
You can be burned, or a fire could start if the
bulb touches something flammable.
HOW TO AVOID THE HAZARD
Wait for the bulb to cool before touching or
removing it.

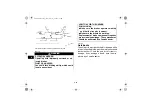
1. Do not touch the glass part of the bulb.

U17S10E0.book  Page 55  Friday, July 6, 2007  1:37 PM

Содержание YFM45FGX

Страница 1: ...READ THIS MANUAL CAREFULLY It contains important safety information This ATV should not be ridden by anyone under 16 years of age WARNING OWNER S MANUAL 17S F8199 10 LIT 11626 21 46 YFM45FGX DIC2342 ...

Страница 2: ...EBU17091 U17S10E0 book Page 1 Friday July 6 2007 1 37 PM ...

Страница 3: ... special tech niques and skills necessary to ride the ATV It also includes basic maintenance and inspection proce dures If you have any questions regarding the operation or maintenance of your ATV please consult a Yamaha dealer AN IMPORTANT SAFETY MESSAGE READ THIS MANUAL TOGETHER WITH TIPS FOR THE ATV RIDER CAREFULLY AND COMPLETE LY BEFORE OPERATING YOUR ATV MAKE SURE YOU UNDERSTAND ALL INSTRUCTI...

Страница 4: ...o change without notice The Safety Alert Symbol means ATTENTION BECOME ALERT YOUR SAFETY IS INVOLVED Failure to follow WARNING instructions could result in severe injury or death to the ATV operator a bystander or a person inspecting or repairing the ATV A CAUTION indicates special precautions that must be taken to avoid damage to the ATV A NOTE provides key information to make procedures easier o...

Страница 5: ...arrester laws and regulations in effect at the time of manufacture Please check your local riding laws and regulations before operating this ATV EBU17401 AFFIX DEALER LABEL HERE YFM45FGX OWNER S MANUAL 2007 by Yamaha Motor Corporation U S A 1st edition June 2007 All rights reserved Any reprinting or unauthorized use without the written permission of Yamaha Motor Corporation U S A is expressly proh...

Страница 6: ...ebar switches 4 5 Throttle lever 4 11 Speed limiter 4 12 Front brake lever 4 13 Brake pedal and rear brake lever 4 14 Drive select lever 4 14 Recoil starter 4 15 Fuel tank cap 4 16 Fuel 4 16 Fuel cock 4 17 Starter choke 4 19 Seat 4 19 Storage compartment 4 20 Front carrier 4 21 Rear carrier 4 22 Adjusting the front and rear shock absorber assemblies 4 22 Trailer hitch 4 23 Auxiliary DC jack 4 24 P...

Страница 7: ...G THROUGH SHALLOW WATER 7 28 RIDING OVER ROUGH TERRAIN 7 30 SLIDING AND SKIDDING 7 31 WHAT TO DO IF 7 32 WHAT TO DO 7 33 PERIODIC MAINTENANCE AND MINOR REPAIR 8 1 Owner s manual and tool kit 8 1 Periodic maintenance chart for the emission control system 8 3 General maintenance and lubrication chart 8 5 Removing and installing panels 8 9 Checking the spark plug 8 14 Engine oil and oil filter cartri...

Страница 8: ...48 Checking the wheel hub bearings 8 48 Lubricating the drive shaft universal joint 8 48 Checking the stabilizer bushes 8 49 Lubricating the rear knuckle pivots 8 49 Lubricating the steering shaft 8 49 Battery 8 50 Replacing a fuse 8 52 Replacing a headlight bulb 8 54 Adjusting a headlight beam 8 56 Replacing the tail brake light bulb 8 56 Removing a wheel 8 58 Installing a wheel 8 58 Troubleshoot...

Страница 9: ...should never oper ate an ATV with engine size greater than 90 cc Never allow a child under age 16 to operate an ATV without adult supervision and never allow continued use of an ATV by a child if he or she does not have the abilities to operate it safely Never carry a passenger on an ATV Always avoid operating an ATV on any paved surfaces including sidewalks driveways park ing lots and streets Nev...

Страница 10: ...limbing hills as described in this manual Check the ter rain carefully before you start up any hill Never climb hills with excessively slippery or loose sur faces Shift your weight forward Never open the throttle suddenly Never go over the top of a hill at high speed Always follow proper procedures for going down hills and for braking on hills as described in this manual Check the terrain carefull...

Страница 11: ...n fast flowing water or in water deeper than that recommended in this manual Remember that wet brakes may have reduced stopping ability Test your brakes after leaving water If necessary apply them several times to let friction dry out the linings Always be sure there are no obstacles or people behind you when you operate in reverse When it is safe to proceed in reverse go slowly Always use the siz...

Страница 12: ...e pilot lights of water heaters and clothes dryers When transporting the ATV in another vehi cle be sure it is kept upright and that the fuel cock is in the OFF position Other wise fuel may leak out of the carburetor or fuel tank WHAT CAN HAPPEN Gasoline is poisonous and can cause inju ries HOW TO AVOID THE HAZARD If you should swallow some gasoline or in hale a lot of gasoline vapor or get some g...

Страница 13: ...haust fumes are poisonous and may cause loss of consciousness and death within a short time HOW TO AVOID THE HAZARD Always operate your ATV in an area with ad equate ventilation U17S10E0 book Page 5 Friday July 6 2007 1 37 PM ...

Страница 14: ...2 1 2 EBU17660 LOCATION OF THE WARNING AND SPECIFICATION LABELS U17S10E0 book Page 1 Friday July 6 2007 1 37 PM ...

Страница 15: ...TV These labels contain important information for safe and proper operation Never remove any labels from your ATV If a label becomes difficult to read or comes off request a replace ment label from your Yamaha dealer U17S10E0 book Page 2 Friday July 6 2007 1 37 PM ...

Страница 16: ...2 3 2 U17S10E0 book Page 3 Friday July 6 2007 1 37 PM ...

Страница 17: ...2 4 2 U17S10E0 book Page 4 Friday July 6 2007 1 37 PM ...

Страница 18: ...cap 10 Oil filter cartridge 11 Coolant reservoir 12 V belt cooling duct check hose 1 Trailer hitch receiver 2 Rear shock absorber assembly spring preload adjusting ring 3 Spark arrester 4 Storage compartment and tool kit 5 Spark plug 6 Front shock absorber assembly spring preload adjusting ring 7 Rear brake light switch 8 Brake pedal 9 V belt case drain plug U17S10E0 book Page 1 Friday July 6 2007...

Страница 19: ...n in this manual 1 Rear brake lever 2 Handlebar switches 3 Starter choke 4 Drive select lever 5 Multifunction display 6 Main switch 7 Fuel tank cap 8 Auxiliary DC jack 9 On Command four wheel drive differential gear lock switch 10 Throttle lever 11 Front brake lever U17S10E0 book Page 2 Friday July 6 2007 1 37 PM ...

Страница 20: ...ain switch The positions of the main switch are as follows ON All electrical systems are supplied with power The headlights and taillight come on when the light switch is on and the engine can be started The key cannot be removed OFF All electrical systems are off The key can be re moved 1 Main switch U17S10E0 book Page 1 Friday July 6 2007 1 37 PM ...

Страница 21: ...n is in the neutral position EBU17920 Coolant temperature warning light This warning light comes on when the engine over heats When this occurs during operation stop the engine as soon as it is safe to do so and allow it to cool down for about 10 minutes CAUTION ECB00010 The engine may overheat if the ATV is over loaded In this case reduce the load to spec ification 1 On Command differential gear ...

Страница 22: ...mmand differential gear lock switch is set to LOCK the indicator will flash until the differential gear is locked EBU17970 Park indicator light This indicator light comes on when the transmis sion is in the park position EBU17980 High range indicator light This indicator light comes on when the transmis sion is in the high range position EBU17990 Low range indicator light This indicator light come...

Страница 23: ...RIP B ODO To reset a tripmeter select it by pushing the TRIP ODO button and then push the TRIP ODO button for at least three seconds The tripmeters can be used to estimate the distance that can be traveled with a full tank of fuel This in formation will enable you to plan future fuel stops NOTE Holding in the TRIP ODO button and then turning the key to ON switches the display between mph and km h ...

Страница 24: ...el gauge indicates the amount of fuel in the fuel tank When the needle reaches the red line re fill the tank at the first opportunity NOTE If the ATV runs out of fuel move the fuel cock lever to the RES position Approximately 4 5 L 1 19 US gal 0 99 Imp gal of fuel will be remaining in the tank EBU18061 Handlebar switches 1 Fuel gauge 2 Red line 1 Light switch OFF 2 Start switch 3 Engine stop switc...

Страница 25: ...his switch to to turn on the low beams and the taillight Set the switch to to turn on the high beams and the taillight Set the switch to OFF to turn off all the lights CAUTION ECB00040 Do not use the headlights with the engine turned off for an extended period of time oth erwise the battery may discharge to the point that the starter motor will not operate properly If this should happen remove the...

Страница 26: ...hange from two wheel drive to four wheel drive and vice versa Select the appropriate drive according to the ter rain and the conditions 2WD two wheel drive Power is supplied to the rear wheels POTENTIAL HAZARD Riding too fast while the ATV is in four wheel drive differential gear lock WHAT CAN HAPPEN All wheels turn at the same speed when the differential is locked so it takes more effort to turn ...

Страница 27: ...ing from two wheel drive to four wheel drive or from four wheel drive to two wheel drive while the ATV is moving WHAT CAN HAPPEN The ATV handles differently in two wheel drive than in four wheel drive in some cir cumstances Changing from two wheel drive to four wheel drive or from four wheel drive to two wheel drive while moving may cause the ATV to unexpectedly handle differently This could distr...

Страница 28: ...rive all wheels turn at the same speed To lock the differential gear in four wheel drive make sure the On Command four wheel drive switch is pushed in to the 4WD position Stop the ATV move the differential gear lock lever to position a and then push the differential gear lock switch in to the LOCK position When the dif ferential gear is locked the differential gear lock in dicator DIFF LOCK will c...

Страница 29: ...ATV handles differently in four wheel drive than in differential gear lock in some circumstances Changing from four wheel drive to differential gear lock or vice versa while moving may cause the ATV to handle differently unexpectedly This could distract the operator and increase the risk of losing control and causing an accident HOW TO AVOID THE HAZARD Always stop the ATV before changing from four...

Страница 30: ...ee page 4 6 for a detailed explanation of this switch EBU18270 Throttle lever Once the engine is running movement of the throt tle lever will increase the engine speed Regulate the speed of the ATV by varying the throttle position Because the throttle is spring loaded the ATV will decelerate and the engine will return to an idle any time the hand is removed from the throttle lever POTENTIAL HAZARD...

Страница 31: ...V turn the adjusting screw in direction a To de crease the maximum engine power available and the maximum speed of the ATV turn the adjusting screw in direction b 1 Throttle lever POTENTIAL HAZARD Malfunction of throttle WHAT CAN HAPPEN The throttle could be hard to operate mak ing it difficult to speed up or slow down when you need to This could cause an acci dent HOW TO AVOID THE HAZARD Check th...

Страница 32: ...TIAL HAZARD Improper adjustment of the speed limiter and throttle WHAT CAN HAPPEN The throttle cable could be damaged Im proper throttle operation could result You could lose control have an accident or be in jured HOW TO AVOID THE HAZARD Do not turn the adjusting screw out more than 12 mm 0 47 in Always make sure the throttle lever free play is adjusted to 3 0 5 0 mm 0 12 0 20 in See page 8 37 1 ...

Страница 33: ...brake pedal or pull the brake lever toward the handlebar grip EBU18611 Drive select lever The drive select lever is used to shift your ATV into the low range high range neutral reverse and park positions See the Operating the drive select lever and driving in reverse section on page 6 3 for the drive select lever operation 1 Brake pedal 1 Rear brake lever U17S10E0 book Page 14 Friday July 6 2007 1...

Страница 34: ...NG EWB00290 1 Drive select lever 1 Recoil starter POTENTIAL HAZARD Starting the engine without setting the drive select lever to the park position WHAT CAN HAPPEN The ATV could start to move unexpectedly which could cause an accident HOW TO AVOID THE HAZARD Set the drive select lever to the park position before starting the engine U17S10E0 book Page 15 Friday July 6 2007 1 37 PM ...

Страница 35: ...ficient fuel in the tank Fill the fuel tank to the bottom of the filler tube as shown 1 Fuel tank cap 1 Fuel level 2 Fuel tank filler tube Recommended fuel UNLEADED GASOLINE ONLY Fuel tank capacity 15 0 L 3 96 US gal 3 30 Imp gal Fuel reserve amount 4 5 L 1 19 US gal 0 99 Imp gal U17S10E0 book Page 16 Friday July 6 2007 1 37 PM ...

Страница 36: ...asohol containing methanol is not recommended by Yamaha be cause it can cause damage to the fuel system or ATV performance problems WARNING EWB00270 EBU18820 Fuel cock The fuel cock supplies fuel from the tank to the car buretor while also filtering it The fuel cock lever positions are explained as fol lows and shown in the illustrations POTENTIAL HAZARD Improper care when refueling WHAT CAN HAPPE...

Страница 37: ...to this position when the engine is not running ON With the fuel cock lever in this position fuel flows to the carburetor Turn the fuel cock lever to this position when starting the engine and riding 1 Arrow mark pointing to OFF 1 Arrow mark pointing to ON U17S10E0 book Page 18 Friday July 6 2007 1 37 PM ...

Страница 38: ...choke Starting a cold engine requires a richer air fuel mix ture which is supplied by the starter choke Move the starter choke in direction a to turn on the starter choke Move the starter choke in direction b to turn off the starter choke See the Starting a cold engine section on page 6 1 for proper operation EBU18880 Seat To remove the seat Pull the seat lock lever upward and pull up the seat at ...

Страница 39: ...1 Storage compartment The storage compartment is located under the seat See page 4 19 When storing any documents in the storage com partment be sure to wrap them in a plastic bag so that they will not get wet When washing the ATV be careful not to let any water enter the storage compartment 1 Seat 2 Seat lock lever 1 Projection 2 Seat holder U17S10E0 book Page 20 Friday July 6 2007 1 37 PM ...

Страница 40: ...ompartment Do not exceed the maximum load of 210 0 kg 463 lb for the ATV NOTE There is a check hose at the bottom of the storage compartment If any water collects in this hose re move the hose empty it and then install it EBU18960 Front carrier Do not exceed the load limit of 40 0 kg 88 lb for the front carrier Do not exceed the maximum load of 210 0 kg 463 lb for the ATV 1 Storage compartment 1 S...

Страница 41: ...o suit the rid er s weight and the riding conditions Adjust the spring preload as follows Turn the adjusting ring in direction a to increase the spring preload and thereby harden the suspen sion and in direction b to decrease the spring preload and thereby soften the suspension NOTE A special wrench can be obtained at a Yamaha dealer to make this adjustment 1 Spring preload adjusting ring 2 Positi...

Страница 42: ...ecial wrench Spring preload setting Minimum soft 1 Standard 2 Maximum hard 5 POTENTIAL HAZARD Improper shock absorber assembly adjust ment WHAT CAN HAPPEN Uneven adjustment can cause poor handling and loss of stability which could lead to an accident HOW TO AVOID THE HAZARD Always adjust the shock absorber assem blies on the left and right side to the same setting U17S10E0 book Page 23 Friday July...

Страница 43: ...lights radios etc The auxiliary DC jack should only be used when the engine is running 1 Set the light switch to OFF 2 Start the engine See page 6 1 3 Open the auxiliary DC jack cap and then in sert the accessory power plug into the jack 1 Trailer hitch receiver 1 Auxiliary DC jack cap 1 Auxiliary DC jack U17S10E0 book Page 24 Friday July 6 2007 1 37 PM ...

Страница 44: ...he engine running or with the headlights turned on the battery will lose its charge and engine start ing may become difficult Do not use an automotive cigarette lighter or other accessories with a plug that gets hot because the jack can be damaged WARNING EWB00010 Indicates a potential hazard that could result in serious injury or death Maximum rated capacity for the auxiliary DC jack DC 12 V 120 ...

Страница 45: ...AL HAZARD Failure to inspect the ATV before operating Failure to properly maintain the ATV WHAT CAN HAPPEN Increases the possibility of an accident or equipment damage HOW TO AVOID THE HAZARD Always inspect your ATV each time you use it to make sure it is in safe operating condition Always follow the inspection and maintenance procedures and schedules described in the Own er s Manual ITEM ROUTINE ...

Страница 46: ... 39 8 40 Rear brake Check operation and correct if necessary Lubricate cables if necessary Check lever and pedal free play and adjust if necessary 5 5 8 38 8 41 Throttle lever Make sure that operation is smooth Lubricate cable and lever hous ing if necessary Check cable free play and adjust if necessary 5 6 8 37 Control cables Make sure that operation is smooth Lubricate if necessary 8 47 Wheels a...

Страница 47: ...5 3 5 Instruments lights and switches Check operation and correct if necessary 5 9 ITEM ROUTINE PAGE U17S10E0 book Page 3 Friday July 6 2007 1 37 PM ...

Страница 48: ...OTE The coolant level must be checked on a cold en gine since the level varies with engine tempera ture WARNING EWB00490 POTENTIAL HAZARD Improper care when refueling WHAT CAN HAPPEN Fuel can spill which can cause a fire and se vere injury Fuel expands when it heats up If the fuel tank is overfilled fuel could spill out due to heat from the engine or the sun HOW TO AVOID THE HAZARD Do not overfill...

Страница 49: ...eaking out of the hose joint or brake fluid reservoir of the front brake Apply the brake firmly for one minute If the lever moves slowly inward there may be a leak in the brake system If there is any leakage the brake system should be checked by a Yamaha dealer Brake operation Test the brakes at slow speed after starting out to make sure they are working properly If the brakes do not provide prope...

Страница 50: ... brakes If a problem cannot be corrected by the adjustment procedures pro vided in this manual have a Yamaha dealer check for the cause POTENTIAL HAZARD Operating this ATV with improper tires or with improper or uneven tire pressure WHAT CAN HAPPEN Use of improper tires on this ATV or opera tion of this ATV with improper or uneven tire pressure may cause loss of control in creasing your risk of ac...

Страница 51: ...ures must be equal on both sides Tire pressure below the minimum speci fied could cause the tire to dislodge from the rim under severe riding conditions Minimum tire pressure Front 22 0 kPa 3 2 psi 0 220 kgf cm Rear 22 0 kPa 3 2 psi 0 220 kgf cm Use no more than the following pressures when seating the tire beads Maximum tire seating pressure Front 250 kPa 36 psi 2 5 kgf cm Rear 250 kPa 36 psi 2 5...

Страница 52: ...t the tire pressures to the following specifications EBU19830 Tire wear limit Replace the tire when the tire groove decreases to 3 mm 0 12 in 1 Low pressure tire gauge Recommended pressure Front 25 0 kPa 3 6 psi 0 250 kgf cm Rear 25 0 kPa 3 6 psi 0 250 kgf cm Minimum Front 22 0 kPa 3 2 psi 0 220 kgf cm Rear 22 0 kPa 3 2 psi 0 220 kgf cm Maximum Front 28 0 kPa 4 1 psi 0 280 kgf cm Rear 28 0 kPa 4 1...

Страница 53: ...t all nuts bolts and screws are prop erly tightened EBU19850 Instruments lights and switches Check that all instruments lights and switches are working properly Correct if necessary 1 Tire wear limit U17S10E0 book Page 9 Friday July 6 2007 1 37 PM ...

Страница 54: ...AZARD Operating ATV without being familiar with all controls WHAT CAN HAPPEN Loss of control which could cause an acci dent or injury HOW TO AVOID THE HAZARD Read the Owner s Manual carefully If there is a control or function you do not understand ask your Yamaha dealer POTENTIAL HAZARD Frozen control cables in cold weather WHAT CAN HAPPEN You could be unable to control the ATV which could lead to...

Страница 55: ...to the fig ure Position 1 Cold engine start with ambient temperature below 5 C 40 F Position 2 Cold engine start with ambient temperature between 0 C 30 F and 30 C 90 F Position 3 Cold engine start with ambient temperature above 25 C 80 F Ambient temp starter choke position 5 Apply the rear brake lever 6 Completely close the throttle lever and start the engine by pushing the start switch NOTE If t...

Страница 56: ...TE The engine is warm when it responds normally to the throttle with the starter choke turned off EBU20291 Starting a warm engine Follow the same procedure as for starting a cold engine with the exception that the starter choke is not required when the engine is warm Instead start the engine with the throttle slightly open EBU20430 Operating the drive select lever and driving in reverse CAUTION EC...

Страница 57: ... Shift from neutral to reverse or from reverse to park and vice versa by moving the drive select lever along the shift guide NOTE When in reverse the reverse indicator light should come on If the indicator light does not come on have a Yamaha dealer check the elec trical circuit 1 Drive select lever 2 L Low range 3 H High range 4 N Neutral 5 R Reverse 6 P Park 1 Drive select lever 2 L Low range 3 ...

Страница 58: ...r the first 320 km 200 mi or 20 hours The various parts in the engine wear and polish themselves to the correct operating clear ances During this period prolonged full throttle operation or any condition that might result in en gine overheating must be avoided 0 160 km 0 100 mi or 0 10 hours Avoid prolonged operation above 1 2 throttle Vary the speed of the ATV regularly Do not operate it at one s...

Страница 59: ...ake pedal applied shift the drive select lever to the park position POTENTIAL HAZARD Parking on a hill or other incline WHAT CAN HAPPEN The ATV could roll out of control increasing the chance of an accident HOW TO AVOID THE HAZARD Avoid parking on hills or other inclines If you must park on an incline place the ATV transversely across the incline stop the en gine shift the drive select lever to th...

Страница 60: ...hich can shift position or come off while you are riding could affect your ability to control the ATV Do not mount an accessory where it could inter fere with your ability to control the ATV Exam ples include but are not limited to a heavy or bulky object attached to the handlebars which could make steering difficult an accessory that limits your ability to move around on the seat or one that limi...

Страница 61: ...cident Make sure the load does not interfere with con trols or your ability to see where you are going Ride more slowly than you would without a load The more weight you carry the slower you should go Although conditions vary it is good practice not to exceed low range whenever you are carrying heavier loads or when towing a trail er Allow more braking distance A heavier ATV takes longer to stop A...

Страница 62: ... cargo improperly WHAT CAN HAPPEN Could cause changes in ATV handling which could lead to an accident HOW TO AVOID THE HAZARD Never exceed the stated load capacity for this ATV Cargo should be properly distributed and se curely attached Reduce speed when carrying cargo or pull ing a trailer Allow greater distance for brak ing U17S10E0 book Page 9 Friday July 6 2007 1 37 PM ...

Страница 63: ...7 1 7 EBU21131 RIDING YOUR ATV U17S10E0 book Page 1 Friday July 6 2007 1 37 PM ...

Страница 64: ...y to enjoy riding safely Before you begin to ride be sure you have read this Owner s Manual completely and un derstand the operation of the controls Pay partic ular attention to the safety information on pages 1 1 1 5 Please also read all caution and warning labels on your ATV RIDE WITH CARE AND GOOD JUDGEMENT Get training if you are inexperienced Beginners should get training from a certified in ...

Страница 65: ...uld then regularly practice the skills learned in the course and the operating techniques de scribed in this Owner s Manual For more in formation about the training course contact an authorized ATV dealer or call 1 800 887 2887 POTENTIAL HAZARD Failure to follow the age recommendations for this ATV WHAT CAN HAPPEN Use by children of ATVs that are not recom mended for their age can lead to severe i...

Страница 66: ...AN HAPPEN Greatly reduces your ability to balance and control this ATV Could cause an accident resulting in harm to you and or your passen ger HOW TO AVOID THE HAZARD Never carry a passenger The long seat is to allow the operator to shift position as need ed during operation It is not for carrying passengers U17S10E0 book Page 4 Friday July 6 2007 1 37 PM ...

Страница 67: ...ye protection can result in an accident and increases your chances of a severe injury in the event of an accident Operating without protective clothing in creases your chances of severe injury in the event of an accident HOW TO AVOID THE HAZARD Always wear an approved motorcycle helmet that fits properly You should also wear eye protection goggles or face shield gloves boots long sleeved shirt or ...

Страница 68: ...Could cause you to react more slowly Could affect your balance and perception Could result in an accident HOW TO AVOID THE HAZARD Never consume alcohol or drugs before or while driving this ATV POTENTIAL HAZARD Failure to inspect the ATV before operating Failure to properly maintain the ATV WHAT CAN HAPPEN Increases the possibility of an accident or equipment damage HOW TO AVOID THE HAZARD Always ...

Страница 69: ...loss of control in creasing your risk of an accident HOW TO AVOID THE HAZARD Always use the size and type tires specified in the Owner s Manual for this ATV on page 5 6 Always maintain proper tire pressure as de scribed in the Owner s Manual on page 5 7 POTENTIAL HAZARD Operating this ATV at speeds too fast for your skills or the conditions WHAT CAN HAPPEN Increases your chances of losing control ...

Страница 70: ...d See page 4 12 Loading and accessories Use extra caution when riding the ATV with addi tional loads such as accessories or cargo The ATV s handling may be adversely affected Re duce your speed when adding additional loads 1 Adjusting screw MAXIMUM LOADING LIMIT ATV loading limit total weight of cargo rider accessories and tongue 210 0 kg 463 lb Front carrier 40 0 kg 88 lb Rear carrier 80 0 kg 176...

Страница 71: ...accident HOW TO AVOID THE HAZARD Never exceed the stated load capacity for this ATV Cargo should be properly distributed and se curely attached Reduce speed when carrying cargo or pull ing a trailer Allow greater distance for brak ing Always follow the instructions in your Own er s Manual for carrying cargo or pulling a trailer U17S10E0 book Page 9 Friday July 6 2007 1 37 PM ...

Страница 72: ...or could cause you to lose your balance and fall off of the ATV If you remove a foot from a foot board your foot or leg may come into con tact with the rear wheels which could injure you or cause an accident HOW TO AVOID THE HAZARD Always keep both hands on the handlebars and both feet on the footboards of your ATV during operation POTENTIAL HAZARD Attempting wheelies jumps and other stunts WHAT C...

Страница 73: ...ome situations could lead to an accident HOW TO AVOID THE HAZARD Never modify this ATV through improper in stallation or use of accessories All parts and accessories added to this ATV should be genuine Yamaha or equivalent compo nents designed for use on this ATV and should be installed and used according to instructions If you have questions consult an authorized ATV dealer U17S10E0 book Page 11 ...

Страница 74: ... accumulated around the engine area could catch fire Someone touching the exhaust system dur ing or after operation could be burned HOW TO AVOID THE HAZARD Do not operate idle or park the ATV in dry grass or other dry ground cover Keep the engine area free of dry grass brush or other combustible material Do not touch the hot exhaust system Do not park the ATV in a place where others might be likel...

Страница 75: ...ewalks driveways parking lots and streets POTENTIAL HAZARD Operating this ATV on public streets roads or highways WHAT CAN HAPPEN You can collide with another vehicle HOW TO AVOID THE HAZARD Never operate this ATV on any public street road or highway even a dirt or gravel one In many states it is illegal to operate ATVs on public streets roads and highways U17S10E0 book Page 13 Friday July 6 2007 ...

Страница 76: ...den rocks bumps or holes without enough time to react Could result in the ATV overturning or going out of control HOW TO AVOID THE HAZARD Go slowly and be extra careful when operat ing on unfamiliar terrain Always be alert to changing terrain conditions when operating the ATV POTENTIAL HAZARD Failure to use extra care when operating on excessively rough slippery or loose terrain WHAT CAN HAPPEN Co...

Страница 77: ...until you have learned and practiced the skills necessary to control the ATV on such terrain Always be especial ly cautious on these kinds of terrain POTENTIAL HAZARD Operating in areas where you might not be seen by other off road vehicles WHAT CAN HAPPEN You could be in a collision You could be in jured HOW TO AVOID THE HAZARD Always mount a caution flag on the ATV to make you more visible Watch...

Страница 78: ... afterwards do not allow skin or clothing to come in contact with these com ponents With the engine idling shift the drive select lever into the low range position or the high range posi tion Apply the throttle slowly and smoothly The centrifugal clutch will engage and you will start to accelerate If the throttle is applied too abruptly the front wheels may lift off the ground resulting in a loss ...

Страница 79: ... to make turns quickly and easily It is es sential that this skill be learned first at low speed WARNING EWB01310 POTENTIAL HAZARD Turning improperly WHAT CAN HAPPEN ATV could go out of control causing a colli sion or overturn HOW TO AVOID THE HAZARD Always follow proper procedures for turning as described in this Owner s Manual Prac tice turning at low speeds before attempting to turn at faster s...

Страница 80: ...d on the seat Once you have learned this technique you should be able to perform it at higher speeds or in tighter curves Improper riding procedures such as abrupt throttle changes excessive braking incorrect body move ments or too much speed for the sharpness of the turn may cause the ATV to tip If the ATV begins to tip over to the outside while negotiating a turn lean more to the inside It may a...

Страница 81: ... HAZARD Operating on excessively steep hills WHAT CAN HAPPEN The ATV can overturn more easily on ex tremely steep hills than on level surfaces or small hills HOW TO AVOID THE HAZARD Never operate the ATV on hills too steep for the ATV or for your abilities Practice on smaller hills before attempting large hills U17S10E0 book Page 19 Friday July 6 2007 1 37 PM ...

Страница 82: ...r cause the ATV to overturn HOW TO AVOID THE HAZARD Always follow proper procedures for climb ing hills as described in this Owner s Manu al Always check the terrain carefully before you start up any hill Never climb hills with excessively slippery or loose surfaces Shift your weight forward Never open the throttle suddenly The ATV could flip over backwards Never go over the top of any hill at hig...

Страница 83: ...7 21 7 U17S10E0 book Page 21 Friday July 6 2007 1 37 PM ...

Страница 84: ...ide Physically turn the ATV around and then descend the hill POTENTIAL HAZARD Improperly crossing hills or turning on hills WHAT CAN HAPPEN Could cause loss of control or cause the ATV to overturn HOW TO AVOID THE HAZARD Never attempt to turn the ATV around on any hill until you have mastered the turning tech nique as described in the Owner s Manual on level ground Be very careful when turn ing on...

Страница 85: ...improperly dis mounting while climbing a hill WHAT CAN HAPPEN Could result in ATV overturning HOW TO AVOID THE HAZARD Use the proper gear and maintain a steady speed when climbing a hill If you lose all forward speed Keep weight uphill Apply the brakes Shift to the park position after you are stopped If you begin rolling backwards Keep weight uphill 2WD Never apply the rear brake while roll ing ba...

Страница 86: ...edal will brake the wheels on the down hill side Avoid sudden application of either the front or rear brake because the wheels on the up hill side could come off the ground Apply both the front and rear brakes gradually Whenever possible ride your ATV straight down hill Avoid sharp angles which could allow the ATV to tip or roll over Carefully choose your path and ride no faster than you will be a...

Страница 87: ...7 25 7 U17S10E0 book Page 25 Friday July 6 2007 1 37 PM ...

Страница 88: ...adually steer in the downhill direction if there are no obstacles in your path As you regain proper balance gradually steer again in the direction you wish to travel WARNING EWB01141 POTENTIAL HAZARD Improperly crossing hills or turning on hills WHAT CAN HAPPEN Could cause loss of control or cause the ATV to overturn HOW TO AVOID THE HAZARD Never attempt to turn the ATV around on any hill until yo...

Страница 89: ...7 27 7 U17S10E0 book Page 27 Friday July 6 2007 1 37 PM ...

Страница 90: ...ide your ATV without verifying that you have regained proper braking ability POTENTIAL HAZARD Operating this ATV through deep or fast flowing water WHAT CAN HAPPEN Tires may float causing loss of traction and loss of control which could lead to an acci dent HOW TO AVOID THE HAZARD Never operate this ATV in fast flowing water or in water deeper than that specified in your Owner s Manual Remember th...

Страница 91: ...hose the drive select lever box check hose and the storage compartment check hose Also remove the V belt case drain plug to drain any water that may have accumu lated Wash the ATV in fresh water if it has been operated in salt water or muddy conditions 1 Air filter case check hose 1 V belt cooling duct check hose left front side of ATV U17S10E0 book Page 29 Friday July 6 2007 1 37 PM ...

Страница 92: ... or ac cident Be sure to keep your feet firmly mounted on the footboards at all times Avoid jumping the ATV as loss of control and damage to the ATV may re sult WARNING EWB01160 1 Drive select lever box check hose 1 Storage compartment check hose 1 V belt case drain plug POTENTIAL HAZARD Improperly operating over obstacles U17S10E0 book Page 30 Friday July 6 2007 1 37 PM ...

Страница 93: ...tions positioning your weight over the front wheels will sometimes help WHAT CAN HAPPEN Could cause loss of control or a collision Could cause the ATV to overturn HOW TO AVOID THE HAZARD Before operating in a new area check for ob stacles Never attempt to ride over large obstacles such as large rocks or fallen trees When you go over obstacles always follow proper procedures as described in the Own...

Страница 94: ...ed on extremely slippery surfaces such as ice since all control may be lost WARNING EWB01170 WHAT TO DO IF This section is designed to be a reference guide only Be sure to read each section on riding tech niques completely POTENTIAL HAZARD Skidding or sliding improperly WHAT CAN HAPPEN You may lose control of this ATV You may also regain traction unexpectedly which may cause the ATV to overturn HO...

Страница 95: ... the ATV and physically turn the ATV around If the ATV starts to slip backwards DO NOT USE THE REAR BRAKE IF THE ATV IS IN 2WD the ATV may tip over on top of you Dismount the ATV on the uphill side See page 7 18 If your ATV is traversing a sloping surface Be sure to ride with your weight positioned to wards the uphill side of the ATV to maintain proper balance If the ATV starts to tip steer down t...

Страница 96: ...D INDIVIDUAL USE THE MAINTENANCE INTER VALS MAY NEED TO BE SHORTENED WARNING EWB01820 EBU21720 Owner s manual and tool kit Be sure to put this owner s manual in the plastic bag and always carry it on the bottom of the seat as shown Put the owner s tool kit and low pres sure tire gauge under the seat POTENTIAL HAZARD Servicing an engine while it is running WHAT CAN HAPPEN Moving parts can catch clo...

Страница 97: ...wner s tool kit 3 Low pressure tire gauge POTENTIAL HAZARD Operating this ATV with improper modifica tions WHAT CAN HAPPEN Improper installation of accessories or mod ification of this ATV may cause changes in handling which in some situations could lead to an accident HOW TO AVOID THE HAZARD Never modify this ATV through improper in stallation or use of accessories All parts and accessories added...

Страница 98: ...uire special tools data and technical skills NO ITEM CHECK OR MAINTENANCE JOB INITIAL EVERY Whichev er comes first month 1 3 6 6 12 km mi 320 200 1300 800 2500 1600 2500 1600 5000 3200 hours 20 80 160 160 320 1 Fuel line Check fuel hoses for cracks or other damage and replace if necessary 2 Spark plug Check condition and clean regap or replace if necessary 3 Valves Check valve clearance and adjust...

Страница 99: ...ness and tighten all screw clamps and joints if necessary 7 Spark arrester Clean NO ITEM CHECK OR MAINTENANCE JOB INITIAL EVERY Whichev er comes first month 1 3 6 6 12 km mi 320 200 1300 800 2500 1600 2500 1600 5000 3200 hours 20 80 160 160 320 U17S10E0 book Page 4 Friday July 6 2007 1 37 PM ...

Страница 100: ...never worn to the limit 3 Rear brake Check operation and correct if necessary Check brake lever and pedal free play and adjust if necessary Replace brake friction plates Whenever worn to the limit 4 Brake hoses Check for cracks or other damage and replace if necessary Replace Every 4 years 5 Wheels Check runout and for damage and replace if nec essary 6 Tires Check tread depth and for damage and r...

Страница 101: ... Steering system Check operation and repair or replace if damaged Check toe in and adjust if necessary 16 Engine mount Check for cracks or other damage and replace if necessary 17 Axle boots Check for cracks or other damage and replace if necessary 18 Engine oil Change Check ATV for oil leakage and correct if neces sary 19 Engine oil filter car tridge Replace 20 Engine oil strainer Clean 21 Differ...

Страница 102: ... operation and adjust or replace if neces sary 26 Throttle lever hous ing and cable Check operation and correct if necessary Check throttle cable free play and adjust if neces sary Lubricate throttle lever housing and cable 27 Front and rear brake switches Check operation and correct if necessary 28 Lights and switches Check operation and correct if necessary Adjust headlight beams NO ITEM CHECK O...

Страница 103: ...y correct the brake fluid level Every two years replace the internal components of the brake master cylinder and calipers and change the brake fluid Replace the brake hoses every four years and if cracked or damaged U17S10E0 book Page 8 Friday July 6 2007 1 37 PM ...

Страница 104: ... some of the maintenance jobs described in this chapter Refer to this section each time a panel needs to be removed and installed EBU27600 Panels A and D To remove one of the panels 1 Remove the seat See page 4 19 2 Pull outward on the areas shown and then pull upward as shown 1 Panel A 2 Panel B 1 Panel C 2 Panel D 3 Panel E 4 Panel F U17S10E0 book Page 9 Friday July 6 2007 1 37 PM ...

Страница 105: ...8 10 8 To install one of the panels 1 Place the panel in its original position U17S10E0 book Page 10 Friday July 6 2007 1 37 PM ...

Страница 106: ... bolt and then take the panel off To install the panel Place the panel in the original position and install the bolt CAUTION ECB00380 When installing the panel be sure not to pinch the cables or wires 1 Panel B 2 Bolt U17S10E0 book Page 11 Friday July 6 2007 1 37 PM ...

Страница 107: ... bolts 2 Remove the carrier bolts under the fenders and then take the carrier off 3 Remove the quick fastener screws and then pull the panel upward to remove it 1 Carrier bolt top 1 Carrier bolt under the fenders U17S10E0 book Page 12 Friday July 6 2007 1 37 PM ...

Страница 108: ...ll bolts to the specified torques Panel E To remove the panel Remove the bolts and then take the panel off To install the panel Place the panel in the original position and install the bolts Panel F To remove the panel Pull outward on the areas shown 1 Quick fastener screw 2 Panel C Tightening torques Carrier bolt top 34 Nm 3 4 m kgf 24 ft lbf Carrier bolt under fenders 7 Nm 0 7 m kgf 5 1 ft lbf 1...

Страница 109: ... will cause any spark plug to slowly erode the spark plug should be removed and checked in accor dance with the periodic maintenance and lubrica tion chart In addition the condition of the spark plug can reveal the condition of the engine To remove the spark plug 1 Remove panel A See page 8 9 2 Remove the spark plug cap 1 Panel F 1 Spark plug cap U17S10E0 book Page 14 Friday July 6 2007 1 37 PM ...

Страница 110: ...ent color the engine could be operating improperly Do not attempt to diagnose such problems yourself In stead have a Yamaha dealer check the ATV 2 Check the spark plug for electrode erosion and excessive carbon or other deposits and replace it if necessary To install the spark plug 1 Measure the spark plug gap with a wire thick ness gauge and if necessary adjust the gap to specification 1 Spark pl...

Страница 111: ... to the specified torque as soon as possible 4 Install the spark plug cap 5 Install the panel EBU23325 Engine oil and oil filter cartridge The engine oil level should be checked before each ride In addition the oil must be changed and the oil filter cartridge replaced at the intervals spec ified in the periodic maintenance and lubrication chart To check the engine oil level 1 Remove panel F See pa...

Страница 112: ...le without screwing it in and then remove it again to check the oil level NOTE The engine oil should be between the minimum and maximum level marks 6 If the engine oil is at or below the minimum level mark add sufficient oil of the recom mended type to raise it to the correct level 7 Insert the dipstick into the oil filler hole and then tighten the engine oil filler cap 8 Install the panel 1 Engin...

Страница 113: ...an oil pan under the engine to collect the used oil 5 Remove the engine oil filler cap and then re move the engine oil drain bolt to drain the oil from the crankcase NOTE Skip steps 6 10 if the oil filter cartridge is not being replaced 6 Remove panels D and E See page 8 9 7 Remove the oil filter cartridge with an oil filter wrench 1 Engine oil drain bolt 1 Oil filter cartridge U17S10E0 book Page ...

Страница 114: ...l to the O ring of the new oil filter cartridge NOTE Make sure that the O ring is properly seated 9 Install the new oil filter cartridge with an oil fil ter wrench and then tighten it to the specified torque with a torque wrench 1 Oil filter wrench 1 O ring U17S10E0 book Page 19 Friday July 6 2007 1 37 PM ...

Страница 115: ...oil also lubricates the clutch do not mix any chemical additives Do not use oils with a diesel specification of CD or oils of a higher quality than specified In addition do not use oils labeled ENERGY CONSERV ING II or higher 1 Torque wrench Tightening torque Oil filter cartridge 17 Nm 1 7 m kgf 12 ft lbf Tightening torque Engine oil drain bolt 23 Nm 2 3 m kgf 17 ft lbf Recommended oil See page 10...

Страница 116: ...nal gear oil level must be checked and the oil changed as follows at the intervals specified in the periodic maintenance and lubrication chart To check the final gear oil level 1 Place the ATV on a level surface NOTE The final gear oil level must be checked on a cold engine 2 Remove the final gear oil filler bolt and then check the oil level in the final gear case NOTE The oil level should be at t...

Страница 117: ...l gear oil drain bolt to drain the oil from the final gear case 5 Install the drain bolt and then tighten it to the specified torque 6 Add the recommended final gear oil to the brim of the filler hole as shown Tightening torque Final gear oil filler bolt 24 Nm 2 4 m kgf 17 ft lbf 1 Engine guard 2 Final gear case guard 3 Bolt 1 Final gear oil drain bolt Tightening torque Final gear oil drain bolt 2...

Страница 118: ... Check the final gear case for oil leakage If oil is leaking check for the cause 9 Install the engine guard and the final gear case guard by installing the bolts and then tightening them to the specified torques 1 Final gear oil filler bolt 2 Correct oil level 3 Final gear oil Recommended final gear oil See page 10 1 Tightening torque Final gear oil filler bolt 24 Nm 2 4 m kgf 17 ft lbf Tightening...

Страница 119: ...he differential gear oil level must be checked on a cold engine 2 Remove the differential gear oil filler bolt and then check the oil level in the differential gear case NOTE The oil level should be at the brim of the filler hole 3 If the oil is below the brim of the filler hole add sufficient oil of the recommended type to raise it to the correct level 4 Install the oil filler bolt and then tight...

Страница 120: ...specified torque 5 Add the recommended differential gear oil to the brim of the filler hole as shown CAUTION ECB00410 Be sure no foreign material enters the differen tial gear case 6 Install the oil filler bolt and then tighten it to the specified torque 1 Differential gear oil drain bolt Tightening torque Differential gear oil drain bolt 10 Nm 1 0 m kgf 7 2 ft lbf 1 Differential gear oil 2 Differ...

Страница 121: ...a cold en gine since the level varies with engine tempera ture 2 Check the coolant level in the coolant reser voir NOTE The coolant should be between the minimum and maximum level marks 3 If the coolant is at or below the minimum level mark remove panel D See page 8 9 4 Remove the reservoir cap add coolant or dis tilled water to the maximum level mark install the reservoir cap and then install the...

Страница 122: ...gine overheats see page 8 61 for fur ther instructions EBU23592 To change the coolant WARNING EWB01880 1 Place the ATV on a level surface 2 Remove panels E and F See page 8 9 3 Place a container under the engine and then remove the coolant drain bolt Use a trough or a similar object as shown to prevent coolant from spilling on the footrest Coolant reservoir capacity up to the maximum level mark 0 ...

Страница 123: ...diator cap 6 Remove panel D See page 8 9 7 Remove the coolant reservoir cap 8 Disconnect the hose on the coolant reservoir side and then drain the coolant from the cool ant reservoir 1 Coolant drain bolt 1 Trough 1 Radiator cap U17S10E0 book Page 28 Friday July 6 2007 1 37 PM ...

Страница 124: ...tap water instead Do not use hard wa ter or salt water since it is harmful to the en gine If water has been used instead of coolant re place it with coolant as soon as possible otherwise the cooling system will not be pro tected against frost and corrosion 1 Coolant reservoir hose Tightening torque Coolant drain bolt 10 Nm 1 0 m kgf 7 2 ft lbf Antifreeze water mixture ratio 1 1 Recommended antifre...

Страница 125: ...akage NOTE If any leakage is found have a Yamaha dealer check the cooling system 17 Install the panels and the front carrier EBU23631 Cleaning the air filter element The air filter element should be cleaned at the in tervals specified in the periodic maintenance and lubrication chart Clean the air filter element more frequently if you are riding in unusually wet or dusty areas NOTE There is a chec...

Страница 126: ...of the air filter case 4 Pull off the lock plate and then remove the sponge material from the air filter element frame 1 Air filter case cover holder 2 Air filter case cover 1 Air filter element U17S10E0 book Page 31 Friday July 6 2007 1 37 PM ...

Страница 127: ...maged 8 Apply Yamaha foam air filter oil or other qual ity foam air filter oil to the sponge material 1 Air filter element frame 2 Sponge material 3 Air filter element lock plate POTENTIAL HAZARD Using low flash point solvents or gasoline to clean the sponge material WHAT CAN HAPPEN Low flash point solvents or gasoline can catch fire or explode HOW TO AVOID THE HAZARD Use parts cleaning solvent to...

Страница 128: ...ter case rubber joint to the carburetor fittings and the rubber joint manifold fittings for an air tight seal Tighten all fit tings securely to avoid the possibility of unfiltered air entering the engine CAUTION ECB00460 Make sure that the air filter element is prop erly seated in the air filter case Never operate the engine with the air filter el ement removed This will allow unfiltered air to en...

Страница 129: ...or water collects in the V belt cooling duct check hose remove the hose and clean it 1 Tailpipe 2 Spark arrester Tightening torque Tailpipe bolt 10 Nm 1 0 m kgf 7 2 ft lbf POTENTIAL HAZARD Improper cleaning of the spark arrester Hot exhaust system WHAT CAN HAPPEN Could injure the eyes Could cause burns Could cause carbon monoxide poisoning possibly leading to death Could start a fire HOW TO AVOID ...

Страница 130: ... if neces sary adjusted at the intervals specified in the peri odic maintenance and lubrication chart The carburetor is an important part of the engine and requires very sophisticated adjustment Therefore most carburetor adjustments should be left to a Yamaha dealer who has the necessary profes sional knowledge and experience The adjustment described in the following section however may be perform...

Страница 131: ... adjustment 1 Start the engine and warm it up NOTE The engine is warm when it quickly responds to the throttle 2 Remove panel D See page 8 9 3 Attach the tachometer to the spark plug lead 4 Check the engine idling speed and if neces sary adjust it to specification by turning the throttle stop screw at the carburetor To in crease the engine idling speed turn the throt tle stop screw in direction a ...

Страница 132: ...ssary before adjusting the throttle ca ble free play 1 Loosen the locknut 2 To increase the throttle cable free play turn the adjusting bolt in direction a To decrease the throttle cable free play turn the adjusting bolt in direction b 3 Tighten the locknut EBU24060 Valve clearance The valve clearance changes with use resulting in improper air fuel mixture and or engine noise To prevent this from ...

Страница 133: ...ar brake friction plates must be checked for wear at the intervals specified in the periodic maintenance and lubrica tion chart NOTE This ATV is equipped with a wet multiple disc type rear brake which is located inside of the final gear case EBU24171 Front brake pads Check each front brake pad for damage and mea sure the lining thickness If a brake pad is dam aged or if the lining thickness is les...

Страница 134: ... EBU24251 Checking the brake fluid level Insufficient brake fluid may allow air to enter the brake system possibly causing it to become inef fective Before riding check that the brake fluid is above the minimum level mark and replenish if neces sary A low brake fluid level may indicate worn brake pads and or brake system leakage If the brake fluid level is low be sure to check the brake pads for w...

Страница 135: ...ddenly have a Yamaha dealer check the cause EBU24280 Changing the brake fluid Have a Yamaha dealer change the brake fluid at the intervals specified in the NOTE after the peri odic maintenance and lubrication chart In addi tion have the oil seals of the brake master cylinder and calipers as well as the brake hoses replaced at the intervals listed below or whenever they are damaged or leaking Oil s...

Страница 136: ...n plates for wear Adjusting the brake pedal and brake lever free play The brake pedal free play should measure 17 0 20 0 mm 0 67 0 79 in The brake lever free play should measure 8 0 10 5 mm 0 31 0 41 in If ei ther free play is incorrect adjust it as follows POTENTIAL HAZARD Operating with improperly serviced or ad justed brakes WHAT CAN HAPPEN You could lose braking ability which could lead to an ...

Страница 137: ... lever free play adjusting bolt 2 Fully loosen the brake lever free play adjust ing nut on the brake cable at the final gear case 1 Brake pedal free play 1 Brake lever free play 1 Locknut 2 Brake lever free play adjusting bolt U17S10E0 book Page 42 Friday July 6 2007 1 37 PM ...

Страница 138: ...es 2 5 3 0 mm 0 10 0 12 in 4 Push the brake camshaft lever in direction a until it stops apply approximately 50 N 5 0 kgf 11 0 lbf of force and then turn the brake lever free play adjusting nut on the brake ca ble at the final gear case so that gap B mea sures 4 0 6 0 mm 0 16 0 24 in 1 Brake lever free play adjusting nut 1 Brake pedal free play adjusting nut 2 Brake camshaft lever 3 Gap A U17S10E0...

Страница 139: ...ver NOTE When adjusting the rear brake lever free play Be sure not to step on the brake pedal Make sure the brake pedal does not move Checking the brake pedal position The top of the brake pedal should be positioned 75 0 85 0 mm 2 95 3 35 in above the footboard If the brake pedal position is incorrect have a Yamaha dealer adjust it 1 Brake lever free play adjusting nut 2 Brake camshaft lever 3 Gap...

Страница 140: ...ake pedal and footboard POTENTIAL HAZARD Operating with improperly serviced or ad justed brakes WHAT CAN HAPPEN You could lose braking ability which could lead to an accident HOW TO AVOID THE HAZARD After servicing Make sure the brakes operate smoothly and that the free play is correct Make sure the brakes do not drag Replacement of brake components requires professional knowledge These procedures...

Страница 141: ...ould be adjusted by a Yamaha dealer 1 Remove panel B See page 8 9 NOTE The brake light switch is properly adjusted when the brake light comes on just before braking takes effect 2 Turn the adjusting nut while holding the brake light switch in place To make the brake light come on earlier turn the adjusting nut in direc tion a To make the brake light come on lat er turn the adjusting nut in directi...

Страница 142: ...ers should be checked before each ride and the lever pivots should be lubricated if necessary 1 Brake light switch 2 Brake light switch adjusting nut Recommended lubricant Engine oil POTENTIAL HAZARD Damaged control cables WHAT CAN HAPPEN Corrosion can result when the cable sheaths become damaged and cables can also be come frayed or kinked which could restrict the operation of controls and lead t...

Страница 143: ...eel hub bearings must be checked at the intervals specified in the periodic maintenance and lubrication chart If there is play in a wheel hub or if a wheel does not turn smoothly have a Yamaha dealer check the wheel hub bear ings EBU24970 Lubricating the drive shaft universal joint The drive shaft universal joint must be lubricated at the intervals specified in the periodic maintenance and lubrica...

Страница 144: ...vots The rear knuckle pivots must be lubricated at the intervals specified in the periodic maintenance and lubrication chart Lubricate the pivoting points using a grease gun EBU25102 Lubricating the steering shaft The steering shaft must be lubricated at the inter vals specified in the periodic maintenance and lu brication chart Recommended lubricant Lithium soap based grease Recommended lubricant...

Страница 145: ...ne month remove the battery fully charge it and then place it in a cool dry place POTENTIAL HAZARD Failure to handle batteries or battery electro lyte carefully WHAT CAN HAPPEN You could be poisoned You could be se verely burned by the sulfuric acid in battery electrolyte Batteries produce explosive gas es HOW TO AVOID THE HAZARD Avoid contact with skin eyes or clothing Al ways shield eyes when wo...

Страница 146: ...tery terminals CAUTION ECB00630 Always keep the battery charged Storing a discharged battery can cause permanent battery damage To charge a sealed type MF battery a spe cial constant voltage battery charger is re quired Using a conventional battery charger will damage the battery If you do not have access to a constant voltage battery charg er have a Yamaha dealer charge your bat tery 1 Positive b...

Страница 147: ...8 52 8 EBU25313 Replacing a fuse 1 Main fuse 2 Fuse box 1 Main fuse 2 Spare main fuse U17S10E0 book Page 52 Friday July 6 2007 1 37 PM ...

Страница 148: ...g a fuse 2 Remove the blown fuse and then install a new fuse of the specified amperage 1 Headlight fuse 2 Ignition fuse 3 Auxiliary DC jack fuse 4 Four wheel drive motor fuse 5 Signaling system fuse 6 Backup fuse for odometer and clock 7 Spare fuse Specified fuses Main fuse 30 0 A Headlight fuse 15 0 A Ignition fuse 10 0 A Four wheel drive motor fuse 10 0 A Signaling system fuse 10 0 A Auxiliary D...

Страница 149: ...move the cover at the rear of the headlight by pulling it off 2 Remove the headlight bulb holder cover by pulling it off POTENTIAL HAZARD Using an improper fuse WHAT CAN HAPPEN An improper fuse can cause damage to the electrical system which could lead to a fire HOW TO AVOID THE HAZARD Always use a fuse of the specified rating Never use a material in place of the proper fuse 1 Cover at the rear of...

Страница 150: ...will be adversely affect ed Thoroughly clean off any dirt and finger prints on the headlight bulb using a cloth moistened with alcohol or thinner 6 Install the bulb holder by pushing it in and turn ing it clockwise 1 Headlight bulb holder POTENTIAL HAZARD A headlight bulb is hot when it is on and im mediately after it is turned off WHAT CAN HAPPEN You can be burned or a fire could start if the bul...

Страница 151: ...UTION ECB00690 It is advisable to have a Yamaha dealer make this adjustment To raise a headlight beam turn the adjusting screw in direction a To lower a headlight beam turn the adjusting screw in direction b EBU25620 Replacing the tail brake light bulb If the tail brake light bulb burns out replace it as follows 1 Remove the tail brake light assembly by re moving the nuts together with the washers...

Страница 152: ...ulb by turning it counterclockwise 3 Remove the defective bulb by pushing it in and turning it counterclockwise 1 Tail brake light assembly 2 Nut 1 Tail brake light assembly 2 Tail brake light bulb holder U17S10E0 book Page 57 Friday July 6 2007 1 37 PM ...

Страница 153: ...s and the nuts EBU25650 Removing a wheel 1 Loosen the wheel nuts 2 Elevate the ATV and place a suitable stand under the frame 3 Remove the nuts from the wheel 4 Remove the wheel EBU25700 Installing a wheel 1 Install the wheel and the nuts NOTE The arrow mark on the tire must point toward the rotating direction of the wheel 1 Tail brake light bulb holder 2 Tail brake light bulb 1 Wheel nut U17S10E0...

Страница 154: ...r tapered side to wards the wheel 2 Lower the ATV to the ground 3 Tighten the wheel nuts to the specified torques 1 Arrow mark 1 Tapered nut Tightening torques Front wheel nut 55 Nm 5 5 m kgf 40 ft lbf Rear wheel nut 55 Nm 5 5 m kgf 40 ft lbf U17S10E0 book Page 59 Friday July 6 2007 1 37 PM ...

Страница 155: ...cians have the necessary tools expe rience and know how to service the ATV properly Use only genuine Yamaha replacement parts Im itation parts may look like Yamaha parts but they are often inferior have a shorter service life and can lead to expensive repair bills WARNING EWB02260 POTENTIAL HAZARD Checking the fuel system while smoking or near an open flame WHAT CAN HAPPEN Fuel can ignite or explo...

Страница 156: ...ATV Remove the spark plug and check the electrodes 3 Ignition Wipe off with a dry cloth and correct the spark plug gap or replace the spark plug Have a Yamaha dealer check the ATV The engine does not start Have a Yamaha dealer check the ATV The engine does not start Check the battery Operate the electric starter 4 Battery The engine turns over quickly The engine turns over slowly The battery is go...

Страница 157: ...e engine to cool before removing the radiator cap Always use a thick rag over the cap Allow any remaining pressure to escape before completely removing the cap Wait until the engine has cooled Check the coolant level in the reservoir and radiator The coolant level is OK The coolant level is low Check the cooling system for leakage Have a Yamaha dealer check and repair the cooling system Add coolan...

Страница 158: ...transmission seals and electrical de vices Many expensive repair bills have result ed from improper high pressure detergent applications such as those available in coin operated car washers 4 Once most of the dirt has been hosed off wash all surfaces with warm water and mild detergent type soap An old toothbrush or bot tle brush is handy for hard to reach places 5 Rinse the ATV off immediately wit...

Страница 159: ... float chamber by loosen ing the drain bolt this will prevent fuel deposits from building up Pour the drained fuel into the fuel tank 4 Fill up the fuel tank and add fuel stabilizer if available to prevent the fuel from deteriorat ing 5 Perform the following steps to protect the cyl inder piston rings etc from corrosion a Remove the spark plug cap and spark plug b Pour a teaspoonful of engine oil ...

Страница 160: ...d if necessary correct the tire air pressure and then block up the ATV so that all of its wheels are off the ground Alternative ly turn the wheels a little every month in order to prevent the tires from becoming degraded in one spot 8 Cover the muffler outlet with a plastic bag to prevent moisture from entering it 9 Remove the battery and fully charge it Store it in a cool dry place and charge it ...

Страница 161: ...gle cylinder Displacement 421 0 cm Bore stroke 84 5 75 0 mm 3 33 2 95 in Compression ratio 10 00 1 Starting system Electric and recoil starter Lubrication system Wet sump Engine oil Type YAMALUBE 4 SAE5W30 or SAE10W30 or SAE20W40 Recommended engine oil grade API service SG type or higher JASO standard MA Engine oil quantity Without oil filter cartridge replacement 2 30 L 2 43 US qt 2 02 Imp qt 0 1...

Страница 162: ... 30 L 1 37 US qt 1 14 Imp qt Air filter Air filter element Wet element Fuel Recommended fuel Unleaded gasoline only Fuel tank capacity 15 0 L 3 96 US gal 3 30 Imp gal Fuel reserve amount 4 5 L 1 19 US gal 0 99 Imp gal Carburetor Manufacturer MIKUNI Type x quantity BSR33 x 1 Spark plug s Manufacturer model NGK DR8EA Spark plug gap 0 6 0 7 mm 0 024 0 028 in Clutch Clutch type Wet centrifugal automat...

Страница 163: ...asured on cold tires Recommended Front 25 0 kPa 3 6 psi 0 250 kgf cm Rear 25 0 kPa 3 6 psi 0 250 kgf cm Minimum Front 22 0 kPa 3 2 psi 0 220 kgf cm Rear 22 0 kPa 3 2 psi 0 220 kgf cm Maximum Front 28 0 kPa 4 1 psi 0 280 kgf cm Rear 28 0 kPa 4 1 psi 0 280 kgf cm Front wheel Wheel type Panel wheel Rim size 12 x 6 0AT Rear wheel Wheel type Panel wheel Rim size 12 x 7 5AT Front brake Type Dual disc br...

Страница 164: ... capacity 12 V 18 0 Ah Headlight Bulb type Krypton bulb Bulb voltage wattage x quantity Headlight 12 V 30 0 30 0 W 2 Tail brake light 12 V 5 0 21 0 W 1 Neutral indicator light LED Reverse indicator light LED Coolant temperature warning light LED Park indicator light LED On Command four wheel drive differential gear lock indicator LCD High range indicator light LED Low range indicator light LED Dif...

Страница 165: ...10 5 10 Auxiliary DC jack fuse 10 0 A Backup fuse 10 0 A Four wheel drive motor fuse 10 0 A U17S10E0 book Page 5 Friday July 6 2007 1 37 PM ...

Страница 166: ...f erence in case the ATV is stolen KEY IDENTIFICATION NUMBER VEHICLE IDENTIFICATION NUMBER MODEL LABEL INFORMATION EBU26020 Key identification number The key identification number is stamped into the key Record this number in the space provided and use it for reference when ordering a new key EBU26030 Vehicle identification number The vehicle identification number is stamped into the frame 1 Key i...

Страница 167: ...el label is affixed at the location in the il lustration Record the information on this label in the space provided This information will be need ed when ordering spare parts from a Yamaha deal er 1 Vehicle identification number front left side 1 Model label U17S10E0 book Page 2 Friday July 6 2007 1 37 PM ...

Страница 168: ...rpose of noise control prior to its sale or delivery to the ul timate purchaser or while it is in use or 2 the use of the vehicle after such device or element of design has been removed or rendered inoperative by any person AMONG THOSE ACTS PRESUMED TO CONSTITUTE TAMPERING ARE THE ACTS LISTED BELOW These acts include tampering with the following systems i e modification removal etc Exhaust system ...

Страница 169: ...t the maintenance work is required It is not acceptable proof of maintenance work MAINTENANCE INTERVAL DATE OF SERVICE MILEAGE SERVICING DEALER NAME AND ADDRESS REMARKS month km mi hours 1 320 200 20 3 1300 800 80 6 2500 1600 160 12 5000 3200 320 18 7500 4800 480 24 10000 6400 640 30 12500 8000 800 36 15000 9600 960 42 17500 11200 1120 48 20000 12800 1280 54 22500 14400 1440 60 25000 16000 1600 U1...

Страница 170: ...ubsequent pur chaser s it is imperative that the machine be inspected and registered for warranty by an autho rized Yamaha ATV dealer In order for this warranty to remain in effect this inspection and registration must take place within ten 10 days after transfer An inspection and registration fee will be charged for this service EMISSION CONTROL SYSTEM WARRANTY Yamaha Motor Corporation USA also w...

Страница 171: ...nd upon your request at any later date 3 Each Yamaha ATV dealer is held responsible for his setup service and war ranty repair work Q Is the warranty transferable to second owners A Yes The remainder of the existing warranty can be transferred upon request The unit has to be inspected and re registered by an authorized Yamaha ATV dealer for the policy to remain effective CUSTOMER SERVICE If your m...

Страница 172: ...le to pay and repairs aren t pro rated You don t have any out of pocket expenses for covered repairs In addition Travel and Recreation Interruption Protection TRIP is included at no extra cost TRIP gives you up to 150 reimbursement per occurrence for any reasonable expenses you incur because your Yamaha needs covered service replacement vehicle rental emergency towing phone calls even food and lod...

Страница 173: ... costs less within the first 90 days after you buy your Yamaha See your dealer today A special note If visiting your dealer isn t convenient contact Yamaha with your Primary ID number your frame number We ll be happy to help you get the Y E S coverage you need Yamaha Service Marketing P O Box 6555 Cypress CA 90630 Indicates a potential hazard that could result in serious injury or death WARNING U1...

Страница 174: ...11 9 11 EBU26132 U17S10E0 book Page 9 Friday July 6 2007 1 37 PM ...

Страница 175: ...21 Carrier rear 4 22 Chassis fasteners 5 9 Cleaning 9 1 Coolant 5 4 8 26 Coolant temperature warning light 4 2 D Differential gear lock indicator light 4 3 Differential gear oil 5 4 8 24 Drive select lever 4 14 Drive select lever and driving in reverse 6 3 Drive select lever safety system cable adjusting 8 38 Drive shaft universal joint lubricating 8 48 E Engine break in 6 5 Engine cold start 6 1 ...

Страница 176: ...ght 4 3 Parking 6 6 Parking on a slope 6 6 Part locations 3 1 Pre operation check list 5 1 R Rear knuckle pivots lubricating 8 49 Recoil starter 4 15 Reverse indicator light 4 2 Riding your ATV 7 1 S Safety information 1 1 Seat 4 19 Shock absorber assemblies adjusting the front and rear 4 22 Spark arrester cleaning 8 33 Spark plug checking 8 14 Specifications 10 1 Speed limiter 4 12 Stabilizer bus...

Страница 177: ...t cooling duct check hose 8 34 Vehicle identification number 11 1 W Warranty extended 11 7 Warranty limited 11 5 Wheel hub bearings checking 8 48 Wheel installing 8 58 Wheel removing 8 58 U17S10E0 book Page 3 Friday July 6 2007 1 37 PM ...

Страница 178: ...B6 yoko fm Page 1 Wednesday March 8 2006 10 46 AM ...

Страница 179: ...B6 yoko fm Page 1 Wednesday March 8 2006 10 46 AM ...

Страница 180: ... and control Improper ATV use can result in SEVERE INJURY or DEATH NEVER operate without proper training or instruction at speeds too fast for your skills or the conditions on public roads a collision can occur with another vehicle with a passenger passengers affect balance and steering and increase risk of losing control ALWAYS USE AN APPROVED HELMET AND PROTECTIVE GEAR NEVER USE ON PUBLIC ROADS ...

Страница 181: ......

Страница 182: ......

Отзывы: