background image

i

En

• To assure the finest performance, please read this 

manual carefully. Keep it in a safe place for future 
reference.

• Install this unit in a well ventilated, cool, dry, clean 

place - away from direct sunlight, heat sources, 
vibration, dust, moisture, and/or cold. For proper 
ventilation, allow the following minimum 
clearances. 
Top: 10 cm (4 in), Rear: 10 cm (4 in), Sides: 10 cm 
(4 in)

• Locate this unit away from other electrical 

appliances, motors, or transformers to avoid 
humming sounds.

• Do not expose this unit to sudden temperature 

changes from cold to hot, and do not locate this 
unit in an environment with high humidity (i.e. a 
room with a humidifier) to prevent condensation 
inside this unit, which may cause an electrical 
shock, fire, damage to this unit, and/or personal 
injury.

• Avoid installing this unit where foreign objects 

may fall onto this unit and/or this unit may be 
exposed to liquid dripping or splashing. On the top 
of this unit, do not place:

Other components, as they may cause damage 
and/or discoloration on the surface of this unit.

Burning objects (i.e. candles), as they may cause 
fire, damage to this unit, and/or personal injury.

Containers with liquid in them, as they may fall 
and liquid may cause electrical shock to the user 
and/or damage to this unit.

• Do not cover this unit with a newspaper, 

tablecloth, curtain, etc. in order not to obstruct heat 
radiation. If the temperature inside this unit rises, it 
may cause fire, damage to this unit, and/or 
personal injury.

• Do not plug in this unit to a wall outlet until all 

connections are complete.

• Do not operate this unit upside-down. It may 

overheat, possibly causing damage.

• Do not use force on switches, knobs and/or cords.
• When disconnecting the power cable from the wall 

outlet, grasp the plug; do not pull the cable.

• Do not clean this unit with chemical solvents; this 

might damage the finish. Use a clean, dry cloth.

• Only voltage specified on this unit must be used. 

Using this unit with a higher voltage than specified 
is dangerous and may cause fire, damage to this 
unit, and/or personal injury. Yamaha will not be 

held responsible for any damage resulting from use 
of this unit with a voltage other than specified.

• To prevent damage by lightning, keep the power 

cable and outdoor antennas disconnected from a 
wall outlet or the unit during a lightning storm.

• Do not attempt to modify or fix this unit. Contact 

qualified Yamaha service personnel when any 
service is needed. The cabinet should never be 
opened for any reasons.

• When not planning to use this unit for long periods 

of time (i.e. vacation), disconnect the AC power 
plug from the wall outlet.

• Be sure to read the “Troubleshooting” section on 

common operating errors before concluding that 
this unit is faulty.

• Before moving this unit, press   to set this unit in 

standby mode, and disconnect the power supply 
cable from the wall outlet.

• Condensation will form when the surrounding 

temperature changes suddenly. Disconnect the 
power supply cable from the outlet, then leave the 
unit alone.

• Install this unit near the wall outlet and where the 

AC power plug can be reached easily.

• The batteries shall not be exposed to excessive 

heat such as sunshine, fire or like.

• Secure placement or installation is the owner’s 

responsibility. Yamaha shall not be liable for any 
accident caused by improper placement or 
installation of speakers.

Notes on remote controls and batteries

• Do not spill water or other liquids on the remote 

control.

• Do not drop the remote control.
• Do not leave or store the remote control in the 

following places:

places of high humidity, such as near a bath

places of high temperatures, such as near a 
heater or a stove

places of extremely low temperatures

dusty places

• Do not expose the remote control sensor of this 

unit to direct sunlight or lighting such as inverted 
fluorescent lamps.

• If the batteries grow old, the effective operation 

range of the remote control decreases 

considerably. If this happens, replace the batteries 
with two new ones as soon as possible.

• Do not use old batteries together with new ones.
• Do not use different types of batteries (such as 

alkaline and manganese batteries) together. Read 
the packaging carefully as these different types of 
batteries may have the same shape and color.

• Exhausted batteries may leak. If the batteries have 

leaked, dispose of them immediately. Avoid 
touching the leaked material or letting it come into 
contact with clothing, etc. Clean the battery 
compartment thoroughly before installing new 
batteries.

• Do not throw away batteries with general house 

waste. Dispose of them correctly in accordance 
with your local regulations.

• Keep batteries away from children. If a battery is 

accidentally swallowed, contact your doctor 
immediately.

• When not planning to use the remote control for 

long periods of time, remove the batteries from the 
remote control.

• Do not charge or disassemble the supplied 

batteries.

CAUTION: READ THIS BEFORE OPERATING YOUR UNIT.

WARNING

TO REDUCE THE RISK OF FIRE OR 
ELECTRIC SHOCK, DO NOT EXPOSE THIS 
UNIT TO RAIN OR MOISTURE.

As long as this unit is connected to the AC wall 
outlet, it is not disconnected from the AC power 
source even if you turn off this unit by  . In this 
state, this unit is designed to consume a very 
small quantity of power.

 (Power key)

Turns on the power of this unit or sets it to the 
standby mode.

(YAS-103 only)

Do not use this unit within 22 cm (9 inches) of 
persons with a heart pacemaker implant or 
defibrillator implant.

(YAS-103 only)

Radio waves may affect electro-medical devices.
Do not use this unit near medical devices or 
inside medical facilities.

Содержание YAS-93

Страница 1: ...LHV Front Surround System Owner s Manual Manual de Instrucciones ...

Страница 2: ...cluding that this unit is faulty Before moving this unit press to set this unit in standby mode and disconnect the power supply cable from the wall outlet Condensation will form when the surrounding temperature changes suddenly Disconnect the power supply cable from the outlet then leave the unit alone Install this unit near the wall outlet and where the AC power plug can be reached easily The bat...

Страница 3: ...e TV s remote signal through the sound bar TV Remote Repeater function 14 Setting the auto power standby function 14 Initializing the sound bar 14 Troubleshooting 15 Specifications 18 PDF versions of this manual can be downloaded from the following website http download yamaha com About this manual Illustrations used in this manual refer to the YAS 103 Instructions are common to both YAS 103 and Y...

Страница 4: ... have received all of the following items Sound bar Remote control Battery x 2 AAA R03 UM4 Optical cable 1 5 m 4 9 ft Mounting template Using when attaching the sound bar to a wall Spacer 2 Using when attaching the sound bar to a wall ...

Страница 5: ...ar voice Makes voice sound such as dialogues and narrations clear p 9 UniVolume Maintains consistent volume between channels programs commercials and sound sources p 9 Q1 Can I operate the sound bar using the remote control of the TV Switching between the remote controls of the TV and sound bar is inconvenient A1 Yes You can control the sound bar using your TV s remote control by the TV s remote c...

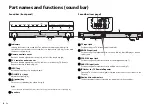
Страница 6: ...the volume p 8 F power key Turns on or off standby the sound bar p 9 HINT The sound bar may automatically turn off when the auto power standby function is enabled p 14 G Speakers Sound bar rear panel H TV input jack For connecting to a TV with an optical cable p 6 I BD DVD input jack For connecting to a playback device such as a Blu ray Disc BD player with an optical cable J COAXIAL input jack For...

Страница 7: ...r to connect the sound bar and external devices such as a TV before installing the sound bar Do not place the sound bar within 50 mm 2 of the TV The wall mount brackets on the rear panel can be removed as necessary Cautions When installing the sound bar on a wall all installation work must be performed by a qualified contractor or dealer The customer must never attempt to perform this installation...

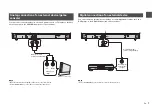
Страница 8: ...etting to disable the speaker output is not available on your TV you may disable it by connecting headphones to the headphone jack on the TV For details refer to the manuals of the TV The TV BD DVD and COAXIAL input jacks support the following audio signals PCM 2 channel Dolby Digital up to 5 1 channel DTS Digital Surround up to 5 1 channel CAUTIONS Do not connect the power cable of the sound bar ...

Страница 9: ... source You can connect an external device that has a coaxial digital audio output such as a DVD player to the COAXIAL input jack of the sound bar NOTE Select the COAXIAL key on the remote control for the input source Analog connection of an external device game console RCA stereo cable commercially available Analog audio output Game console etc red white Digital connection of an external device C...

Страница 10: ...a Bluetooth connected device The indicator for the selected input source lights up Example when TV is selected HINT To play audio of the playback device connected to the TV or to watch videos of the playback device set the TV s input source to the playback device For details on Bluetooth connection refer to Listening to the sound from a Bluetooth device YAS 103 only p 10 SUBWOOFER keys Adjust the ...

Страница 11: ... function When this function is enabled you can enjoy clear voice sounds while watching movies TV dramas news programs or sports programs UNIVOLUME key Enables disables the UniVolume function When this function is enabled consistent volume is maintained between channels programs commercials and sound sources HINT The UniVolume function is automatically disabled when BLUETOOTH is selected as the in...

Страница 12: ...vice 3 Select YAS 103 Yamaha in the Bluetooth device list on the device If a passkey PIN is required enter the number 0000 When pairing is completed or a completion message appears NOTE Perform pairing with the Bluetooth device and sound bar within 10 meters 33 ft of each other Up to eight Bluetooth devices can be pairing with the sound bar If a ninth device is paired the oldest pairing informatio...

Страница 13: ... turned off Using the Bluetooth standby mode The Bluetooth standby mode allows you to turn on or off the sound bar automatically that interlocked by the operation of the Bluetooth device How to set With the sound bar turned on hold down the BLUETOOTH STANDBY key on the sound bar s remote control for more than 3 seconds Holding down the BLUETOOTH STANDBY key for 3 seconds each time toggles the mode...

Страница 14: ... times 5 Teach the sound bar the Volume code of the TV s remote control 5 1 Press VOLUME on the front panel of the sound bar 5 2 While pointing your TV s remote control at the remote control sensor hold down the volume key for more than 1 second twice or three times Programming the sound bar with the TV s remote control TV s remote control learning function NOTE This function is available only whe...

Страница 15: ...Set the TV volume to minimum When you turn up the volume of the sound bar with the TV s remote control the volume of the TV may be turned up at the same time In this case follow Step 3 in Connections p 6 to change the TV setting You can press the key on the sound bar s remote control to finish leaning mode Clearing all programmed functions 1 With the sound bar turned off hold down the LEARN key on...

Страница 16: ... change the TV setting You can check the status of the TV Remote Repeater function by the center indicator when turning on the sound bar By enabling the auto power standby function you can avoid forgetting to turn off the sound bar after use or if you fall asleep while watching TV NOTE When the auto power standby function is enabled and one of the following conditions is met the sound bar will aut...

Страница 17: ...ower on the front panel of the sound bar for more than 10 seconds to reboot it If the problem persists disconnect the power cable from the AC wall outlet and plug it again The sound bar operates by itself Another Bluetooth device is being operated nearby Terminate Bluetooth connection of the sound bar p 11 TV s 3D glasses do not work The sound bar is blocking the 3D glasses transmitter of your TV ...

Страница 18: ...nce the signals from the TV s remote control and IR flasher for TV Remote Repeater of the sound bar are interfering Disable the TV Remote Repeater function p 14 The sound bar does not learn TV s remote control operations The TV s remote control key was not held down long enough Hold down the key for more than 1 second twice or three times p 12 The TV s remote control does not use infrared signals ...

Страница 19: ...s Terminate current Bluetooth connection and make connection for the desired device More than nine devices are paired and the oldest pairing information is deleted Perform pairing again The sound bar can retain pairing information for up to eight devices When pairing a ninth device the oldest pairing information will be deleted No sound is produced or the sound is interrupted during playback The B...

Страница 20: ...utput Power Front L R 30 W x 2 ch Subwoofer 60 W Front Speaker Section Type Acoustic suspension type Non magnetic shielding type Driver 6 5 cm 2 1 2 cone x 2 Frequency Response 150 Hz to 22 kHz Subwoofer Section Type Bass reflex type Non magnetic shielding type Driver 7 5 cm 3 cone x 2 Frequency Response 50 Hz to 150 Hz Decoder Supported audio signal TV BD DVD PCM 2ch Dolby Digital DTS Digital Sur...

Страница 21: ...se a technology minimizing the influence of other components using the same radio band such influence may reduce the speed or distance of communications and in some cases interrupt communications The speed of signal transfer and the distance at which communications is possible differs according to the distance between the communicating devices the presence of obstacles radio wave conditions and ty...

Страница 22: ... la toma de corriente Asegúrese de leer la sección Resolución de problemas antes de dar por concluido que su aparato está averiado Antes de trasladar este aparato pulse para ponerlo en el modo de espera y luego desconecte el cable de alimentación de CA de la toma de corriente La condensación se formará cuando cambie de repente la temperatura ambiental Desconecte en este caso el cable de alimentaci...

Страница 23: ...sonido función de repetidor de mando a distancia de TV 14 Configuración de la función de espera automática 14 Inicialización de la barra de sonido 14 Resolución de problemas 15 Especificaciones 18 Se pueden descargar versiones PDF de este manual desde el siguiente sitio web http download yamaha com Acerca de este manual Las ilustraciones de este manual hacen referencia al modelo YAS 103 Las instru...

Страница 24: ...bido todos los elementos siguientes Barra de sonido Mando a distancia Pilas x 2 AAA R03 UM4 Cable óptico 1 5 m Plantilla de montaje Se utiliza para montar la barra de sonido en la pared Separador 2 Se utiliza para montar la barra de sonido en la pared ...

Страница 25: ... 14 Voz clara Consiga unas voces con un sonido claro y nítido por ejemplo diálogos y narraciones p 9 UniVolume Conserve el mismo volumen en distintos canales programas anuncios y fuentes de sonido p 9 P1 Puedo controlar la barra de sonido utilizando el mando a distancia del TV Tener que utilizar tanto el mando a distancia del TV como el de la barra de sonido es poco práctico R1 Sí Puede controlar ...

Страница 26: ... p 8 F Tecla encendido Enciende o apaga espera la barra de sonido p 9 SUGERENCIA La barra de sonido puede apagarse automáticamente cuando está habilitada la función de espera automática p 14 G Altavoces Barra de sonido panel trasero H Toma de entrada TV Para conectar el aparato al TV con un cable óptico p 6 I Toma de entrada BD DVD Para conectar el aparato a un dispositivo de reproducción como un ...

Страница 27: ...a de sonido a los dispositivos externos como un TV antes de instalar la barra de sonido No coloque la barra de sonido a menos de 50 mm del TV Los soportes de montaje en pared del panel trasero se pueden quitar si es necesario Precauciones Si la barra de sonido se instala en una pared todo el trabajo de instalación debe realizarlo un contratista o distribuidor cualificado El cliente nunca debe inte...

Страница 28: ...puede deshabilitar la salida de altavoz podría deshabilitarla conectando auriculares a la toma de auriculares del TV Para obtener más información consulte el manual del TV Las tomas de entrada TV BD DVD y COAXIAL admiten las siguientes señales de audio PCM 2 canales Dolby Digital hasta 5 1 canales DTS Digital Surround hasta 5 1 canales PRECAUCIONES No conecte el cable de alimentación de la barra d...

Страница 29: ...ectar un dispositivo externo con una salida de audio digital coaxial como un reproductor de DVD a la toma de entrada COAXIAL de la barra de sonido NOTA Seleccione el botón COAXIAL del mando a distancia como fuente de entrada Conexión analógica de un dispositivo externo videoconsola Cable RCA estéreo disponible en el mercado Salida de audio analógica Videoconsola etc rojo blanco Conexión digital de...

Страница 30: ...ooth conectado El indicador de la fuente de entrada seleccionada se ilumina Ejemplo cuando TV está seleccionado SUGERENCIA Para reproducir el audio o ver vídeos del dispositivo conectado al TV establezca la fuente de entrada del TV en el dispositivo de reproducción Para obtener más información sobre la conexión Bluetooth consulte Escuchar sonido desde un dispositivo Bluetooth solo YAS 103 p 10 Tec...

Страница 31: ...función de claridad de voz Cuando está función está activada es más claro el sonido de las voces de películas series de TV programas de noticias y deportes etc Tecla UNIVOLUME Activa o desactiva la función UniVolume Cuando está activada esta función se puede mantener el mismo volumen en distintos canales programas anuncios y fuentes de sonido SUGERENCIA La función UniVolume se desactiva automática...

Страница 32: ...dispositivos Bluetooth del dispositivo Si le pide una contraseña PIN introduzca el número 0000 Cuando haya finalizado el emparejado aparece o un mensaje de confirmación NOTA Lleve a cabo el emparejado con el dispositivo Bluetooth y la barra de sonido dejando una distancia entre ellos de no más de 10 metros Se pueden emparejar hasta ocho dispositivos Bluetooth con la barra de sonido Si se quiere em...

Страница 33: ...o del modo de espera Bluetooth El modo de espera Bluetooth permite activar o desactivar la barra de sonido automáticamente todo combinado con el funcionamiento del dispositivo Bluetooth Cómo configurarlo Con la barra de sonido apagada mantenga pulsado el botón BLUETOOTH STANDBY en el mando a distancia de la barra de sonido durante más de 3 segundos Mantener pulsada la tecla BLUETOOTH STANDBY duran...

Страница 34: ...ódigo de Volumen del mando a distancia del TV 5 1 Pulse VOLUME en el panel delantero de la barra de sonido 5 2 Dirigiendo el mando a distancia del TV hacia el sensor de mando a distancia mantenga pulsado más de 1 segundo dos o tres veces el botón de volumen Programar la barra de sonido con el mando a distancia del TV función de memorización de mando a distancia de TV NOTA Esta función solo está di...

Страница 35: ...umen del TV al mínimo Cuando suba el volumen de la barra de sonido con el mando a distancia del TV el volumen de este podría subir también En ese caso realice el paso 3 de Conexiones p 6 para cambiar el ajuste del TV Puede pulsar el botón del mando a distancia de la barra de sonido para finalizar el modo de memorización Borrado de todas las funciones programadas 1 Con la barra de sonido apagada ma...

Страница 36: ...V Puede comprobar el estado de la función de repetidor de mando a distancia de TV en el indicador central al encender la barra de sonido Si activa la función de espera automática por fin podrá olvidarse de apagar la barra de sonido después de usarla aunque se quede dormido delante del TV NOTA Con la función de espera automática activada y si se cumple una de las condiciones siguientes la barra de ...

Страница 37: ... pulsado más de diez segundos encendido en la parte delantera de la barra de sonido para que se vuelva a encender Si el problema persiste desconecte el cable de alimentación de la toma de CA y vuelva a enchufarlo La barra de sonido empieza a funcionar sola Se está usando otro dispositivo Bluetooth cerca Finalice la conexión Bluetooth de la barra de sonido p 11 Las gafas 3D del TV no funcionan La b...

Страница 38: ...eñales del mando a distancia del TV y la luz IR del repetidor de mando a distancia de TV de la barra de sonido Deshabilite la función de repetidor de mando a distancia de TV p 14 La barra de sonido no memoriza las operaciones del mando a distancia del TV El botón del mando a distancia del TV no se mantuvo pulsado el tiempo suficiente Mantenga la tecla pulsada más de 1 segundo dos o tres veces p 12...

Страница 39: ...blezca la conexión nueva con el dispositivo que desee Hay más de nueve dispositivos emparejados y la información de emparejado más antigua se ha eliminado Vuelva a realizar el emparejado La barra de sonido puede conservar la información de emparejado de hasta ocho dispositivos Cuando se empareja un noveno dispositivo la información de emparejado más antigua se elimina No se produce sonido o el son...

Страница 40: ...cia de salida nominal máxima Delantero L R 30 W x 2 canales Altavoz de ultragraves 60 W Sección de altavoz delantero Tipo Tipo de suspensión acústica Tipo de blindaje no magnético Controlador 2 conos de 6 5 cm Respuesta de frecuencia De 150 Hz a 22 kHz Sección de altavoz de ultragraves Tipo Tipo reflexión de graves Tipo de blindaje no magnético Controlador 2 conos de 7 5 cm Respuesta de frecuencia...

Страница 41: ...al mínimo la influencia de otros componentes que puedan estar usando la misma banda de radio esta influencia inevitablemente puede reducir la velocidad o la distancia de las comunicaciones y en algunos casos interrumpir la comunicación La velocidad de transferencia de la señal y la distancia a la que es posible la comunicación varía en función de la distancia entre los dispositivos comunicantes la...

Страница 42: ... 2013 Yamaha Corporation Printed in Malaysia ZK08340 ...

Отзывы: