background image

INSTRUMENT AND CONTROL FUNCTIONS

4-2

1

2

3

4

5

6

7

8

9

EAU11080

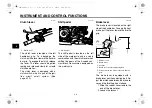
High beam indicator light “

” 

This indicator light comes on when the
high beam of the headlight is switched
on.

EAU52390

Fuel level warning light “ ” 

This warning light comes on when the
fuel level drops below approximately
3.0 L (0.79 US gal, 0.66 Imp.gal). When
this occurs, refuel as soon as possible.
The electrical circuit of the warning light
can be checked by pushing the main
switch to “ON”. The warning light
should come on for a few seconds, and
then go off.
If the warning light does not come on
initially when the main switch is pushed
to “ON”, or if the warning light remains
on, have a Yamaha dealer check the
electrical circuit.

EAU52400

Engine trouble warning light “

” 

This warning light comes on or flashes
if a problem is detected in the electrical
circuit monitoring the engine. If this oc-
curs, have a Yamaha dealer check the
vehicle.

The electrical circuit of the warning light
can be checked by pushing the main
switch to “ON”. The warning light
should come on for a few seconds, and
then go off.
If the warning light does not come on
initially when the main switch is pushed
to “ON”, or if the warning light remains
on, have a Yamaha dealer check the
electrical circuit.

EAU52982

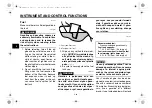
Multi-function display 

WARNING

EWA12312

Be sure to stop the vehicle before
making any setting changes to the
multi-function display. Changing
settings while riding can distract the
operator and increase the risk of an
accident.

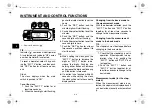
1. “RST” button

2. “SLCT 1” button

3. “SLCT 2” button

4. Clock/stopwatch

5. Speedometer

6. Odometer/tripmeter

1 2 3

4

6

5

1DX-9-20.book  2 ページ  2011年10月12日 水曜日 午前9時39分

Содержание wr450fb

Страница 1: ...q Read this manual carefully before operating this vehicle OWNER S MANUAL WR450FB 1DX 28199 20 1DX 9 20_EUR OCE_Hyoshi indd 1 2011 10 20 11 59 58 ...

Страница 2: ...Q Read this manual carefully before operating this vehicle This manual should stay with this vehicle if it is sold EAU46090 1DX 9 20_EUR OCE_Hyoshi indd 2 2011 10 20 11 59 58 ...

Страница 3: ...jury In addition the many tips given in this manual will help keep your motorcycle in the best possible condition If you have any further questions do not hesitate to contact your Yamaha dealer The Yamaha team wishes you many safe and pleasant rides So remember to put safety first Yamaha continually seeks advancements in product design and quality Therefore while this manual contains the most cur ...

Страница 4: ...potential personal injury hazards Obey all safety messages that follow this symbol to avoid possible injury or death A WARNING indicates a hazardous situation which if not avoided could result in death or serious injury A NOTICE indicates special precautions that must be taken to avoid damage to the vehicle or other property A TIP provides key information to make procedures easier or clearer WARNI...

Страница 5: ...MANUAL 2011 by Yamaha Motor Co Ltd 1st edition September 2011 All rights reserved Any reprinting or unauthorized use without the written permission of Yamaha Motor Co Ltd is expressly prohibited Printed in Japan 1DX 9 20 book 2 ページ 2011年10月12日 水曜日 午前9時39分 ...
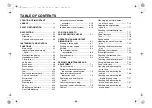
Страница 6: ...k in 6 4 Parking 6 5 PERIODIC MAINTENANCE AND ADJUSTMENT 7 1 Owner s tool kit 7 2 Periodic maintenance chart for the emission control system 7 3 General maintenance and lubrication chart 7 4 Removing and installing the panel 7 7 Checking the spark plug 7 7 Engine oil and oil filter element 7 8 Coolant 7 12 Cleaning the air filter element and check hose 7 14 Adjusting the engine idling speed 7 17 C...

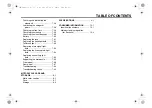
Страница 7: ...33 Replacing a turn signal light bulb 7 34 Replacing the license plate light bulb 7 34 Replacing an auxiliary light bulb 7 35 Supporting the motorcycle 7 35 Front wheel 7 36 Rear wheel 7 37 Troubleshooting 7 39 Troubleshooting charts 7 40 MOTORCYCLE CARE AND STORAGE 8 1 Matte color caution 8 1 Care 8 1 Storage 8 3 SPECIFICATIONS 9 1 CONSUMER INFORMATION 10 1 Identification numbers 10 1 Motorcycle ...

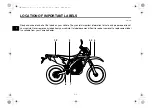
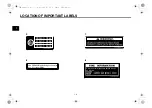
Страница 8: ...icle They contain important information for safe and proper operation of your vehicle Never remove any labels from your vehicle If a label becomes difficult to read or comes off a replacement label is available from your Yamaha dealer 3 8 4 5 7 1 2 6 1DX 9 20 book 1 ページ 2011年10月12日 水曜日 午前9時39分 ...

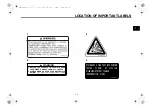
Страница 9: ...READ THE OWNER S MANUAL AND ALL LABELS ALWAYS WEAR AN APPROVED MOTORCYCLE HELMET eye protection and protective clothing 5GK 2118K 00 STATIONARY NOISE TEST INFORMATION TESTED 92 dB A AT 3750 r min SILENCINGSYSTEM YAMAHA IDENTIFICATION 5TJ E0 1DX 2118G 10 1 2 3 4 1DX 9 20 book 2 ページ 2011年10月12日 水曜日 午前9時39分 ...
Страница 10: ...be set as follows 150 kPa 1 50 kgf cm2 22 psi 200 kPa 2 00 kgf cm2 29 psi 1DX 21668 A0 Use PREMIUM unleaded gasoline with min 95 octane RON 2S3 2817K 00 1DX 2811P 00 39R 00 9562 41R 03 9552 53R 01 0703 78R 03 5034 E13 5 6 7 8 1DX 9 20 book 3 ページ 2011年10月12日 水曜日 午前9時39分 ...

Страница 11: ... use as a competition model including enduro usage This motorcycle is not designed nor intended for continuous Paved Road use Never use this motorcycle on highway motor way expressway If any of the components that are necessary for the vehicle to com ply with regulations are modified or replaced with non specified com ponents the vehicle will no longer meet the regulations Watch carefully for othe...

Страница 12: ...n approved helmet Wear a face shield or goggles Wind in your unprotected eyes could contribute to an impairment of vision that could delay seeing a hazard The use of a jacket heavy boots trousers gloves etc is effective in preventing or reducing abrasions or lacerations Never wear loose fitting clothes otherwise they could catch on the control levers footrests or wheels and cause injury or an acci...

Страница 13: ... check the condition and pres sure of your tires Never attach any large or heavy items to the handlebar front fork or front fender These items including such cargo as sleeping bags duffel bags or tents can create unstable han dling or a slow steering re sponse This vehicle is not designed to pull a trailer or to be attached to a sidecar Genuine Yamaha Accessories Choosing accessories for your vehi...

Страница 14: ...t of the opera tor and may limit control ability therefore such accessories are not recommended Use caution when adding electri cal accessories If electrical acces sories exceed the capacity of the motorcycle s electrical system an electric failure could result which could cause a dangerous loss of lights or engine power Aftermarket Tires and Rims The tires and rims that came with your motorcycle ...

Страница 15: ...SAFETY INFORMATION 2 5 2 3 4 5 6 7 8 9 tie downs if possible so that the motorcycle will not bounce exces sively during transport 1DX 9 20 book 5 ページ 2011年10月12日 水曜日 午前9時39分 ...

Страница 16: ...5 3 Starter knob page 4 12 4 Battery page 7 30 5 Main fuse page 7 31 6 Air filter element page 7 14 7 Engine oil check bolt page 7 8 8 Shift pedal page 4 8 9 Engine oil filler cap page 7 8 10 Engine oil drain bolt oil tank page 7 8 11 Engine oil dipstick page 7 8 12 Front fork rebound damping force adjusting screw page 4 14 1DX 9 20 book 1 ページ 2011年10月12日 水曜日 午前9時39分 ...

Страница 17: ...ng force adjusting nut for fast compression damping page 4 16 3 Kickstarter page 4 12 4 Radiator cap page 7 12 5 Steering lock page 4 13 6 Coolant drain bolt page 7 13 7 Brake pedal page 4 9 8 Engine oil drain bolt crankcase page 7 8 9 Rear brake fluid reservoir page 7 23 10 Shock absorber assembly rebound damping force adjusting screw page 4 16 11 Rear brake light switch page 7 22 1DX 9 20 book 2...

Страница 18: ...ver page 4 8 2 Left handlebar switches page 4 7 3 Multi function display page 4 2 4 Main switch page 4 1 5 Front brake fluid reservoir page 7 23 6 Right handlebar switches page 4 7 7 Brake lever page 4 8 8 Throttle grip page 7 17 9 Fuel tank cap page 4 9 1DX 9 20 book 3 ページ 2011年10月12日 水曜日 午前9時39分 ...

Страница 19: ...FF while the vehicle is moving otherwise the electrical systems will be switched off which may result in loss of control or an accident NOTICE ECA17830 Make sure that the main switch is in OFF with the engine turned off otherwise the battery may discharge to the point that the starter motor will not operate properly EAU49391 Indicator lights and warning lights EAU11020 Turn signal indicator light ...

Страница 20: ...uble warning light This warning light comes on or flashes if a problem is detected in the electrical circuit monitoring the engine If this oc curs have a Yamaha dealer check the vehicle The electrical circuit of the warning light can be checked by pushing the main switch to ON The warning light should come on for a few seconds and then go off If the warning light does not come on initially when th...

Страница 21: ...rate tripmeter reading a stopwatch which shows the time that has been accumulated since the start of stopwatch measure ment TIP Be sure to push the main switch to ON before using the SLCT 1 SLCT 2 and RST buttons When the main switch is pushed to ON all of the display segments of the multi function display will ap pear and then disappear in order to test the electrical circuit Basic mode Odometer ...

Страница 22: ... the digits or SLCT 2 button to de crease the digits Pushing and holding either button will increase or decrease the digits continuously until the button is released If a button is not pushed within 30 seconds while setting the clock the clock will be set to the currently displayed time Changing from the basic mode to the measurement mode With the odometer selected push the SLCT 1 button and SLCT ...

Страница 23: ...LCT 1 button and SLCT 2 button together to stop the stopwatch 3 To resume stopwatch counting push the SLCT 1 button and SLCT 2 button together To reset the stopwatch to zero push the RST button for at least two seconds TIP The stopwatch will continue counting when the vehicle is stopped To stop and or resume counting repeat steps 2 and 3 Auto start 1 Push the SLCT 1 button for at least two seconds...

Страница 24: ...push the SLCT 1 button To decrease the read ing push the SLCT 2 button Pushing and holding either button will increase or decrease the reading continuously until the button is released TIP Calibrating the reading of the dis tance compensation tripmeter is possi ble regardless of the stopwatch operation Resetting the distance compensa tion tripmeter or the distance com pensation tripmeter in combin...

Страница 25: ...s switch to sound the horn EAU12660 Engine stop switch Set this switch to before starting the engine Set this switch to to stop the engine in case of an emergen cy such as when the vehicle overturns or when the throttle cable is stuck EAU12711 Start switch Push this switch to crank the engine with the starter See page 6 1 for start ing instructions prior to starting the en gine EAU52440 The engine...

Страница 26: ...sed in combination with the clutch lever when shifting the gears of the 5 speed con stant mesh transmission equipped on this motorcycle EAU41264 Brake lever The brake lever is located on the right side of the handlebar To apply the front brake pull the lever toward the throttle grip The brake lever is equipped with a brake lever position adjusting bolt Ad just the distance between the brake le ver...

Страница 27: ...ply the rear brake press down on the brake pedal EAU13182 Fuel tank cap To remove the fuel tank cap turn it counterclockwise and then pull it off To install the fuel tank cap insert it into the tank opening and then turn it clock wise WARNING EWA11091 Make sure that the fuel tank cap is properly closed after filling fuel Leaking fuel is a fire hazard Distance between the brake lever and the thrott...

Страница 28: ...s ECA10071 4 Be sure to securely close the fuel tank cap WARNING EWA15151 Gasoline is poisonous and can cause injury or death Handle gaso line with care Never siphon gaso line by mouth If you should swallow some gasoline or inhale a lot of gas oline vapor or get some gasoline in your eyes see your doctor immedi ately If gasoline spills on your skin wash with soap and water If gaso line spills on y...

Страница 29: ...his model is equipped with a catalytic converter in the exhaust system WARNING EWA10862 The exhaust system is hot after op eration To prevent a fire hazard or burns Do not park the vehicle near possible fire hazards such as grass or other materials that easily burn Park the vehicle in a place where pedestrians or children are not likely to touch the hot exhaust system Make sure that the exhaust sy...

Страница 30: ...Kickstarter To start the engine fold out the kick starter lever move it down lightly with your foot until the gears engage and then push it down smoothly but force fully This model is equipped with a pri mary kickstarter allowing the engine to be started in any gear if the clutch is disengaged However shifting the transmission into the neutral position before starting is recommended 1 Starter knob...

Страница 31: ...ng is locked and then remove the key from the lock To unlock the steering 1 Insert the key into the steering lock 2 Turn the key 1 2 turn in either di rection 3 Remove the key WARNING Never ride with the key inserted into the steering lock which may result in loss of control and an accident EWA16160 EAU53200 Seat To remove the seat Remove the bolts and then slide the seat to the rear and pull upwa...

Страница 32: ...g force To increase the rebound damping force and thereby harden the rebound damp ing turn the adjusting screw on each fork leg in direction a To decrease the rebound damping force and thereby soften the rebound damping turn the adjusting screw on each fork leg in di rection b Compression damping force To increase the compression damping force and thereby harden the compres sion damping turn the a...

Страница 33: ... and loss of sta bility may result When riding in extremely rough condi tions the air temperature and pressure in the front fork will rise This will in crease the spring preload and harden the front suspension If this occurs bleed the front fork as follows 1 Lift the front wheel off the ground according to the procedure on page 7 35 TIP When bleeding the front fork there should be no weight on the...

Страница 34: ...ad adjustment should be made by a Yamaha dealer since this service requires special tools and tech nical skills The specified settings are listed below The spring preload setting is deter mined by measuring distance A shown in the illustration The shorter the dis tance A is the higher the spring pre load the longer distance A is the lower the spring preload Rebound damping force To increase the re...

Страница 35: ... a precise adjustment it is ad 1 Rebound damping force adjusting screw Rebound damping setting Minimum soft 30 click s in direction b Standard 18 click s in direction b Maximum hard 0 click s in direction b With the adjusting screw fully turned in direction a 1 a b 1 Compression damping force adjusting bolt for fast compression damping Compression damping setting for fast compression damping Minim...

Страница 36: ...or worn out shock absorber as sembly yourself Take the shock absorber assembly to a Yamaha dealer for any service EAU15305 Sidestand The sidestand is located on the left side of the frame Raise the sidestand or lower it with your foot while holding the vehicle upright TIP The built in sidestand switch is part of the ignition circuit cut off system which cuts the ignition in certain situations See ...

Страница 37: ...s It prevents starting when the trans mission is in gear and the side stand is up but the clutch lever is not pulled It prevents starting when the trans mission is in gear and the clutch le ver is pulled but the sidestand is still down It cuts the running engine when the transmission is in gear and the sid estand is moved down Periodically check the operation of the ignition circuit cut off system...

Страница 38: ...ne has stalled 10 Move the sidestand up 11 Keep the clutch lever pulled 12 Push the start switch Does the engine start The system is OK The motorcycle can be ridden The neutral switch may not be working correctly The motorcycle should not be ridden until checked by a Yamaha dealer The sidestand switch may not be working correctly The motorcycle should not be ridden until checked by a Yamaha dealer...

Страница 39: ...icle check the following points ITEM CHECKS PAGE Fuel Check fuel level in fuel tank Refuel if necessary Check fuel line for leakage Check fuel tank breather hose for obstructions cracks or damage and check hose connection 4 10 4 11 Engine oil Check oil level in oil tank If necessary add recommended oil to specified level Check vehicle for oil leakage 7 8 Coolant Check coolant level If necessary ad...

Страница 40: ... and lubricate cable and grip housing 7 17 7 27 Control cables Make sure that operation is smooth Lubricate if necessary 7 26 Drive chain Check chain slack Adjust if necessary Check chain condition Lubricate if necessary 7 24 7 26 Wheels and tires Check for damage Check tire condition and tread depth Check air pressure Correct if necessary 7 18 7 20 Shift pedal Make sure that operation is smooth C...

Страница 41: ...e properly tightened Tighten if necessary Instruments lights signals and switches Check operation Correct if necessary Sidestand switch Check operation of ignition circuit cut off system If system is not working correctly have Yamaha dealer check vehicle 4 18 ITEM CHECKS PAGE 1DX 9 20 book 3 ページ 2011年10月12日 水曜日 午前9時39分 ...

Страница 42: ... will crank when pushing the start switch EAU52903 Starting a cold engine In order for the ignition circuit cut off system to enable starting one of the following conditions must be met The transmission is in the neutral position The transmission is in gear with the clutch lever pulled and the sid estand up See page 4 19 for more informa tion 1 Push the main swtch to ON and make sure that the engi...

Страница 43: ... and then try again Each starting attempt should be as short as possible to preserve the battery Do not crank the engine more than 10 seconds on any one attempt If the engine does not start with the starter motor try us ing the kickstarter 5 When the engine is warm turn the starter off TIP The engine is warm when it responds quickly to the throttle with the starter turned off NOTICE ECA11042 For m...

Страница 44: ...ubricated only when the engine is running Inade quate lubrication may damage the transmission Always use the clutch while changing gears to avoid damag ing the engine transmission and drive train which are not designed to withstand the shock of forced shifting EAU16810 Tips for reducing fuel consumption Fuel consumption depends largely on your riding style Consider the following tips to reduce fue...

Страница 45: ... for about one hour 5 Start the engine and check the op eration of the motorcycle through out its entire operating range Restart the motorcycle and ride it for about 10 to 15 more minutes The motorcycle will now be ready to ride normally After the engine break in period thor oughly check the motorcycle for loose parts oil leakage and any other prob lems Be sure to inspect and make ad justments tho...

Страница 46: ...ine and exhaust system can become very hot park in a place where pedestri ans or children are not likely to touch them and be burned Do not park on a slope or on soft ground otherwise the vehicle may overturn increasing the risk of a fuel leak and fire Do not park near grass or other flammable materials which might catch fire 1DX 9 20 book 5 ページ 2011年10月12日 水曜日 午前9時39分 ...

Страница 47: ...engine when performing maintenance unless otherwise specified A running engine has moving parts that can catch on body parts or clothing and electrical parts that can cause shocks or fires Running the engine while ser vicing can lead to eye injury burns fire or carbon monoxide poisoning possibly leading to death See page 2 2 for more in formation about carbon monox ide WARNING EWA15460 Brake discs...

Страница 48: ...ool kit are intended to assist you in the performance of preventive maintenance and minor repairs How ever additional tools such as a torque wrench may be necessary to perform certain maintenance work correctly TIP If you do not have the tools or experi ence required for a particular job have a Yamaha dealer perform it for you 1DX 9 20 book 2 ページ 2011年10月12日 水曜日 午前9時39分 ...
Страница 49: ...d technical skills EAU52510 Periodic maintenance chart for the emission control system NO ITEM CHECKS AND MAINTENANCE JOBS INITIAL ODOMETER READINGS ANNUAL CHECK 1000 km 600 mi or 1 month 3000 km 1800 mi or 3 months 5000 km 3000 mi or 6 months 1 Fuel line Check fuel hoses for cracks or damage 2 Spark plug Check condition Clean and regap Replace if necessary 3 Valves Check valve clearance Adjust 4 ...

Страница 50: ...er worn to the limit 5 Brake hoses Check for cracks or damage Check for correct routing and clamping Replace Every 20000 km 12000 mi or every two years 6 Wheels Check runout spoke tightness and for damage Tighten spokes if necessary 7 Tires Check tread depth and for damage Replace if necessary Check air pressure Correct if necessary 8 Wheel bearings Check bearing for looseness or damage 9 Swingarm...

Страница 51: ...ion and for oil leakage 19 Shock absorber assembly Check operation and shock absorber for oil leakage 20 Rear suspension relay arm and connecting arm pivoting points Check operation 21 Engine oil Change Check oil level and vehicle for oil leakage 22 Engine oil filter element Replace 23 Cooling system Check hoses for cracks of damage Replace if necessary Check coolant level and vehicle for coolant ...

Страница 52: ...he brake fluid Replace the brake hoses every two years and if cracked or damaged 24 Front and rear brake switches Check operation 25 Moving parts and cables Lubricate 26 Throttle grip Check operation Check throttle grip free play and adjust if necessary Lubricate cable and grip housing 27 Lights signals and switches Check operation Adjust headlight beam NO ITEM CHECKS AND MAINTENANCE JOBS INITIAL ...

Страница 53: ... Yamaha dealer Since heat and deposits will cause any spark plug to slowly erode it should be removed and checked in ac cordance with the periodic mainte nance and lubrication chart In addition the condition of the spark plug can re veal the condition of the engine The porcelain insulator around the cen ter electrode of the spark plug should be a medium to light tan the ideal color when the vehicl...

Страница 54: ...nt replaced at the intervals specified in the periodic maintenance and lubri cation chart A slight tilt to the side can result in a false reading To check the engine oil level 1 Place the vehicle on a level sur face and hold it in an upright posi tion 2 Start the engine warm it up for several minutes and then turn it off 3 Wait a few minutes until the oil set tles remove the oil tank cap wipe the ...

Страница 55: ... TIP The engine oil should be above the minimum level mark 4 Remove the engine oil check bolt and its gasket and then check the engine oil level TIP The engine oil should be below the brim of the check bolt hole 5 If the engine oil is below the mini mum level mark add sufficient oil of the recommended type to raise it to the brim of the engine oil check bolt hole 1 Oil tank cap 1 1 Oil tank cap 2 ...

Страница 56: ... cap the engine oil filler cap 5 Remove the engine oil drain bolts and their gasket to drain the oil from the oil tank and crankcase 6 Remove the engine oil filter ele ment drain bolt and gasket to drain the oil from the oil filter element TIP Skip steps 7 9 if the oil filter element is not being replaced 7 Remove the oil filter element cover by removing the bolts 1 Engine guard 2 Oil tank cap 3 E...

Страница 57: ...hemical additives Do not use oils with a diesel speci fication of CD or oils of a high er quality than specified In addition do not use oils labeled ENERGY CONSERVING II or higher Make sure that no foreign mate rial enters the crankcase 12 Start the engine and then let it idle for several minutes while checking 1 Oil filter element cover 2 Oil filter element cover bolt 1 Oil filter element cover 2...

Страница 58: ...ecified torque EAU20070 Coolant The coolant level should be checked before each ride In addition the cool ant must be changed at the intervals specified in the periodic maintenance and lubrication chart EAUM1295 To check the coolant level 1 Place the vehicle on a level sur face and hold it in an upright posi tion TIP The coolant level must be checked on a cold engine since the level varies with en...

Страница 59: ...e coolant as soon as possible otherwise the effec tiveness of the coolant will be reduced ECA10472 EAUM1315 To change the coolant 1 Place the vehicle on a level sur face and let the engine cool if nec essary 2 Place a container under the engine to collect the used coolant 3 Remove the coolant drain bolt and its gasket and then the radiator cap to drain the cooling system WARNING Never attempt to r...

Страница 60: ...nd lubrica tion chart Clean or if necessary re place the air filter element more frequently if you are riding in unusually wet or dusty areas In addition the air filter check hose must be frequently checked and cleaned if necessary To clean the air filter element 1 Open the air filter case cover by loosen the quick fastener screw and pulling the case cover outward as shown 2 Unhook the holding cli...

Страница 61: ...r element frame TIP Align the projection on the air filter element frame with the hole in the sponge material Apply the lithium soap base grease on the matching surface on the sponge material 6 Insert the air filter element into the air filter case NOTICE Make sure that the air filter element is prop erly seated in the air filter case The engine should never be op erated without the air filter ele...

Страница 62: ...filter case cover and then tighten the quick fastener screw To clean the air filter check hose 1 Check the hose at the bottom of the air filter case for accumulated dirt or water 2 If dirt or water is visible remove the hose clean it and then install it 1 Hole 2 Projection 3 Air filter element 1 2 3 1 Holding clip 2 Projection 1 2 1 Air filter check hose 1 1DX 9 20 book 16 ページ 2011年10月12日 水曜日 午前9時...

Страница 63: ...screw To in crease the engine idling speed turn the screw in direction a To decrease the engine idling speed turn the screw in direction b TIP If the specified idling speed cannot be obtained as described above have a Yamaha dealer make the adjustment EAU21384 Checking the throttle grip free play The throttle grip free play should mea sure 3 0 5 0 mm 0 12 0 20 in at the inner edge of the throttle ...

Страница 64: ...efore each ride WARNING EWA10441 Operation of this vehicle with im proper tire pressure may cause se vere injury or death from loss of control The tire air pressure must be checked and adjusted on cold tires i e when the temperature of the tires equals the ambient temperature The tire air pressure must be ad justed in accordance with the riding speed and with the total weight of rider cargo and ac...

Страница 65: ...NG EWA10571 Have a Yamaha dealer replace excessively worn tires Besides being illegal operating the mo torcycle with excessively worn tires decreases riding stability and can lead to loss of control The replacement of all wheel and brake related parts includ ing the tires should be left to a Yamaha dealer who has the necessary professional knowl edge and experience It is not recommended to patch a...

Страница 66: ... tire life EAU52911 Adjusting the clutch lever free play The clutch lever free play should mea sure 8 0 13 0 mm 0 31 0 51 in as shown Periodically check the clutch le ver free play and if necessary adjust it as follows 1 To increase the clutch lever free play turn the clutch lever free play adjusting bolt in direction a To decrease the clutch lever free play turn the adjusting bolt in direction b ...

Страница 67: ...play have a Yamaha dealer inspect the brake system WARNING EWA14211 A soft or spongy feeling in the brake lever can indicate the presence of air in the hydraulic system If there is air in the hydraulic system have a Yamaha dealer bleed the system be fore operating the vehicle Air in the hydraulic system will diminish the braking performance which may re sult in loss of control and an acci dent 1 N...

Страница 68: ... make the brake light come on earlier turn the adjusting nut in direction a To make the brake light come on later turn the adjusting nut in direction b EAU22392 Checking the front and rear brake pads The front and rear brake pads must be checked for wear at the intervals spec ified in the periodic maintenance and lubrication chart EAU22430 Front brake pads Each front brake pad is provided with wea...

Страница 69: ...fluid level Before riding check that the brake fluid is above the minimum level mark Check the brake fluid level with the top of the reservoir level Replenish the brake fluid if necessary Front brake Rear brake WARNING EWA15990 Improper maintenance can result in loss of braking ability Observe these precautions Insufficient brake fluid may al low air to enter the brake sys tem reducing braking per...

Страница 70: ...the cause before further riding EAU52951 Changing the brake fluid Have a Yamaha dealer change the brake fluid at the intervals specified in the TIP after the periodic maintenance and lubrication chart In addition have the oil seals of the master cylinders and calipers as well as the brake hoses re placed every 20000 km 12000 mi or every two years or whenever they are damaged or leaking EAU22760 Dr...

Страница 71: ...r vital parts of the motorcycle and can lead to chain slippage or breakage To prevent this from occurring keep the drive chain slack with in the specified limits ECA10571 TIP Using the alignment marks on each side of the swingarm make sure that both drive chain pullers are in the same position for proper wheel alignment 3 Tighten the axle nut then the lock nuts to their specified torques 4 Make su...

Страница 72: ...CA11121 2 Wipe the drive chain dry 3 Thoroughly lubricate the drive chain with a special O ring chain lubricant NOTICE Do not use engine oil or any other lubri cants for the drive chain as they may contain substances that could damage the O rings ECA11111 EAU23095 Checking and lubricating the cables The operation of all control cables and the condition of the cables should be checked before each r...

Страница 73: ... though the cover is installed correctly it does not completely protect the cable from water entry Therefore use care not to pour water directly onto the cover or cable when washing the vehicle If the cable or cover becomes dirty wipe clean with a moist cloth EAU23143 Checking and lubricating the brake and clutch levers The operation of the brake and clutch levers should be checked before each rid...

Страница 74: ...e lubricated if necessary WARNING EWA10731 If the sidestand does not move up and down smoothly have a Yamaha dealer check or repair it Otherwise the sidestand could contact the ground and distract the operator re sulting in a possible loss of control EAUM1652 Lubricating the swingarm pivots The swingarm pivots must be lubricat ed by a Yamaha dealer at the intervals specified in the periodic mainte...

Страница 75: ... if the front fork compresses and rebounds smoothly NOTICE ECA10590 If any damage is found or the front fork does not operate smoothly have a Yamaha dealer check or re pair it EAU23283 Checking the steering Worn or loose steering bearings may cause danger Therefore the operation of the steering must be checked as fol lows at the intervals specified in the pe riodic maintenance and lubrication char...

Страница 76: ... it contains sul furic acid which causes severe burns Avoid any contact with skin eyes or clothing and al ways shield your eyes when working near batteries In case of contact administer the fol lowing FIRST AID EXTERNAL Flush with plenty of water INTERNAL Drink large quan tities of water or milk and im mediately call a physician EYES Flush with water for 15 minutes and seek prompt medical attentio...

Страница 77: ...nd fully charge it if necessary 3 Fully charge the battery before in stallation NOTICE When install ing the battery be sure the main switch is pushed to OFF then connect the positive lead before connecting the negative lead ECA17770 4 After installation make sure that the battery leads are properly con nected to the battery terminals NOTICE ECA16530 Always keep the battery charged Storing a discha...

Страница 78: ...ht bulb to keep it free from oil otherwise the transpar ency of the glass the luminosity of the bulb and the bulb life will be adversely affected Thor oughly clean off any dirt and fin gerprints on the headlight bulb using a cloth moistened with al cohol or thinner Headlight lens Do not affix any type of tinted film or stickers to the headlight lens Do not use a headlight bulb of a wattage higher ...

Страница 79: ...cover and then connect the coupler 6 Install the headlight cowling to gether with the headlight unit by placing it in the original position and then installing the bolts 7 Have a Yamaha dealer adjust the headlight beam if necessary EAU24181 Tail brake light This model is equipped with an LED type tail brake light If the tail brake light does not come on have a Yamaha dealer check it 1 Headlight co...

Страница 80: ... it in and then turn it clock wise until it stops 4 Install the lens by installing the screw NOTICE Do not over tighten the screw otherwise the lens may break ECA11191 EAU24313 Replacing the license plate light bulb 1 Remove the license plate light unit by removing the screws 2 Remove the license plate light bulb socket together with the bulb by pulling it out 1 Screw 2 Turn signal light lens 1 2 ...

Страница 81: ...quipped with a centerstand follow these precautions when removing the front and rear wheel or performing other maintenance requiring the motorcycle to stand up right Check that the motorcycle is in a stable and level position before starting any maintenance A strong wooden box can be placed under the engine for added stability To service the front wheel 1 Stabilize the rear of the motorcycle by us...

Страница 82: ...el off the ground according to the procedure in the previous section Supporting the motorcycle 3 Remove the axle nut 4 Pull the wheel axle out 5 Remove the spacers and the wheel NOTICE Do not apply the brake after the wheel has been removed together with the brake disc otherwise the brake pads will be forced shut ECA11071 EAU45174 To install the front wheel 1 Install the spacers into both sides of...

Страница 83: ...veral times to check for proper fork operation EAU25080 Rear wheel EAU45183 To remove the rear wheel WARNING EWA10821 To avoid injury securely support the vehicle so there is no danger of it falling over 1 Loosen the axle nut 2 Lift the rear wheel off the ground according to the procedure on page 7 35 3 Remove the axle nut and washer 4 Loosen the locknut on each side of the swingarm 5 Turn the dri...

Страница 84: ...ECA17700 2 Install the wheel drive chain pull ers and the brake caliper bracket by inserting the wheel axle from the left hand side TIP Make sure that the retainer on the brake caliper bracket is inserted into the slot in the swingarm Make sure that there is enough space between the brake pads be fore installing the wheel 3 Install the drive chain onto the rear sprocket 4 Install the washer and th...

Страница 85: ...torcycle require any repair take it to a Yamaha dealer whose skilled technicians have the necessary tools experience and know how to service the motorcycle properly Use only genuine Yamaha replace ment parts Imitation parts may look like Yamaha parts but they are often inferi or have a shorter service life and can lead to expensive repair bills WARNING EWA15141 When checking the fuel system do not...

Страница 86: ...a Yamaha dealer check the vehicle Remove the spark plug and check the electrodes 3 Ignition Wipe off with a dry cloth and correct the spark plug gap or replace the spark plug Have a Yamaha dealer check the vehicle The engine does not start Have a Yamaha dealer check the vehicle The engine does not start Check the battery Operate the electric starter 4 Battery The engine turns over quickly The engi...

Страница 87: ...d has stopped press down on the cap while turning it counterclockwise and then remove the cap TIP If coolant is not available tap water can be temporarily used instead provided that it is changed to the recommended coolant as soon as possible Wait until the engine has cooled Check the coolant level in the reservoir and radiator The coolant level is OK The coolant level is low Check the cooling sys...

Страница 88: ...the muffler outlet with a plastic bag after the engine has cooled down 2 Make sure that all caps and covers as well as all electrical couplers and connectors including the spark plug cap are tightly in stalled 3 Remove extremely stubborn dirt like oil burnt onto the crankcase with a degreasing agent and a brush but never apply such prod ucts onto seals gaskets sprock ets the drive chain and wheel ...

Страница 89: ... and then rinse thoroughly with clean water Use a toothbrush or bottlebrush for hard to reach areas Stubborn dirt and insects will come off more easily if the area is covered with a wet cloth for a few minutes before cleaning After riding in the rain near the sea or on salt sprayed roads Since sea salt or salt sprayed on roads during winter are extremely corrosive in combination with water carry o...

Страница 90: ...a suitable care product Avoid using abrasive polishing compounds as they will wear away the paint TIP Consult a Yamaha dealer for ad vice on what products to use Washing rainy weather or humid climates can cause the headlight lens to fog Turning the headlight on for a short period of time will help remove the moisture from the lens EAU43202 Storage Short term Always store your motorcycle in a cool...

Страница 91: ... damage or injury from sparking make sure to ground the spark plug elec trodes while turning the en gine over EWA10951 4 Lubricate all control cables and the pivoting points of all levers and pedals as well as of the sidestand centerstand 5 Check and if necessary correct the tire air pressure and then lift the motorcycle so that both of its wheels are off the ground Alterna tively turn the wheels ...

Страница 92: ...ne oil quantity Without oil filter element replacement 0 95 L 1 00 US qt 0 84 Imp qt With oil filter element replacement 1 00 L 1 06 US qt 0 88 Imp qt Cooling system Radiator capacity including all routes 1 04 L 1 10 US qt 0 92 Imp qt Air filter Air filter element Wet element Fuel Recommended fuel Premium unleaded gasoline only Fuel tank capacity 7 2 L 1 90 US gal 1 58 Imp gal Fuel reserve amount ...

Страница 93: ...nt wheel Wheel type Spoke wheel Rim size 21x1 60 Rear wheel Wheel type Spoke wheel Rim size 18x2 15 Front brake Type Single disc brake Operation Right hand operation Specified brake fluid DOT 4 Rear brake Type Single disc brake Operation Right foot operation Specified brake fluid DOT 4 Front suspension Type Telescopic fork Spring shock absorber type Coil spring oil damper Wheel travel 300 0 mm 11 ...

Страница 94: ... 5 0 W 1 License plate light 12 V 5 0 W 1 Meter lighting EL Electroluminescent Neutral indicator light 12 V 1 7 W 1 High beam indicator light 12 V 1 7 W 1 Turn signal indicator light 12 V 1 7 W 1 Fuel level warning light LED Engine trouble warning light 12 V 1 7 W 1 Fuses Main fuse 15 0 A 1DX 9 20 book 3 ページ 2011年10月12日 水曜日 午前9時39分 ...

Страница 95: ...The vehicle identification number is stamped into the steering head pipe Record this number in the space pro vided TIP The vehicle identification number is used to identify your motorcycle and may be used to register your motorcy cle with the licensing authority in your area EAU26460 Model label The model label is affixed to the loca tion shown Record the information on this label in the space pro...

Страница 96: ...ive by any person other than for purposes of maintenance repair or replacement of any device or element of design incorporated into any new vehicle for the pur pose of noise control prior to its sale or delivery to the ultimate pur chaser or while it is in use and The use of the vehicle after such device or element of design has been removed or rendered inoper ative by any person 1DX 9 20 book 2 ペ...

Страница 97: ...7 Headlight bulb replacing 7 32 High beam indicator light 4 2 Horn switch 4 7 I Identification numbers 10 1 Ignition circuit cut off system 4 19 Indicator lights and warning lights 4 1 K Kickstarter 4 12 L Labels location 1 1 License plate light bulb replacing 7 34 M Main switch 4 1 Maintenance and lubrication periodic 7 4 Maintenance emission control system 7 3 Matte color caution 8 1 Model label...

Страница 98: ...ht bulb replacing 7 34 Turn signal switch 4 7 V Valve clearance 7 18 Vehicle identification number 10 1 W Wheel bearings checking 7 30 Wheel front 7 36 Wheel rear 7 37 Wheels 7 20 1DX 9 20 book 4 ページ 2011年10月12日 水曜日 午前9時39分 ...

Страница 99: ...1DX 9 20_EUR OCE_Hyoshi indd 3 2011 10 20 11 59 58 ...

Страница 100: ...PRINTED ON RECYCLED PAPER PRINTED IN JAPAN 2011 10 0 9 1 YEC E 1DX 9 20_EUR OCE_Hyoshi indd 4 2011 10 20 11 59 59 ...

Отзывы: