background image

13 

En

Connecting a portable device such as a smartphone or tablet computer to the USB port on this unit charges the 
connected device (power supply of up to 5 V/1 A is supported). 
Prepare a USB cable that is compatible with the portable device and confirm that the device is supported for 
charging via USB connection before use. In addition, read the documentation provided with the portable 
device.

LISTENING TO EXTERNAL SOURCES

A

Connect your portable audio 
device to 

AUX

 using a 

commercially available 3.5 mm 
(1/8 in) mini plug cable.

Turn down the volume of this unit and your 
portable audio device before connection.

B

Turn on the system.

C

Press 

SOURCE

 to set the 

playback source to 

AUX

.

The 

AUX

 indicator lights.

D

Start playback on the connected 
portable audio device.

CHARGING WITH THE USB PORT 

A

Connect your portable device 
to the USB port on this unit 
using a commercially available 
USB cable.

Charging automatically starts.

B

Disconnect the USB cable 
from the unit when charging 
completes.

Check the charging status on the 
portable device. 

• The USB port is for charging use only. The 

USB port does not support audio playback.

• Charging may not be possible depending on 

the portable device.

• In Eco Standby mode, power supply stops, 

and charging is not available.

• This unit does not function as memory 

storage.

• Yamaha will not be held responsible for any 

damage to the portable device or data loss 
occurred while using this unit.

• Disconnect the USB cable immediately after 

charging completes, since power continues to 
be supplied to the connected device.

A

C

B

Rear panel

AUX indicator

Note

USB cable from 
portable device

Rear panel

Note

Содержание TSX-B15D

Страница 1: ...AB OWNER S MANUAL ...

Страница 2: ...ther than specified 13 To prevent damage by lightning keep the power cable disconnected from a wall outlet or this unit during a lightning storm 14 Do not attempt to modify or fix this unit Contact qualified Yamaha service personnel when any service is needed The cabinet should never be opened for any reasons 15 When not planning to use this unit for long periods of time i e vacation disconnect th...

Страница 3: ...el MU18 D120150 B2 Antenna for receiving DAB FM Information for Users on Collection and Disposal of Old Equipment This symbol on the products packaging and or accompanying documents means that used electrical and electronic products should not be mixed with general household waste For proper treatment recovery and recycling of old products please take them to applicable collection points in accord...

Страница 4: ...ns except are disabled To cancel Eco Standby mode press The alarm function is not available in Eco standby mode Auto Standby page 5 This unit has a function that automatically activates standby mode Since you do not have to turn on or off the system every time you can save energy y Dimmer function When in standby mode press DISPLAY repeatedly to set the brightness of the displays and indicators 3 ...

Страница 5: ... reception is obtained The supplied antenna is for receiving DAB FM Be sure to stretch out the antenna as the illustration shows If DAB FM reception is poor change the height or direction of the antenna or relocate the unit If you listen to a DAB FM radio station while USB charging noise may interfere with the radio reception In this case disconnect the USB cable from the unit Caution L CHARGING S...

Страница 6: ...in conjunction with the clock information from the DAB station when receiving DAB signals page 9 Alarm setting A Set the alarm switch on the rear panel to SET The alarm indicator and clock display flash B Set the alarm time with TUNING C Set the alarm volume with VOLUME The volume level is displayed on the information display D Set the alarm source with SOURCE Select DAB or FM for the source that ...

Страница 7: ...ed No operation Activating Deactivating Auto Standby Press and hold PRESET for 3 seconds during standby mode Auto Standby will alternately turn on and off The information will appear for several seconds on the clock display Activate ON default setting Deactivate OFF You can switch the alarm to ON or OFF with the alarm switch When the alarm is on the alarm indicator lights Operations during playing...

Страница 8: ... press TUNING repeatedly If you tune into a station manually the sound is monaural Presetting radio stations A Press TUNING to select a favorite radio station The radio frequency is displayed temporally B Press and hold PRESET for more than 2 seconds C Press TUNING to select the preset number you want to store to D Press PRESET to complete Selecting preset radio stations A Press SOURCE to select R...

Страница 9: ...can must be performed When you select the DAB for the first time Full Scan is performed automatically It scans all the radio frequencies to search the receivable DAB stations LISTENING TO DAB STATIONS Preparing for DAB reception To perform Full Scan press OPTION to scan manually Press SOURCE and set DAB as the playback source The RADIO indicator lights and Full Scan starts During the scan the degr...

Страница 10: ...ct DAB station information Information is displayed in the order shown below Storing DAB stations preset A Press TUNING to tune into your favorite DAB station B Press and hold PRESET for more than 2 seconds C Press TUNING to select the preset number you want to store to D Press PRESET to complete Selecting preset DAB stations A Press SOURCE and set DAB as the playback source The RADIO indicator li...

Страница 11: ...nna to obtain good reception DAB optional settings While listening to a DAB station the functions listed below are available You can perform these functions by the following steps A Press OPTION B Press TUNING to select the setting C Press OPTION to confirm B C A B D B A C Option menu Function page Full Scan Scans stations manually 7 Clock auto update This unit s clock can be updated automatically...

Страница 12: ...ch signals are to be exchanged Bluetooth profile A2DP compatible smartphone digital audio player etc within a direct line of sight distance of 10 m 33 ft Make sure there are no obstacles between this unit and the Bluetooth device 88 35 MHz Within 10 m 33 ft Pairing this unit with your Bluetooth device y What is pairing Pairing is an operation that registers the communicating device subsequently ca...

Страница 13: ... the connecting device D From the Bluetooth connection list of the connecting device choose this unit TSX B15D Yamaha When pairing has been completed the Bluetooth indicator will light in blue y If you are prompted for a passkey enter the numerals 0000 TSX B15D Yamaha C D Within about 5 minutes TSX B15D Yamaha C D Within about 5 minutes Check that the pairing process on the connecting device has b...

Страница 14: ...ection from the Bluetooth device Connecting an already paired device via Bluetooth Note Disconnecting a Bluetooth connection Bluetooth Bluetooth is a technology for wireless communication between devices within an area of about 10 meters 33 ft employing the 2 4 GHz frequency band a band which can be used without a license Bluetooth is a registered trademark of the Bluetooth SIG and is used by Yama...

Страница 15: ...Start playback on the connected portable audio device CHARGING WITH THE USB PORT A Connect your portable device to the USB port on this unit using a commercially available USB cable Charging automatically starts B Disconnect the USB cable from the unit when charging completes Check the charging status on the portable device The USB port is for charging use only The USB port does not support audio ...

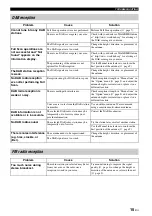
Страница 16: ...e properly The unit may have received a strong electrical shock such as lightning or excessive static electricity or power supply may have dropped Press to enter standby mode and disconnect the power cable Wait about 30 seconds reconnect the power cable and turn on the system The system turns on but immediately shuts off The power cable may be connected improperly Make sure the power cable is plug...

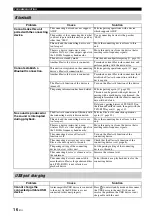
Страница 17: ...adjust the antenna height or orientation or place it in a different location DAB radio reception is weak or noisy There is multi path interference Check reception strength in Manual tune in the Option menu page 9 and adjust the antenna height or orientation or place it in a different location Your area is too far from the DAB station transmitter Use an outdoor antenna We recommend using a sensitiv...

Страница 18: ...ection date will be deleted Delete any pairing history of TSX B15D on the iPhone iPad iPod touch then pair with the TSX B15D again page 10 No sound is produced or the sound is interrupted during playback The Bluetooth connection of this unit with the connecting device is disconnected Perform Bluetooth connection operations again page 12 This unit and the connecting device are too far apart Move th...

Страница 19: ...engaged in a live socket outlet This unit supports DAB DAB tuning Special Instructions for U K Model SPECIFICATIONS 180 mm 7 1 8 in 200 mm 7 7 8 in 100 mm 3 7 8 in iPad iPhone and iPod touch are trademarks of Apple Inc registered in the U S and other countries Note IMPORTANT THE WIRES IN MAINS LEAD ARE COLOURED IN ACCORDANCE WITH THE FOLLOWING CODE Blue NEUTRAL Brown LIVE As the colours of the wir...

Страница 20: ... 2014 Yamaha Corporation Printed in China ZP56850 ...

Отзывы: