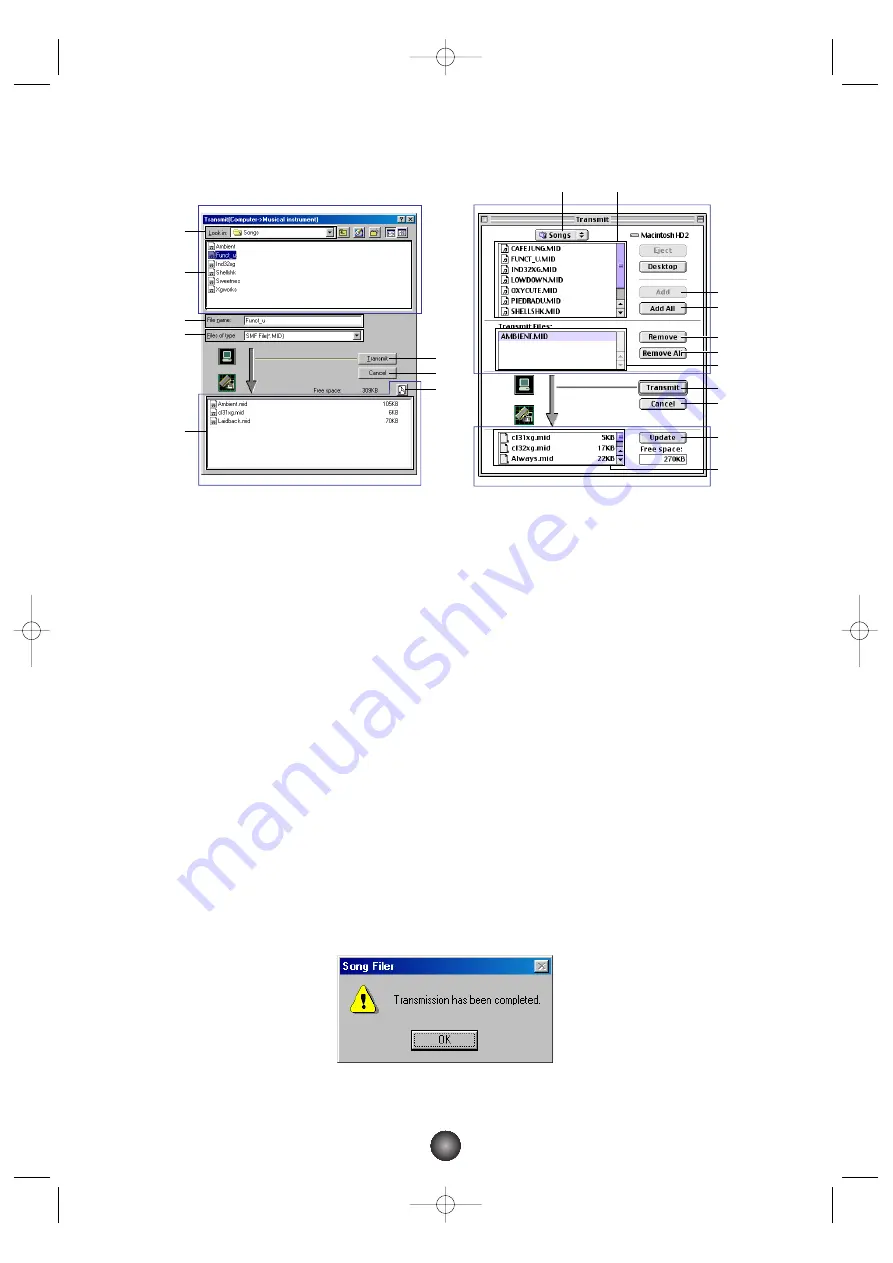
Computer
1
“Look in:”:
Click this and choose the source folder (to send from) from the drop-down list.
2
File/folder list:
This shows the contents of the source folder.
3
“File name (Transmit Files):”:
This shows the name of the file selected from the File/folder list.
4
“Files of type:”:
Click this and choose the file type from the drop-down list, if necessary.
Musical Instrument
5
[Refresh (Update)]:
Click this to update the contents.
6
File list:
This shows the contents.
7
[Transmit]:
Click this to begin transmitting the file.
8
[Cancel]:
Click this to cancel the file transfer.
9
[Add]:
Choose a file and click this to add it to the “Transmit files” list.
)
[Add All]:
Click this to add all files to the “Transmit files” list.
!
[Remove]:
Choose a file and click this to remove a file from the “Transmit files” list.
@
[Remove All]:
Click this to remove all files from the “Transmit files” list.
2. Specify the file(s).
From the top list of files on your computer, choose those that you wish to transfer to your musical
instrument.
3. Click [Transmit].
You will see the following message after the transfer is complete.
4. Click [OK] to return to the “Transmit” window.
1
2
8
5
7
8
7
@
!
)
9
5
1
2
3
4
6
6
3
Windows
Macintosh
Musical
Instrument
Computer
Musical Instrument
Computer
8
SongFiler_E.qx 4/12/01 4:14 PM Page 8


