background image

6-5

6

Tire information

This ATV is equipped with tubeless tires and tire
air valves. After extensive tests, only the tires list-
ed below are approved for this model by Yamaha.

Aftermarket tires and rims

The tires and rims that came with your ATV were
designed to match the performance capabilities
and to provide the best combination of handling,
braking, and comfort. Other tires, rims, sizes, and
combinations may not be appropriate.

WARNING

EWB02552

Use of improper tires on this ATV may cause
loss of control, increasing your risk of an acci-
dent.


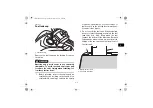
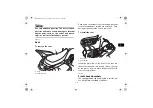
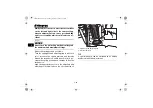
1. Tire tread depth

Front:

Manufacturer/model:

DURO/DI2017

Size:

AT18 x 7-8

Rear:

Manufacturer/model:

DURO/DI2016

Size:

AT18 x 9-8

UBYS11E0.book  Page 5  Friday, October 13, 2023  5:52 PM

Содержание RAPTOR EFI 110 2024

Страница 1: ...RNING YFM01RYXR OWNER S MANUAL READ THIS MANUAL CAREFULLY It contains important safety information NOTICE The removal or modification of evaporative emission related parts on this OHRV is illegal Viol...

Страница 2: ...reproductive harm To minimize exposure avoid breathing exhaust do not idle the engine except as necessary service your vehicle in a well ventilated area and wear gloves or wash your hands frequently w...

Страница 3: ...ation about special tech niques and skills necessary to ride the ATV It also includes basic maintenance and inspection proce dures If you have any questions regarding the operation or maintenance of y...

Страница 4: ...at the child has the ability to operate the ATV safely Your ATV was delivered with an adjustable speed limiter Yamaha recommends that all beginners start off to limit the amount of speed available whi...

Страница 5: ...e figures shown in this manual This is the safety alert symbol It is used to alert you to potential per sonal injury hazards Obey all safety messages that follow this sym bol to avoid possible injury...

Страница 6: ...nd regulations in effect at the time of manufacture Please check your local riding laws and regulations before operating this ATV EBU34380 YFM01RYXR OWNER S MANUAL 2024 by Yamaha Motor Corporation U S...

Страница 7: ...NS 5 1 Main switch 5 1 Indicator lights and warning lights 5 2 Handlebar switches 5 3 Throttle lever 5 3 Speed limiter 5 4 Front brake lever 5 4 Rear brake lever 5 5 Parking brake 5 5 Drive select lev...

Страница 8: ...ral maintenance and lubrication 9 5 Checking the spark plug 9 9 Engine oil 9 11 Why Yamalube 9 14 Transmission oil 9 14 Cleaning the air filter element 9 16 Cleaning the spark arrester 9 19 Checking t...

Страница 9: ...2 SPECIFICATIONS 11 1 CONSUMER INFORMATION 12 1 Vehicle Emission Control Information label 12 1 Emission Regulation California 12 1 Noise regulation for USA 12 2 Maintenance record 12 3 YAMAHA MOTOR...

Страница 10: ...EHICLE IDENTIFICATION NUMBER MODEL LABEL INFORMATION KEY IDENTIFICATION NUMBER EBU26032 Vehicle identification number The vehicle identification number is stamped into the frame This 17 digit number i...

Страница 11: ...tification number The key identification number is stamped into the key tag Record this number in the space provided and use it for reference when ordering a new key 1 Model label 1 Model type code 2...

Страница 12: ...the labels on your ATV These labels contain important information for safe and proper operation Never remove any labels from your ATV If a label becomes difficult to read or comes off request a re pl...

Страница 13: ...DER 10 Operation of this ATV by children under the age of 10 increases the risk of severe injury or death Adult supervision required for children under age 16 NEVER permit children under age 10 to ope...

Страница 14: ...2 3 2 3 6 25 3 6 25 3 2 22 3 2 22 181 82 BD3 F816M 20 2017 BD3 F817J 60 BD3 F151H 00 l l I I l 3 5 4 UBYS11E0 book Page 3 Friday October 13 2023 5 52 PM...

Страница 15: ...10 years old to oper ate this ATV Never allow a child under 16 years old to oper ate an ATV without adult supervision Do not allow continued use of the ATV by a child if he or she does not have the ab...

Страница 16: ...ting larger hills Always follow proper procedures for climbing hills as described in this manual Check the ter rain carefully before you start up any hill Never climb hills with excessively slippery o...

Страница 17: ...er or in water deeper than that recommended in this manual Remember that wet brakes may have reduced stopping ability Test your brakes after leaving water If necessary apply them several times to let...

Страница 18: ...d ride gently back to camp or other known location where you can receive medical at tention If necessary contact your riding party or local authorities to let them know where you are and what has happ...

Страница 19: ...et products similar in design and quality to genuine Yamaha accesso ries recognize that some aftermarket accessories or modifications are not suitable because of po tential safety hazards to you or ot...

Страница 20: ...which may be present even if you do not see or smell any engine exhaust Deadly levels of carbon monoxide can collect rapidly and you can quickly be overcome and unable to save yourself Also deadly lev...

Страница 21: ...ew 1 Fuel tank cap 2 Air filter 3 Fuses 4 Battery 5 Rear shock absorber 1 5 2 3 4 1 Spark arrester 2 Tool kit 3 Front shock absorber 4 Spark plug 5 Engine oil filler cap 6 Transmission oil filler cap...

Страница 22: ...s and instruments 1 Rear brake lever 2 Handlebar switches 3 Parking brake lock plate 4 Main switch 5 Throttle lever 6 Front brake lever 7 Drive select lever 1 2 3 4 6 5 7 UBYS11E0 book Page 2 Friday O...

Страница 23: ...sult in death or serious injury EBU33850 Main switch The positions of the main switch are as follows ON All electrical systems are supplied with power and the engine can be started The key cannot be r...

Страница 24: ...comes on when the fuel level drops below approximately 1 8 L 0 49 US gal 0 41 Imp gal When this occurs refuel as soon as possible EBU41060 Engine trouble warning light This warning light comes on or f...

Страница 25: ...switch is set to EBU18102 Start switch Push this switch to crank the engine with the start er See the starting instructions on page 7 1 prior to starting the engine EBU18286 Throttle lever Push the th...

Страница 26: ...sting screw in direction b Do not turn the adjusting screw out more than 18 5 mm 0 73 in or the throttle cable could be damaged Always make sure the throttle lever free play is adjusted to 2 0 6 0 mm...

Страница 27: ...the rear brake pull the brake lever toward the handlebar grip EBU18462 Parking brake Use the parking brake before starting the engine or after parking the ATV especially on a slope Ap ply the rear br...

Страница 28: ...ou begin to ride The brake could overheat if you ride the ATV without re leasing the parking brake You could lose braking performance which could cause an accident You could also wear out the brakes p...

Страница 29: ...while smoking or while in the vicinity of sparks open flames or other sources of ignition such as the pilot lights of water heat ers and clothes dryers 2 Do not overfill the fuel tank When refueling...

Страница 30: ...diately If gasoline spills on your skin wash with soap and water If gasoline spills on your clothing change your clothes About the recommended fuel This model s engine has been designed to use regular...

Страница 31: ...o release the seat lock Then pull up at the rear of the seat to remove it To install the seat Insert the projection on the front of the seat into the seat holder and then push down on the seat at the...

Страница 32: ...load as follows Turn the spring preload adjusting ring in direction a to increase the spring preload and thereby harden the suspension and in direction b to de crease the spring preload and thereby so...

Страница 33: ...g preload as follows Turn the spring preload adjusting ring in direction a to increase the spring preload and thereby harden the suspension and in direction b to de crease the spring preload and there...

Страница 34: ...make this adjustment WARNING EWB00012 Indicates a hazardous situation which if not avoided could result in death or serious injury 1 Special wrench Spring preload setting Minimum soft 1 Standard 2 Max...

Страница 35: ...r Before using this vehicle check the following points ITEM ROUTINE PAGE Fuel Check fuel level in fuel tank and add recommended fuel if neces sary Check fuel line for leakage Correct if necessary 5 8...

Страница 36: ...ate if necessary 6 3 9 25 9 27 Wheels and tires Check wheel condition and replace if damaged Check tire condition and tread depth Replace if necessary Check air pressure Correct if necessary 6 3 Brake...

Страница 37: ...is applied If not have the ATV checked by a Yamaha dealer Brake operation Test the brakes at slow speed after starting out to make sure they are working properly If the brakes do not provide proper b...

Страница 38: ...ent with your vehicle See page 9 2 When using the tire pressure gauge make two measurements and use the second reading as grit in the gauge or tire valve could have caused the first reading to be inco...

Страница 39: ...o match the performance capabilities and to provide the best combination of handling braking and comfort Other tires rims sizes and combinations may not be appropriate WARNING EWB02552 Use of improper...

Страница 40: ...Make sure that all nuts bolts and screws are properly tightened EBU33810 Instruments and switches Check that all instruments and switches are work ing properly Correct if necessary UBYS11E0 book Page...

Страница 41: ...e 7 4 prior to operating the engine for the first time 1 Set the parking brake 2 Turn the key to ON and the engine stop switch to The following warning lights should come on for a few seconds then go...

Страница 42: ...the engine is cold EBU40632 Operating the drive select lever and driving in reverse NOTICE ECB04060 Do not shift without coming to a complete stop and waiting for the engine to return to normal idle s...

Страница 43: ...there are no people or ob stacles behind you When it is safe to proceed go slowly 1 Bring the ATV to a complete stop 2 Apply the rear brake lever 3 Shift from neutral to reverse by moving the drive se...

Страница 44: ...ves to the cor rect operating clearances Avoid prolonged full throttle operation or any condition that might re sult in engine overheating 0 120 km 0 75 mi or 0 8 hours Avoid prolonged operation above...

Страница 45: ...k on an incline place the ATV transversely across the incline shift the drive select lever to the forward position stop the engine apply the parking brake and then block the front and rear wheels with...

Страница 46: ...e not suitable because of po tential safety hazards to you or others Installing aftermarket products or having other modifica tions performed to your ATV that change any of the vehicle s design or ope...

Страница 47: ...rrying cargo and towing a trailer in clude the tongue weight in the maximum ATV load limit Load cargo on the carriers as close to the center of the ATV as possible Put cargo at the rear of the front c...

Страница 48: ...of more than 16 km h 10 mph The transmission is not lubricated when the engine is not running As such towing can cause severe and irreparable wear WARNING EWB00012 Indicates a hazardous situation whi...

Страница 49: ...8 1 8 EBU21133 RIDING YOUR ATV UBYS11E0 book Page 1 Friday October 13 2023 5 52 PM...

Страница 50: ...ead this manual completely and understand how to operate all of the ATV s con trols Pay particular attention to the safety infor mation on pages 3 1 to 3 6 and all notice and warning labels on the veh...

Страница 51: ...liar with this ATV s handling and performance charac teristics Take the time to learn the basic tech niques well before attempting more difficult maneuvers Not recommended for children under 10 years...

Страница 52: ...protective eyewear Over the ankle boots gloves long sleeved shirt or jacket and long pants An approved helmet and other personal protective equipment can reduce the severity of injuries in an accident...

Страница 53: ...e to make sure that it is safe operating condition Perform the pre operation checks listed on page 6 1 Follow the maintenance schedules and procedures as de scribed in the Periodic Maintenance and Adj...

Страница 54: ...he load does not interfere with your control or ability to see where you are going Reduce speed and allow more room to stop A heavier vehicle takes longer to stop Avoid hills and rough terrain Choose...

Страница 55: ...and fall off of the ATV If you remove a foot from a footboard your foot or leg may come into con tact with the rear wheels which could injure you or cause an accident EWB01472 Avoid wheelies and jump...

Страница 56: ...the engine area free of dry grass brush or other combustible material Someone touching the exhaust system dur ing or after operation could be burned Do not touch the hot exhaust system Do not park the...

Страница 57: ...ATV and may cause the ATV to go out of control Always avoid paved surfaces including sidewalks driveways parking lots and streets EWB01512 Do not ride on any public road street or highway Riding on p...

Страница 58: ...react to hidden rocks bumps or holes Go slowly and be extra care ful when operating on unfamiliar terrain Al ways be alert to changing terrain conditions when operating the ATV EWB01532 Do not operate...

Страница 59: ...h WARNING You could collide with another vehicle if operating in off road ar eas where you cannot easily be seen Mount a caution flag on the ATV to make you more vis ible Watch carefully for other veh...

Страница 60: ...ift off the ground resulting in a loss of directional control Avoid higher speeds until you are thoroughly familiar with the operation of your ATV When slowing down or stopping release the throttle an...

Страница 61: ...n This maneuver will let the wheel on the inside of the turn slip slightly allowing the ATV to make the turn properly This procedure should be practiced at slow speed many times in a large off road ar...

Страница 62: ...ibed in this Owner s Manual Never operate the ATV on hills too steep for the ATV or for your abilities The ATV can overturn more easily on extremely steep hills than on level surfaces or small hills A...

Страница 63: ...that might cause you to lose control To climb a hill you need traction momentum and steady throttle Travel fast enough to maintain mo mentum but not so fast that you cannot react to changes in the te...

Страница 64: ...ure you do not lift the front wheels which could cause you to lose control If you are unable to continue up the hill dismount the ATV on the uphill side Physically turn the ATV around and then descend...

Страница 65: ...aking can cause the wheels on the uphill side to come off the ground or cause loss of traction Gradually apply only the rear brake when going downhill When riding your ATV downhill shift your weight a...

Страница 66: ...ires you to properly position your weight to maintain proper balance Be sure that you have learned the basic riding skills on flat ground before attempting to cross a sloping surface Avoid slopes with...

Страница 67: ...isk of an overturn The ATV can be used to cross slow moving shal low water of up to a maximum of 20 cm 8 in in depth Before entering the water choose your path carefully Enter where there is no sharp...

Страница 68: ...r muddy conditions RIDING OVER ROUGH TERRAIN WARNING EWB01652 Riding improperly over obstacles could cause loss of control or a collision Before operating in a new area check for obstacles Never at te...

Страница 69: ...lowly and be very cautious in order to re duce the chance of skidding or sliding out of control Care should be used when riding on loose or slip pery surfaces since the ATV may slide If unex pected an...

Страница 70: ...the turn Position your weight over the front wheels for better control See page 8 12 If your ATV begins to tip while turning Lean more into the turn to regain balance If necessary gradually let off t...

Страница 71: ...on the uphill side See page 8 18 If your ATV encounters shallow water Ride slowly and carefully through slow moving water watching for obstacles Be sure to let wa ter drain from the ATV and CHECK YOUR...

Страница 72: ...rn off the engine when performing mainte nance unless otherwise specified A running engine has moving parts that can catch on body parts or clothing and electri cal parts that can cause shocks or fire...

Страница 73: ...are intended to assist you in the performance of preventive maintenance and minor repairs However additional tools are necessary to perform certain maintenance work correctly TIP There is a tire pres...

Страница 74: ...require special tools data and technical skills NO ITEM CHECK OR MAINTENANCE JOB INITIAL EVERY Whichev er comes first month 1 3 6 6 12 km mi 240 150 1300 800 2500 1600 2500 1600 5000 3200 hours 15 80...

Страница 75: ...arrester Clean 8 Idle Speed Control ISC hose Check connection and correct if necessary Check for cracks or other damage and replace if necessary NO ITEM CHECK OR MAINTENANCE JOB INITIAL EVERY Whichev...

Страница 76: ...ills NO ITEM CHECK OR MAINTENANCE JOB INITIAL EVERY Whichev er comes first month 1 3 6 6 12 km mi 240 150 1300 800 2500 1600 2500 1600 5000 3200 hours 15 80 160 160 320 1 Air filter element Clean and...

Страница 77: ...an and lubricate 10 Drive chain rollers Check for wear and replace if necessary 11 V belt Check for wear cracks or other damage and re place if necessary 12 Chassis fasteners Make sure that all nuts b...

Страница 78: ...eakage and correct if neces sary 20 Moving parts and cables Lubricate 21 Throttle lever Check operation Check throttle lever free play and adjust if neces sary Lubricate cable and lever housing 22 Bra...

Страница 79: ...8 9 EBU23062 TIP Some maintenance items need more frequent service if you are riding in unusually wet dusty sandy or muddy areas or at full throttle UBYS11E0 book Page 8 Friday October 13 2023 5 52 P...

Страница 80: ...cause any spark plug to slowly erode the spark plug should be removed and checked in ac cordance with the periodic maintenance chart In addition the condition of the spark plug can reveal the conditi...

Страница 81: ...ark plug for electrode erosion and excessive carbon or other deposits and replace it if necessary 3 Measure the spark plug gap with a wire thick ness gauge and if necessary adjust the gap to specifica...

Страница 82: ...pecified in the periodic maintenance chart To check the engine oil level 1 Park the ATV on a level surface 2 Wait for the engine to cool TIP If the engine was started before checking the oil level wai...

Страница 83: ...or several min utes and then turn it off 3 Place an oil pan under the engine to collect the used oil 4 Remove the engine oil filler cap and then re move the engine oil drain bolt to drain the oil from...

Страница 84: ...TICE ECB00331 Do not use oils with a diesel specification of CD or oils of a higher quality than speci fied In addition do not use oils labeled EN ERGY CONSERVING II or higher Make sure that no foreig...

Страница 85: ...oils have their own distinct characters and value Yamaha s experience gained over many years of research and development into oil since the 1960 s helps make Yamalube the best choice for your Yamaha...

Страница 86: ...the bolt to the specified torque 6 Refill with the specified amount of the recom mended oil NOTICE Make sure that no foreign material enters the transmission case ECB03380 1 Transmission oil filler c...

Страница 87: ...replace the air filter element more frequently if you are riding in unusu ally wet or dusty areas TIP There is a check hose at the bottom of the air filter case If dust or water collects in this hose...

Страница 88: ...gasoline to clean the air filter element because the engine could catch fire or ex plode EWB03540 5 Squeeze the excess solvent out of the air filter element and let it dry NOTICE Do not twist the air...

Страница 89: ...e Never operate the engine with the air filter ele ment removed This will allow unfiltered air to enter the engine causing rapid engine wear and possible engine damage Addi tionally the fuel injection...

Страница 90: ...ipe bolt and nut and then tight en the nut to the specified torque WARNING EWB02342 Always let the exhaust system cool prior to touching exhaust components Do not start the engine with the spark arres...

Страница 91: ...e engine idling speed must be checked and ad justed before adjusting the throttle lever free play 1 Idle speed control hose 1 1 Rubber cover 2 Throttle lever free play adjusting nut 3 Locknut 4 Thrott...

Страница 92: ...art EBU29602 Brakes Replacement of brake components requires pro fessional knowledge Brake service should be performed by a Yamaha dealer WARNING EWB02572 Operating with improperly serviced or adjust...

Страница 93: ...ore than 18 mm 0 71 in from the end of the bolt the brake shoes need to be replaced 1 Upper adjusting bolt 2 Lower adjusting bolt 3 No more than 12 mm 0 47 in 3 2 1 1 Rear brake lever free play adjust...

Страница 94: ...to increase the lever free play and in direction b to decrease it 4 Tighten the lower locknut 5 While applying the front brake turn out the upper adjusting bolt until the upper and lower cable lengths...

Страница 95: ...free play Periodically check the rear brake lever free play and adjust if necessary Turn the adjusting nut in direction a to increase the brake lever free play and in direction b to de crease it 1 Ca...

Страница 96: ...t be touching the ground To check the drive chain slack 1 Place the ATV on a level surface 2 Move the ATV back and forth to locate the tightest portion of the drive chain and then measure the drive ch...

Страница 97: ...brake lever free play adjust ing nut 3 Loosen the locknut 1 Bolt 1 Nut 1 1 1 Rear brake lever free play adjusting nut 1 Drive chain slack adjusting nut 2 Locknut 1 1 2 a b UBYS11E0 book Page 26 Friday...

Страница 98: ...nd then the bolts and nuts to their specified torques 6 Adjust the rear brake lever free play See page 9 24 EBU24886 Lubricating the drive chain The drive chain must be cleaned and lubricated at the i...

Страница 99: ...moothly have a Yamaha dealer check or replace it WARNING EWB02582 Inspect cables frequently and replace if damaged Corrosion can result when the ca ble sheaths become damaged and cables can also becom...

Страница 100: ...aintenance chart If there is play in a wheel hub or if a wheel does not turn smoothly have a Yamaha dealer check the wheel hub bearings EBU36392 Lubricating the front arm pivots The front arm pivots m...

Страница 101: ...chart TIP For parts equipped with a grease nipple use a grease gun EBU25096 Lubricating the steering shaft The steering shaft must be lubricated by a Yamaha dealer at the intervals specified in the pe...

Страница 102: ...a Yamaha dealer WARNING EWB02161 Battery electrolyte is poisonous and danger ous as it contains sulfuric acid which can cause severe burns Avoid contact with skin eyes or clothing Always shield your e...

Страница 103: ...specified on the battery itself Select a suitable charger and follow the manu facturer s instructions NOTICE ECB00933 To charge a VRLA valve regulated lead acid battery a special battery charger is r...

Страница 104: ...t the positive battery lead first then connect the negative battery lead by installing their bolt NOTICE When installing the bat tery the main switch must be off and the positive lead must be connecte...

Страница 105: ...e page 5 9 3 Remove the fuse box from its holder by slid ing it in the direction of the front of the vehicle as shown 4 Remove the blown fuse and then install a new fuse of the specified amperage WARN...

Страница 106: ...U34030 Removing a wheel 1 Place the ATV on a level surface 2 Loosen the wheel bolts 3 Elevate the ATV and place a suitable stand under the frame 4 Remove the bolts from the wheel 5 Remove the wheel 1...

Страница 107: ...ower The following troubleshooting chart represents a quick and easy procedure for checking these vital systems yourself However should your ATV re quire any repair take it to a Yamaha dealer whose sk...

Страница 108: ...the fuel system Fuel can ignite or explode causing severe inju ry or property damage Make sure there are no open flames or sparks in the area including pi lot lights from water heaters or furnaces UB...

Страница 109: ...Have a Yamaha dealer check the ATV Remove the spark plug and check the electrodes 3 Ignition Wipe off with a dry cloth and correct the spark plug gap or replace the spark plug Have a Yamaha dealer che...

Страница 110: ...es several times at slow speeds to let friction dry out the linings EWB02312 NOTICE Excessive wa ter pressure may cause water seepage and deterioration of wheel bearings brakes transmission seals and...

Страница 111: ...ing maintenance 2 Follow all the instructions in the Cleaning sec tion of this chapter 3 Fill up the fuel tank and add fuel stabilizer Fu el Med Rx if available and then run the en gine for 5 minutes...

Страница 112: ...Alternatively turn the wheels each month to prevent the tires from degrading in one spot 7 Cover the muffler outlet with a plastic bag to prevent moisture from entering it 8 Remove the battery and ful...

Страница 113: ...ding Maximum load 82 0 kg 181 lb Total weight of rider cargo accessories and tongue Engine Combustion cycle 4 stroke Cooling system Air cooled Valve train SOHC Number of cylinders Single cylinder Disp...

Страница 114: ...e amount 1 8 L 0 49 US gal 0 41 Imp gal Throttle body ID mark V22C Front tire Size AT18 x 7 8 Manufacturer model DURO DI2017 Rear tire Size AT18 x 9 8 Manufacturer model DURO DI2016 Front brake Type M...

Страница 115: ...11 3 11 Battery Model GTX5L 12B Voltage capacity 12 V 4 0 Ah UBYS11E0 book Page 3 Friday October 13 2023 5 52 PM...

Страница 116: ...related to exhaust emissions as required by federal law state law and Environ ment Canada EBU40090 Emission Regulation California An add on or modified part must be compliant with applicable ARB evapo...

Страница 117: ...urpose of noise control prior to its sale or delivery to the ultimate purchaser or while it is in use or 2 the use of the vehicle after such device or element of design has been removed or rendered in...

Страница 118: ...he maintenance work is required It is not acceptable proof of maintenance work MAINTENANCE INTERVAL DATE OF SERVICE MILEAGE SERVICING DEALER NAME AND ADDRESS REMARKS month km mi hours 1 240 150 15 3 1...

Страница 119: ...and repairs at such dealer s place of business 2 EMISSION CONTROL SYSTEM WARRANTY Yamaha Motor Corporation U S A also warrants to the ultimate purchaser and each subsequent purchaser of each applicabl...

Страница 120: ...pon your request at any later date 3 Each Yamaha ATV dealer is held responsible for his setup service and war ranty repair work Q Is the warranty transferable to second owners A Yes The remainder of t...

Страница 121: ...ble to pay and repairs aren t pro rated You don t have any out of pocket expenses for covered repairs In addition Travel and Recreation Interruption Protection TRIP is included at no extra cost TRIP g...

Страница 122: ...t 90 days after you buy your Yamaha See your dealer today A special note If visiting your dealer isn t convenient contact Yamaha with your VIN number vehicle identification number We ll be happy to he...

Страница 123: ...Engine oil 6 3 9 11 Engine start 7 1 Engine stop switch 5 3 Engine trouble warning light 5 2 F Front and rear brake shoes checking 9 21 Front arm pivots lubricating 9 29 Front knuckle pivots lubricati...

Страница 124: ...itch 5 3 Steering shaft lubricating 9 30 Storage 10 2 T Throttle lever 5 3 6 3 Throttle lever free play adjusting 9 20 Tires 6 3 Towing the vehicle 7 8 Transmission 6 3 Transmission oil 9 14 Troublesh...

Страница 125: ...right right out of the box Yamalube Take care of your Yamaha with legendary Yamalube oils lubricants and care products They re formulated and approved by the toughest judges we know the Yamaha enginee...

Страница 126: ...control Improper ATV use can result in SEVERE INJURY or DEATH NEVER operate without proper training or instruction at speeds too fast for your skills or the conditions on public roads a collision can...

Отзывы: