9
PR
E
P
A
R
A
T
IO
N
■
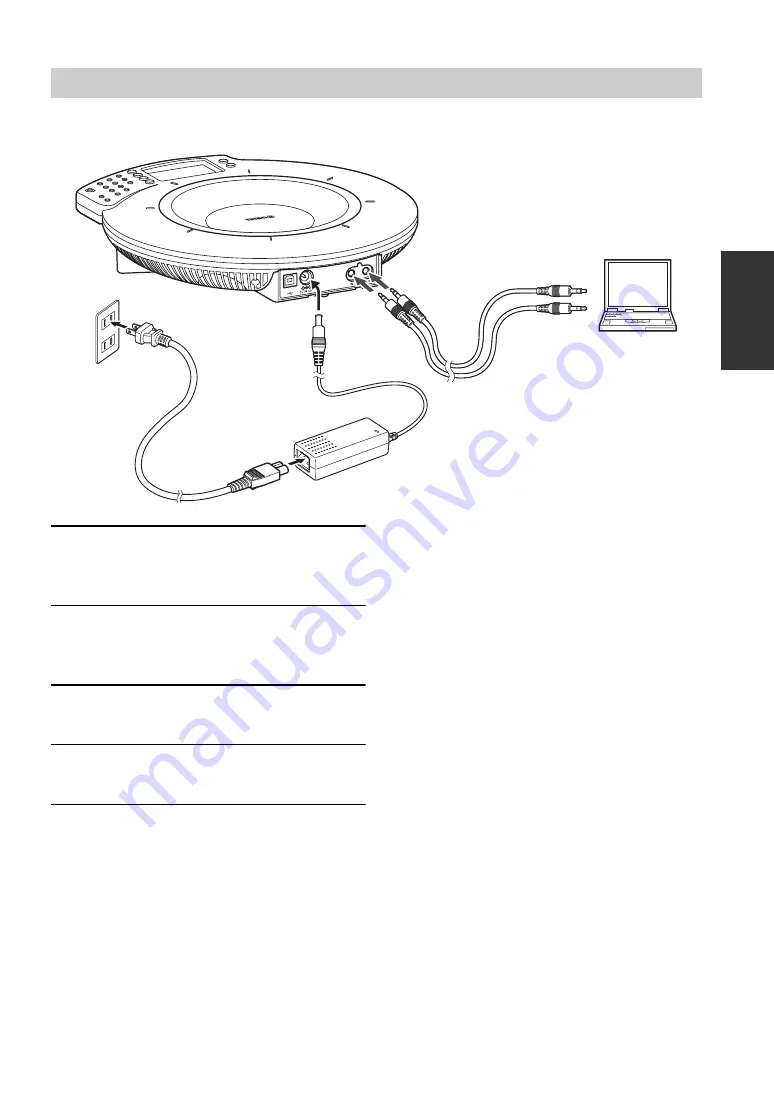
Step 1: Connecting this unit
1
Connect the AUDIO IN terminal of this
unit to the audio output terminal of the
PC or video conference system.
2
Connect the AUDIO OUT terminal of this
unit to the audio input terminal of the PC
or video conference system.
3
Connect the AC adapter to the DC IN 12V
terminal.
4
Connect the power cable to the AC
adapter.
5
Connect the power cable to the AC
outlet.
This unit is turned on. The start-up sound plays and
the microphone indicators light up.
y
•
The audio may be distorted or too low in certain
operating environments. In such a case, adjust "AUDIO
IN LEVEL" and "AUDIO OUT LEVEL" in "Settings".
For details, see page 15.
•
To use this function, you need to change the settings of
the audio input/output of the PC and video conference
system. For the settings of the PC, see "Changing the
settings of the PC" (page 10).
•
The designs of the line input/output terminals of video
conference systems vary depending on the models.
Always use audio connection cables having the plugs
matching the line input/output terminals of the
connected video conference system. The plugs
connected to the Projectphone should always be the
stereo mini plugs regardless of the designs of the plugs
connected to the video conference system.
Connection using audio connection cables
1
3
2
4
5
To audio output
terminal
To audio input
terminal
Содержание PJP-50USB
Страница 2: ......
Страница 22: ...November 2010 3rd edition...


